Basement Remodeling and New Deck in Norwell, MA | Millhawlk Design & Construction
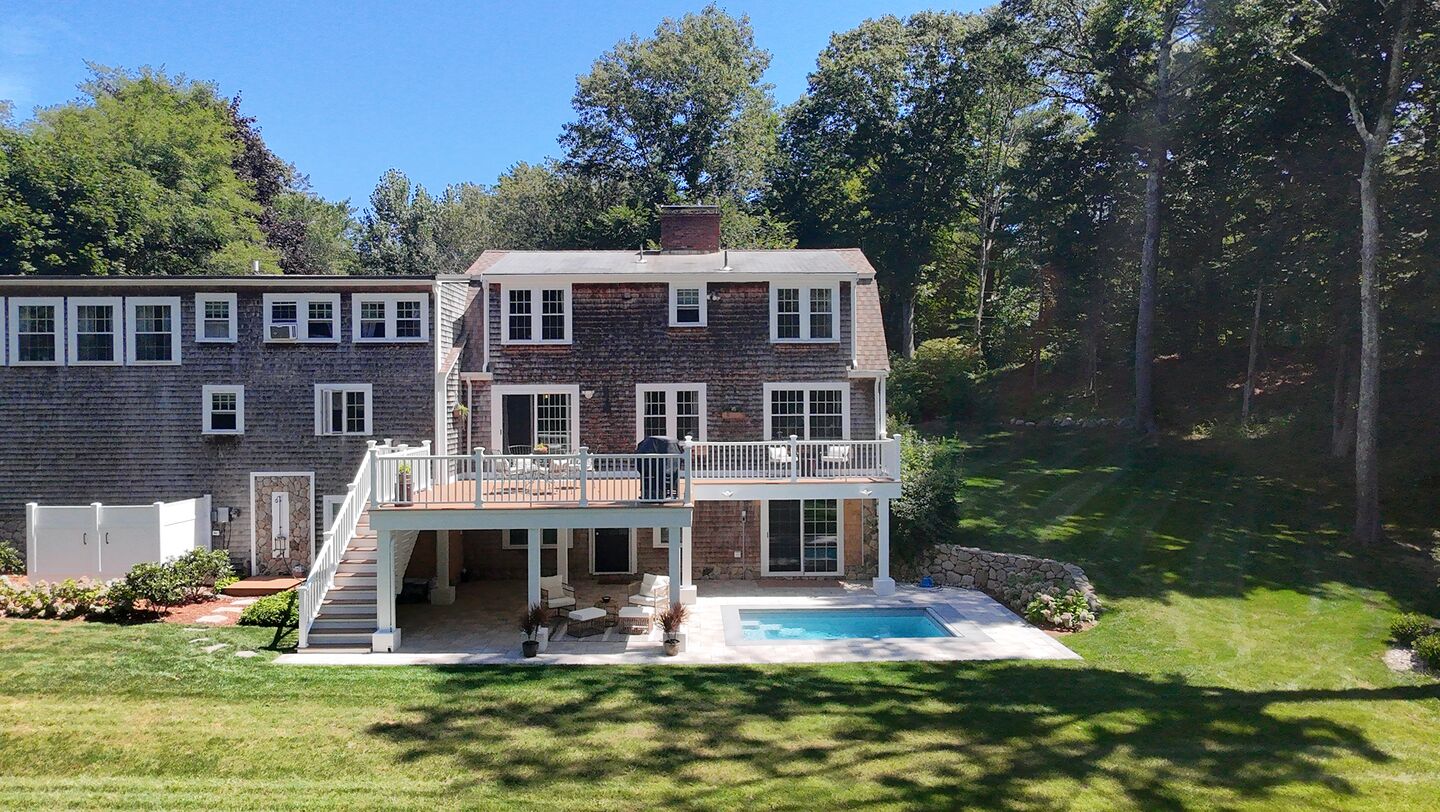
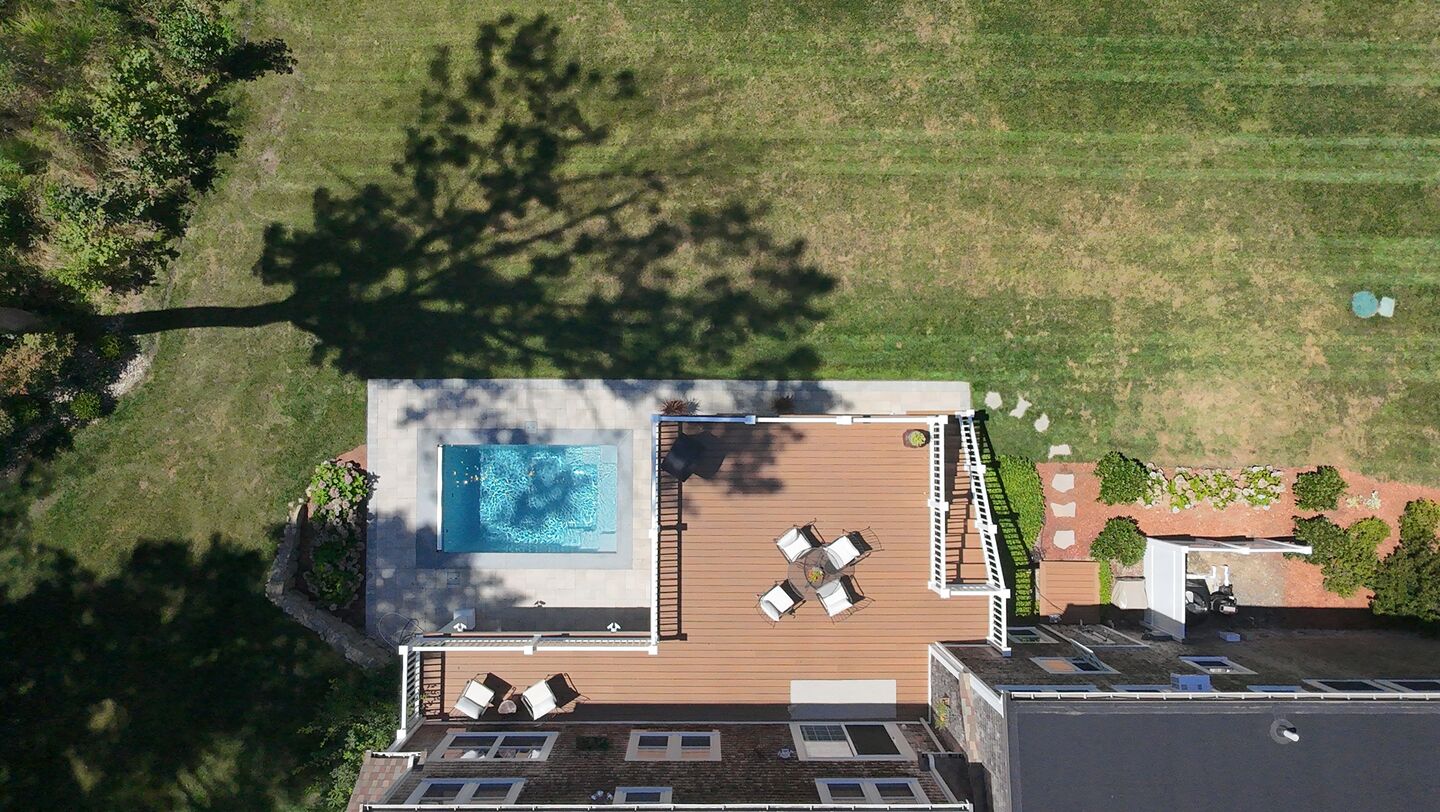
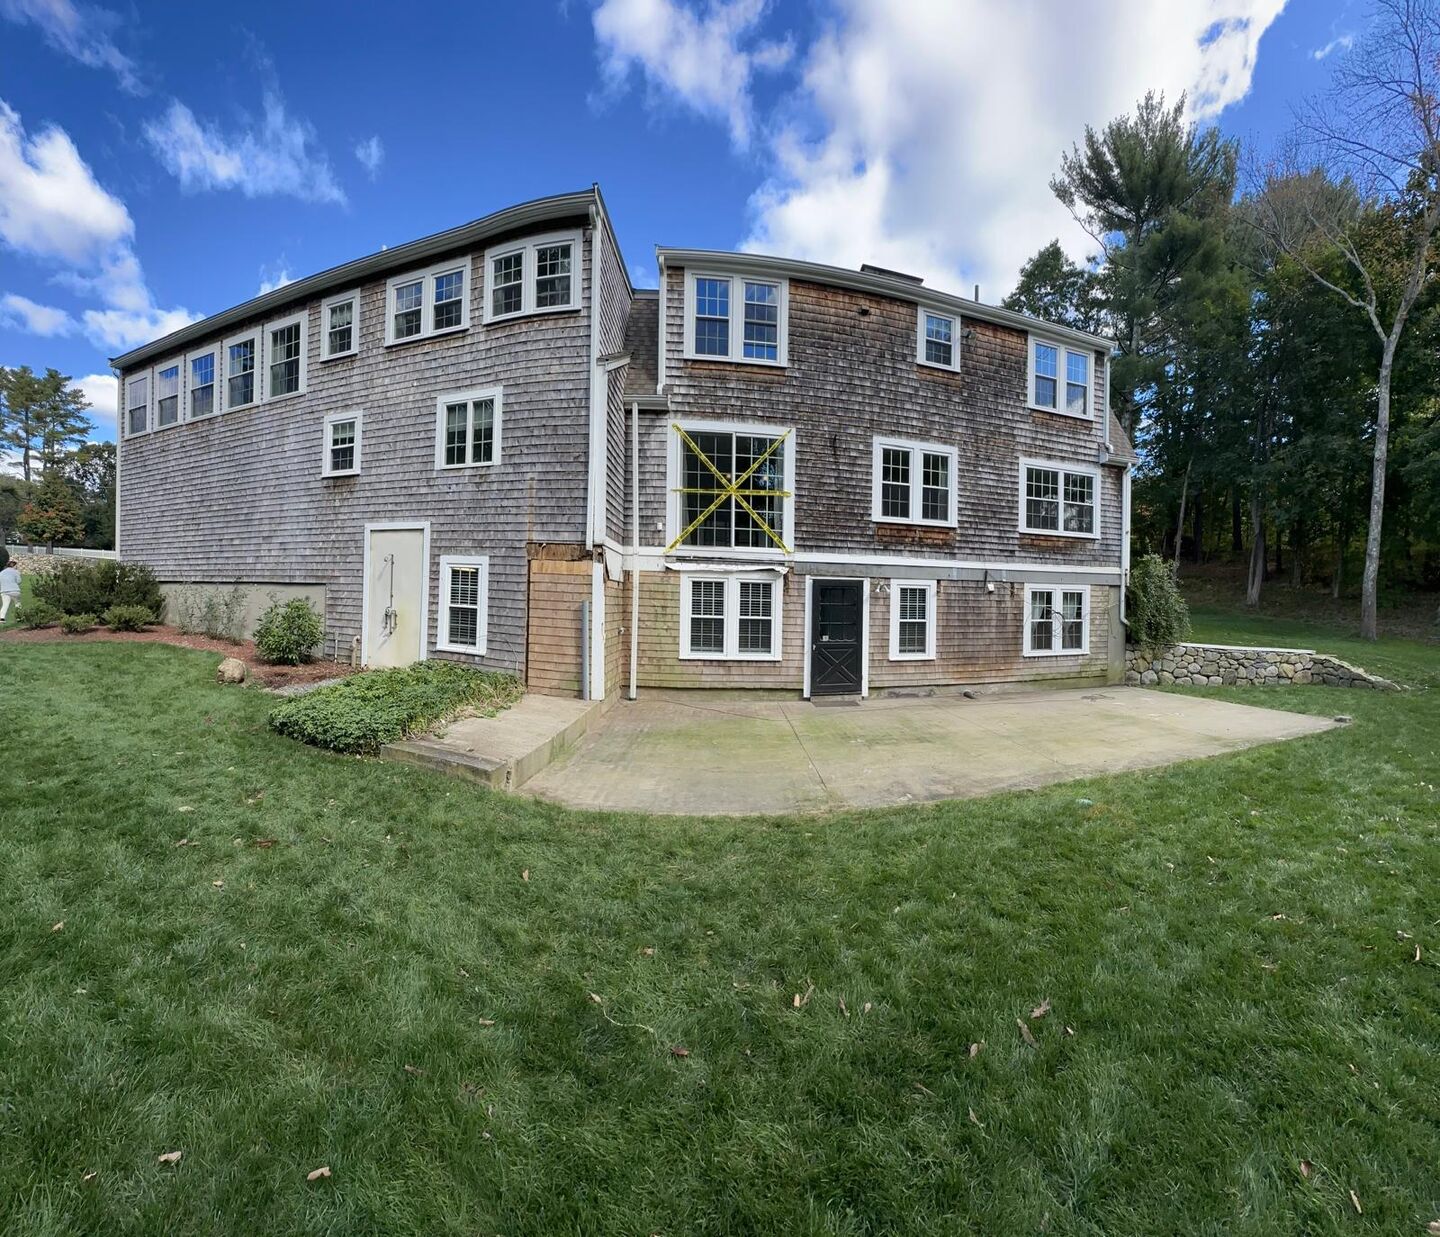
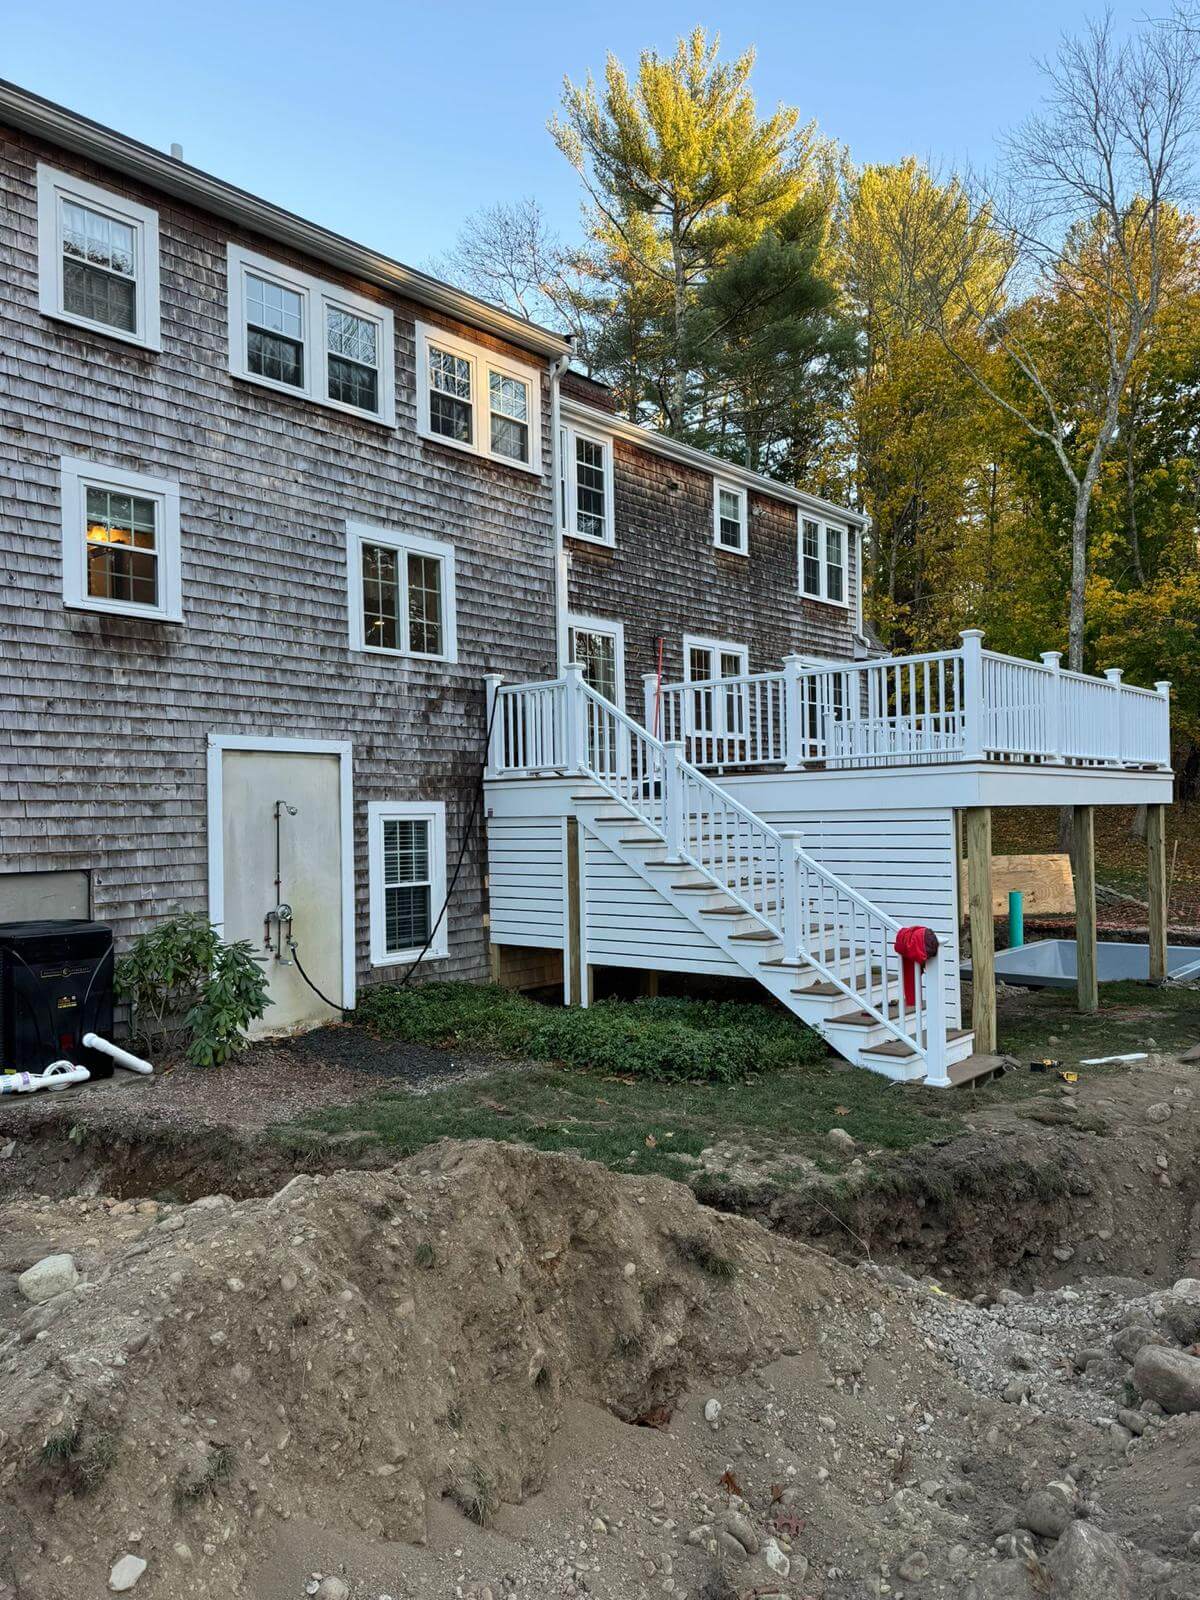
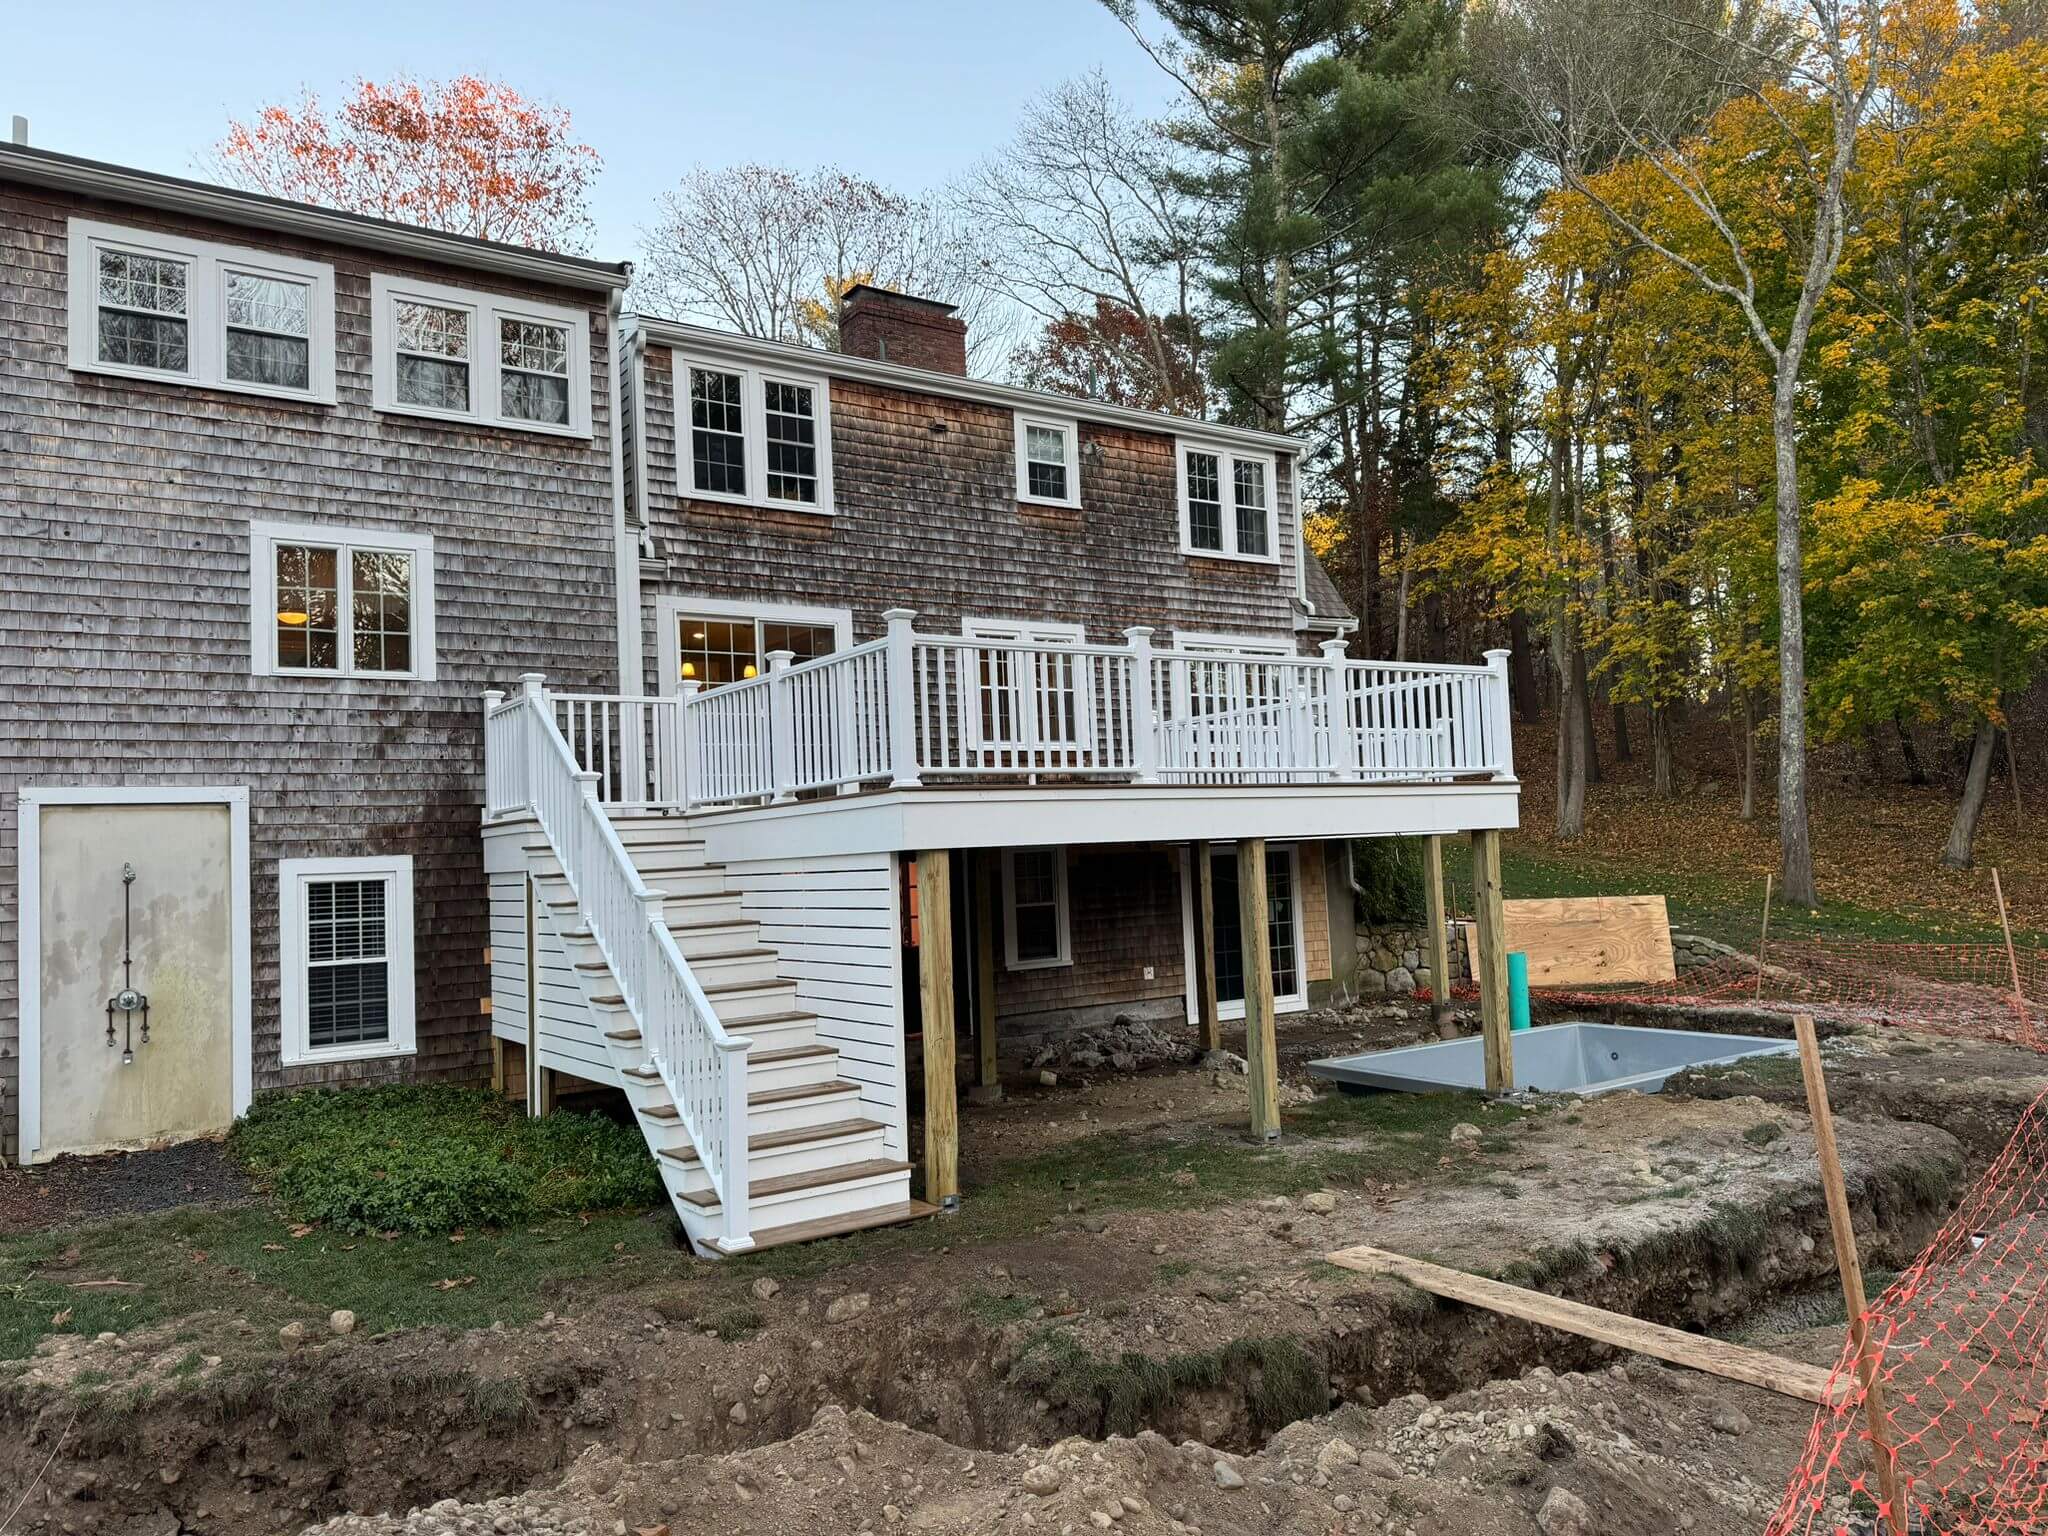
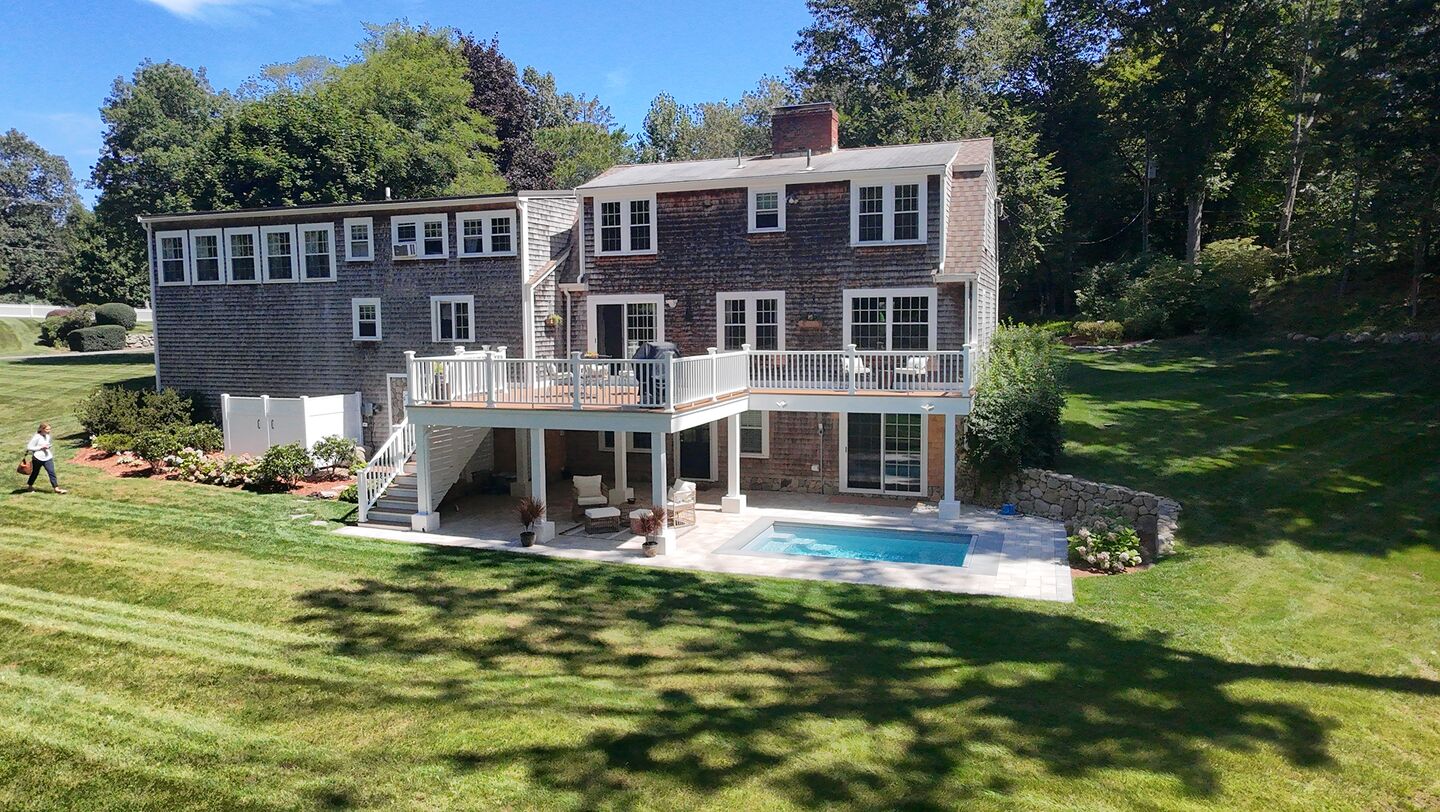
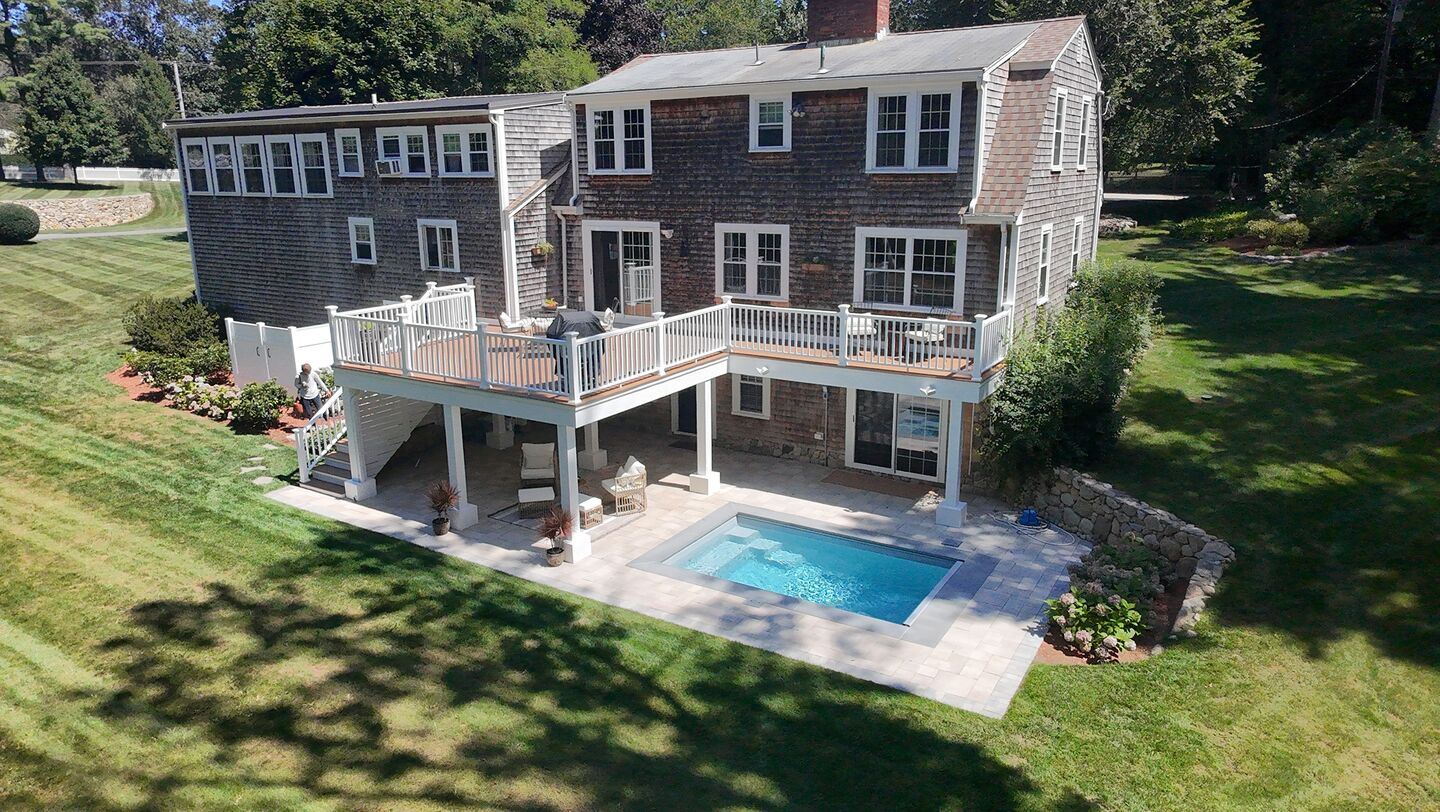
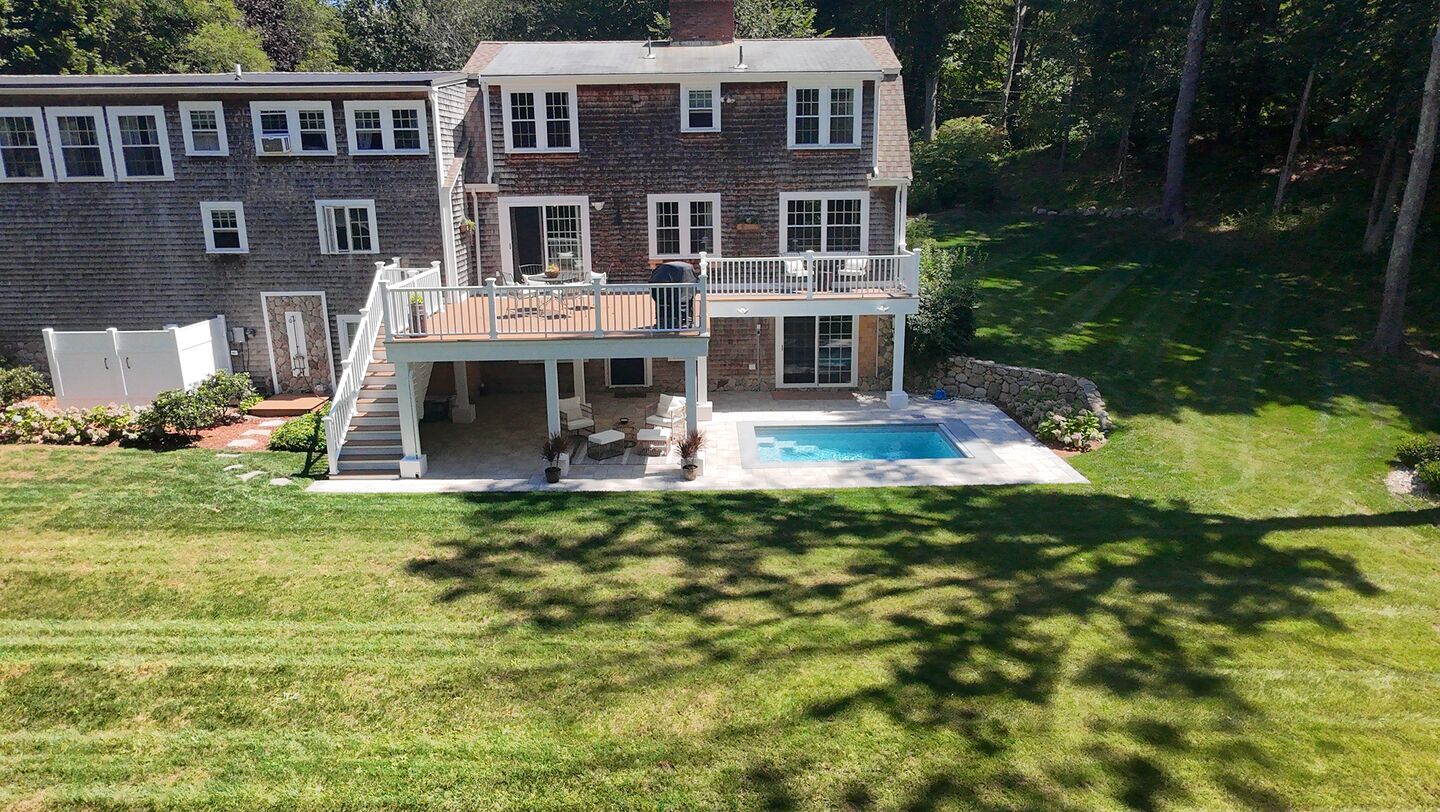
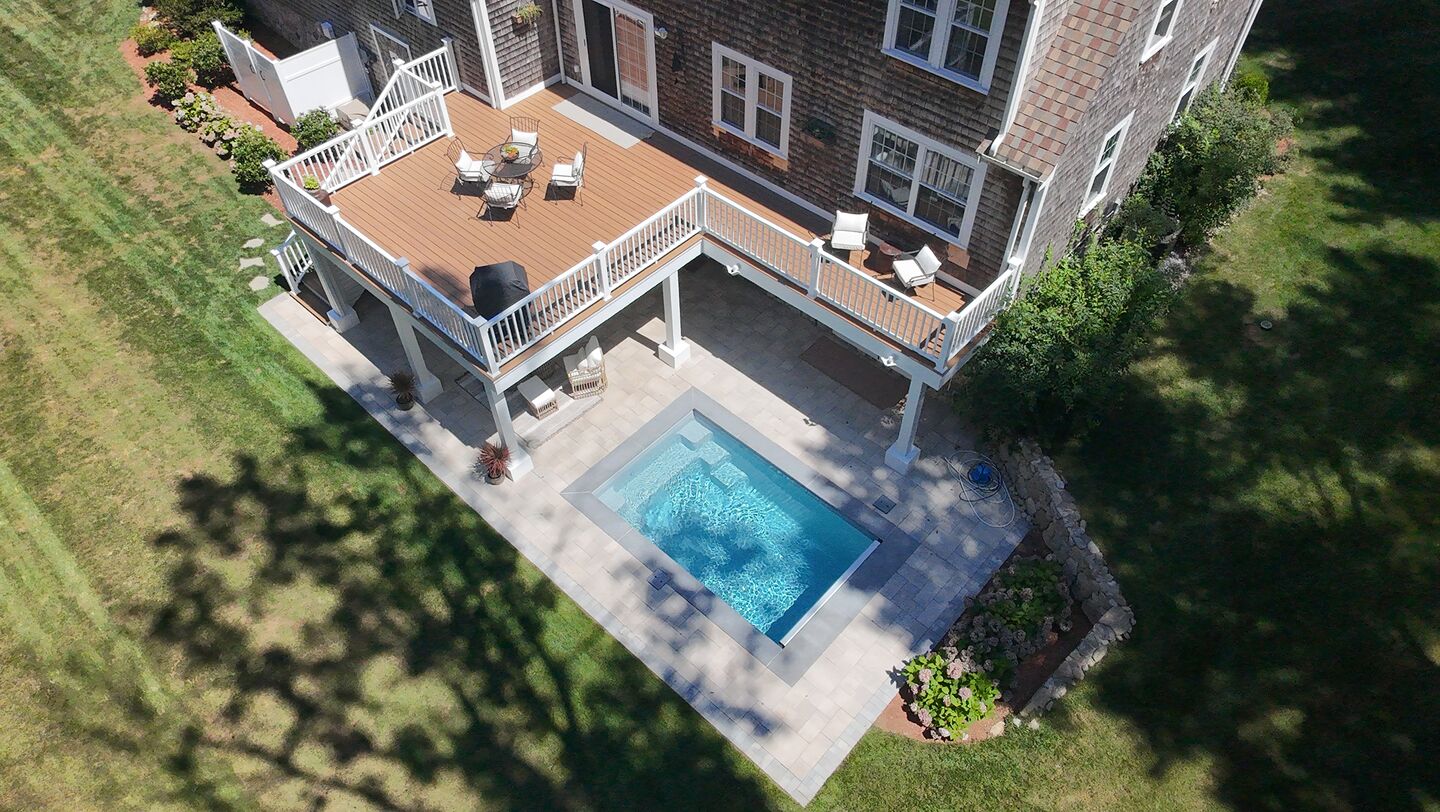
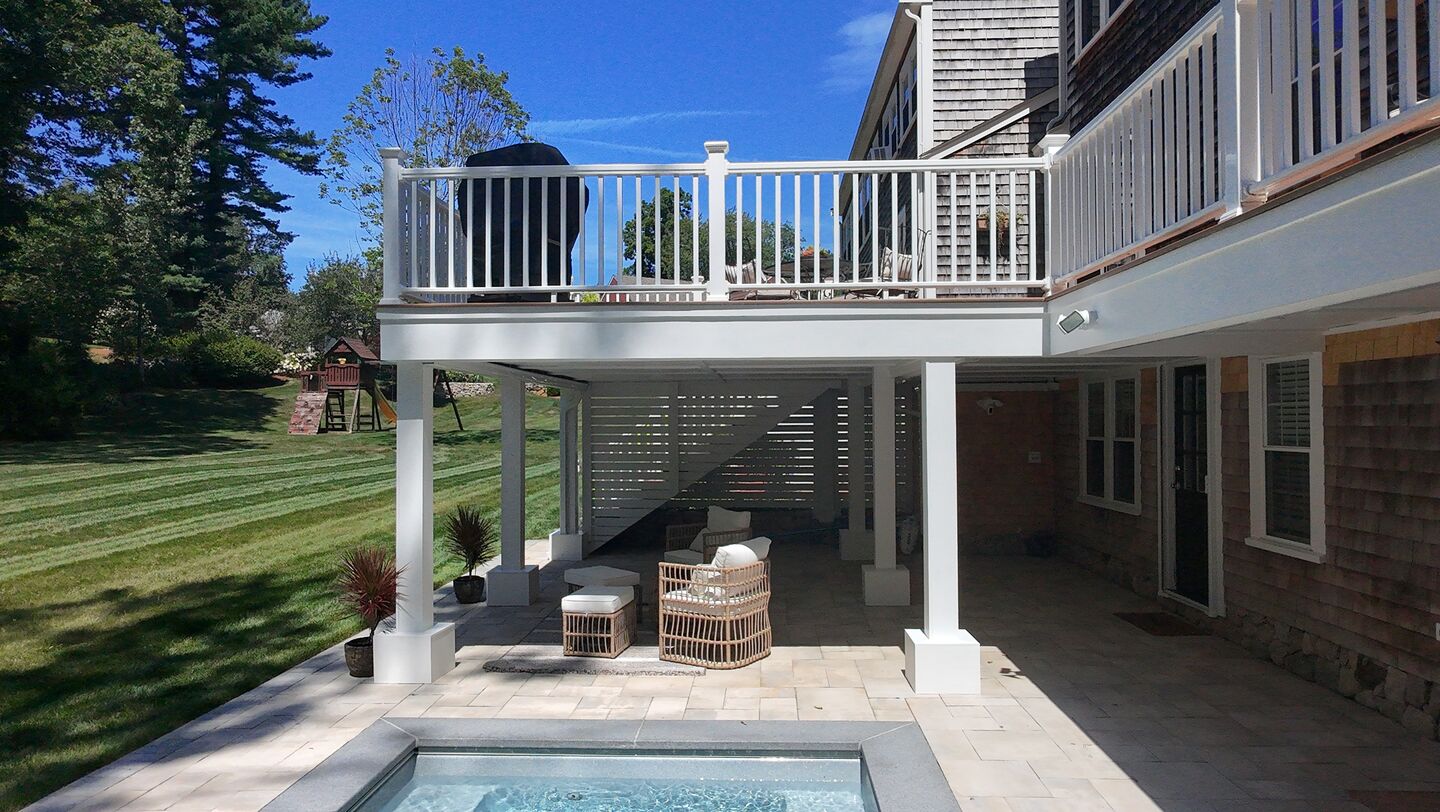
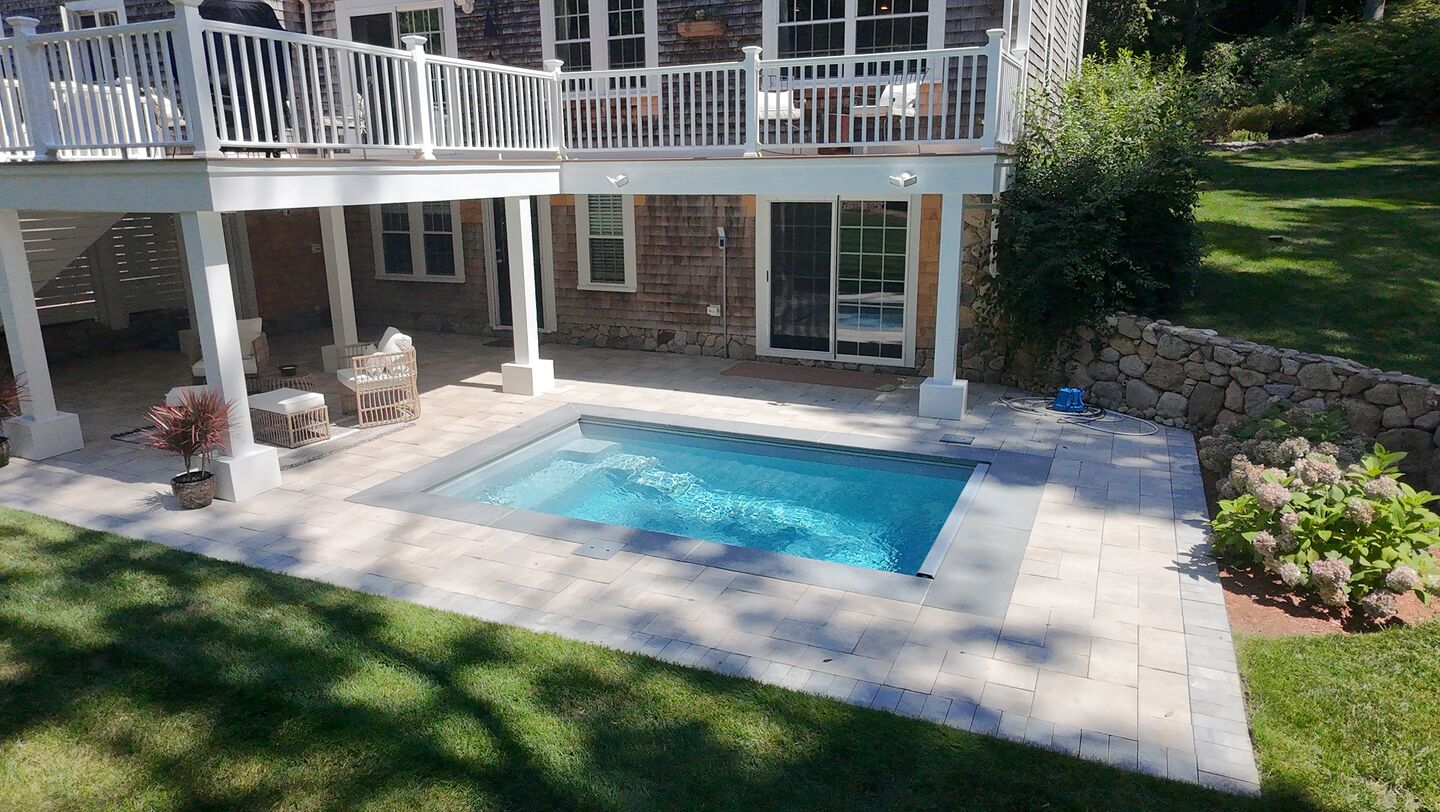
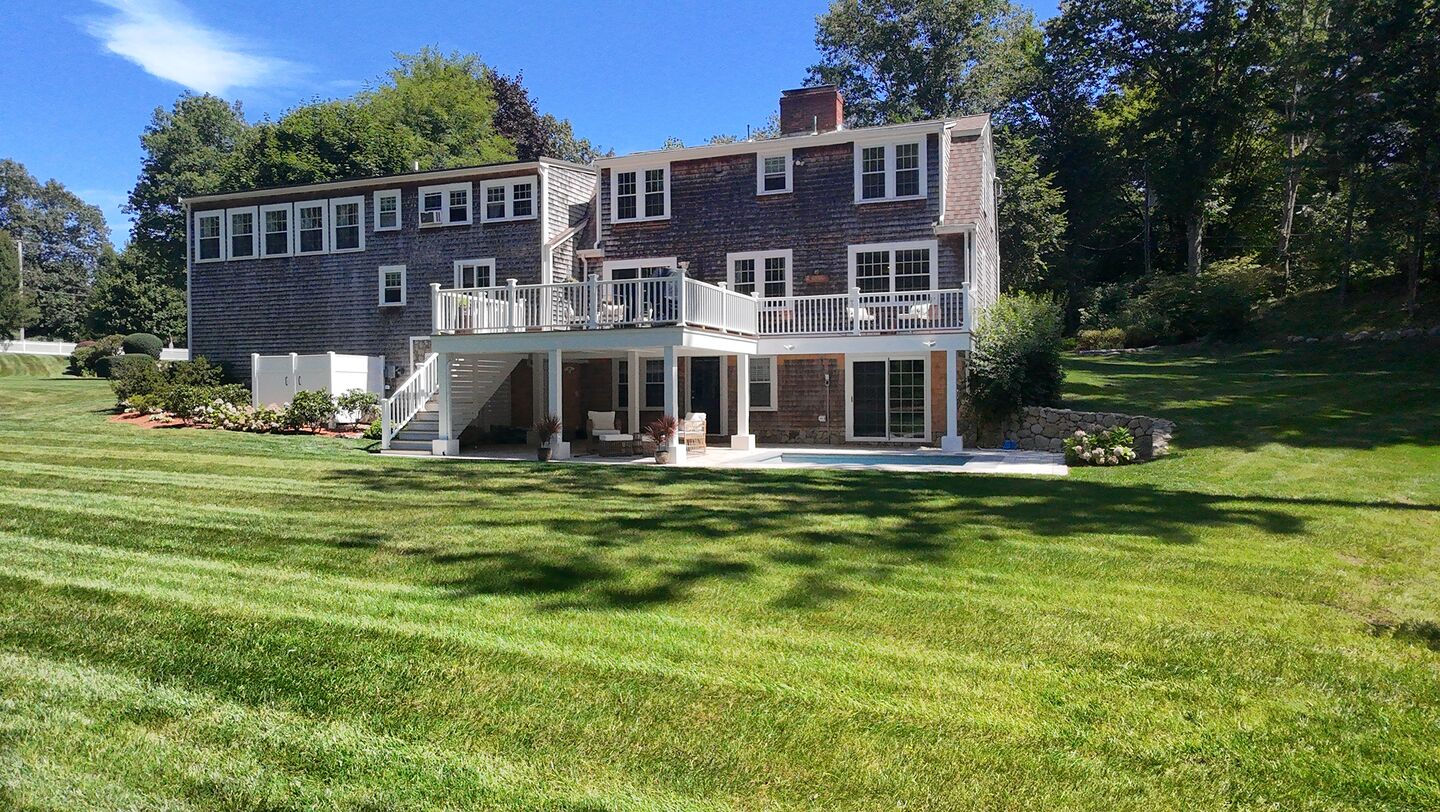
The client contacted us because there was flooding in their basement. Given that the basement was already in the “construction” stage, the client decided to also take on an outdoor project—tearing down the existing deck and building a larger one with a 7×13 pool integrated into it, along with an under-deck lounge.
The Start of a Good Planning Process
When we won the job, at the beginning of the design process, our first concern was that there was a wetland on one side of the property. The client, however, made a very smart move by working closely with the Town of Norwell and moving forward with the Conservation Department early on.
Wetland regulations can be tough to navigate because important reviews are required from multiple departments, and each town has its own set of rules—meaning even a small deck can become a long process.
At this stage, the client already had the Request for Determination (RDA) checklist in hand, the conservation inspector had visited the property, and there was an existing restoration plan. All of these steps saved a significant amount of time and made the process move quickly. Our planning team was shocked (and happy) at the client’s efficiency. At that point, the only items left were the drawings and a proposed restoration plan.
We worked as quickly as possible to create a design that could be approved by the client. After a few rounds of back-and-forth adjustments, the design and plans were submitted to the town for approval in less than two weeks. Just a few days later, the permit was issued.
So, if you’re planning exterior work and your property has a wetland, you have two options:
- Do the early steps yourself – Contact your town’s Conservation Department, request a checklist and site visit, and get the permitting process halfway done before contacting your general contractor (G.C.).
- Let your G.C. handle it entirely – Simply inform your G.C. from the start that there’s a wetland on your property. The G.C. can manage the whole process, but it may take more time to get the permit approved.
At Millhawlk, we have a team specialized in permitting and special permits, which is crucial for keeping a project like this running smoothly.
Challenges & Solutions:
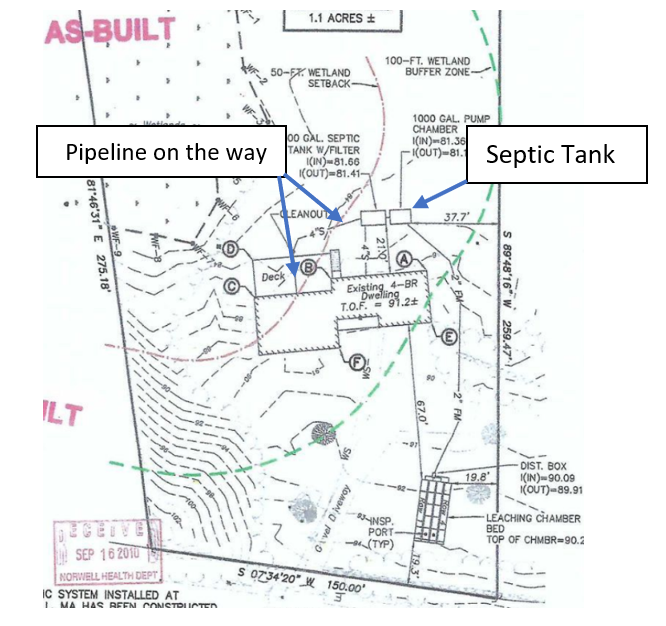
Pool planning and Septic Tank
While we don’t handle pool installations, the client hired their own pool company. Initially, working with third parties might seem challenging, but with good planning and communication, it’s rarely a problem.
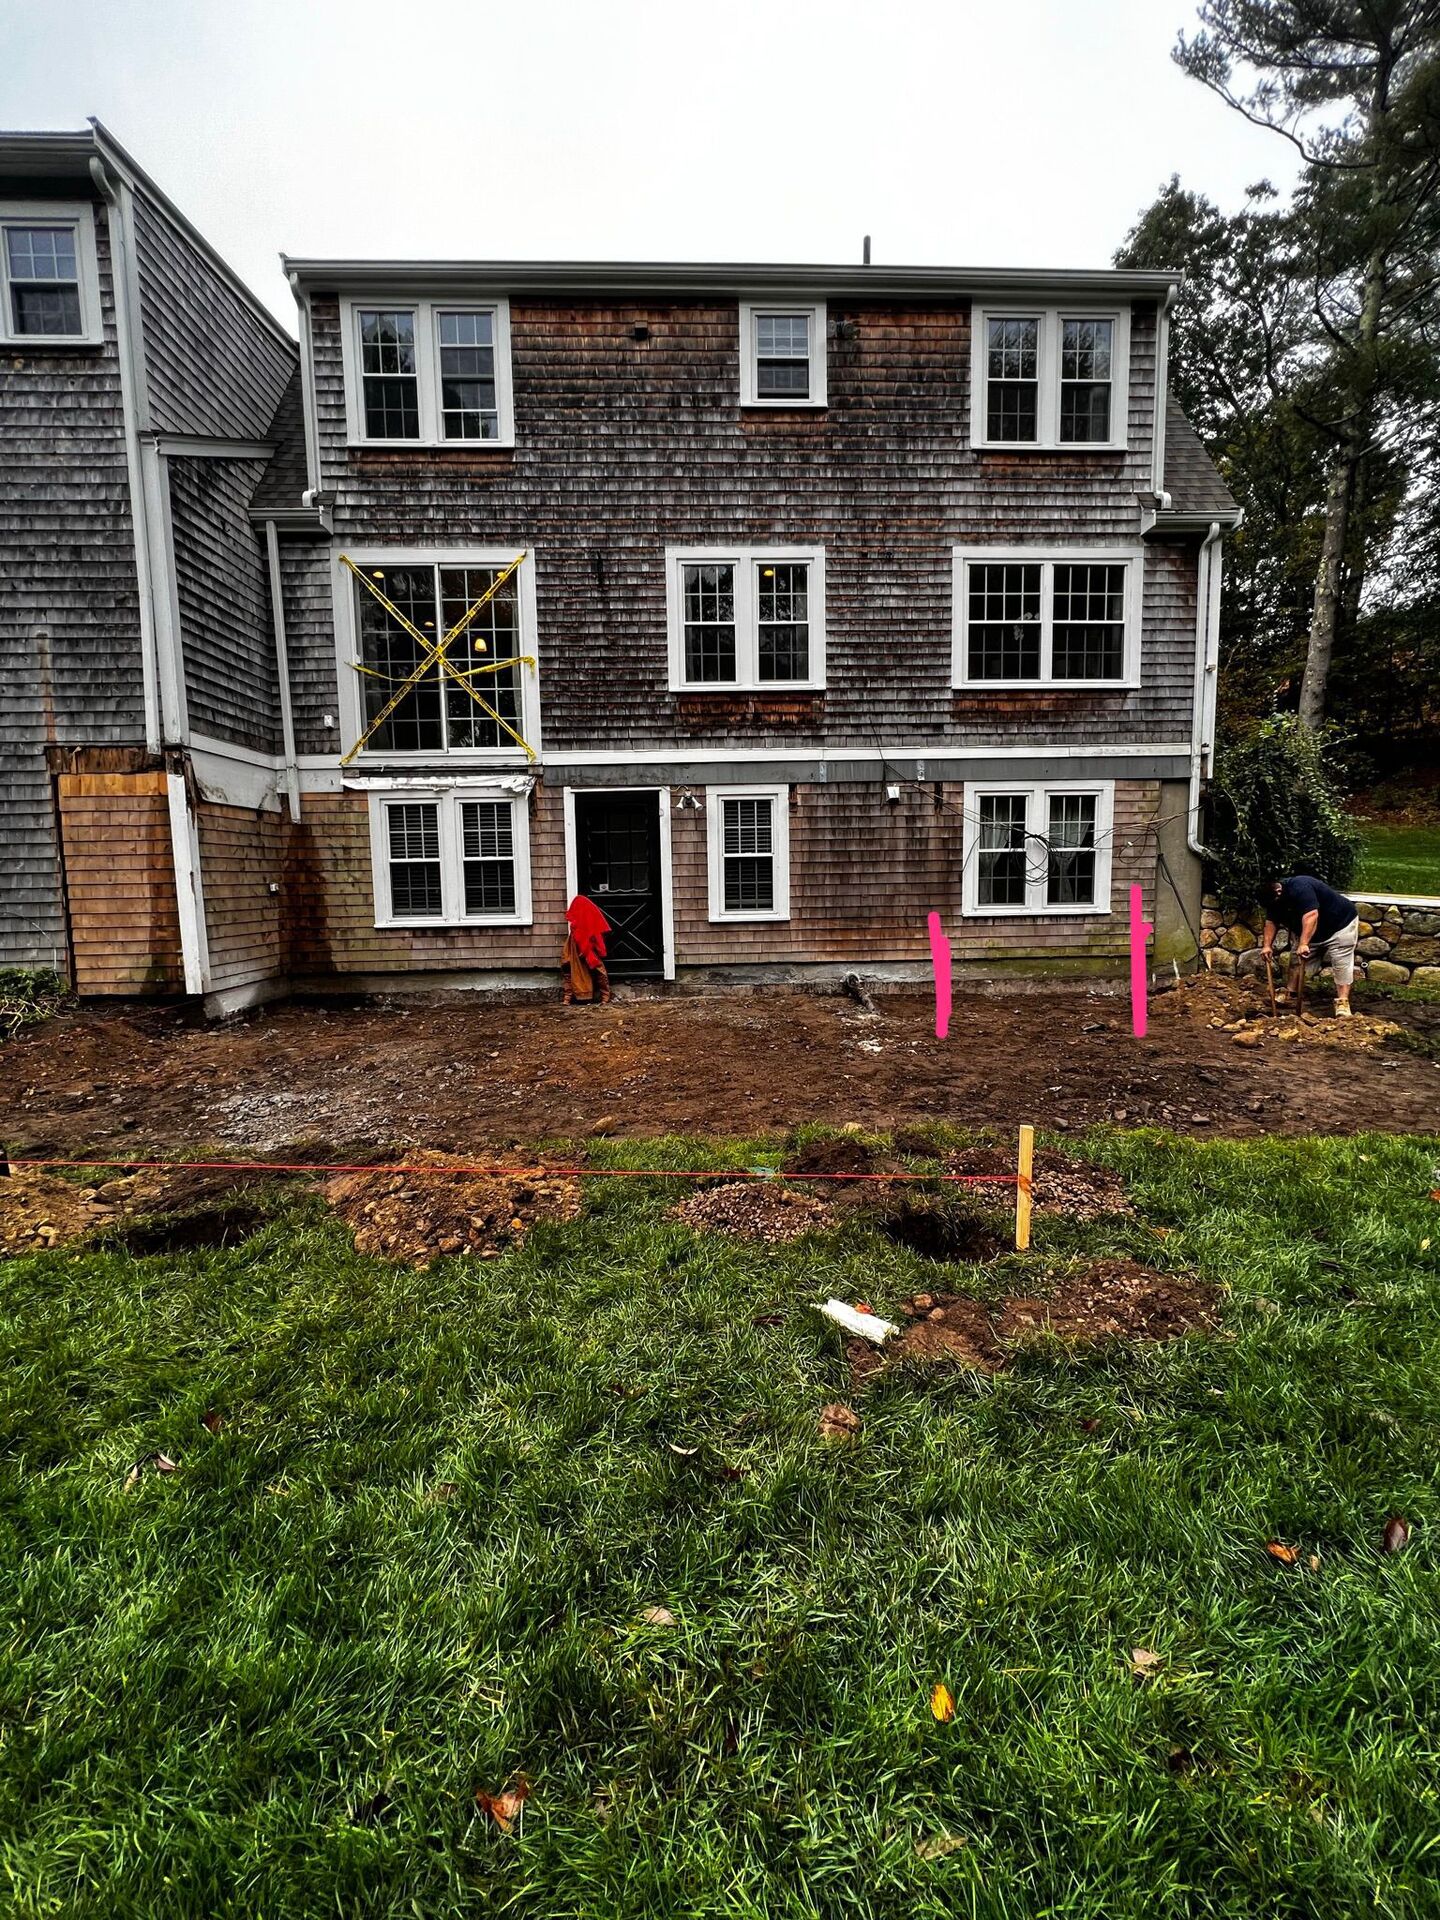
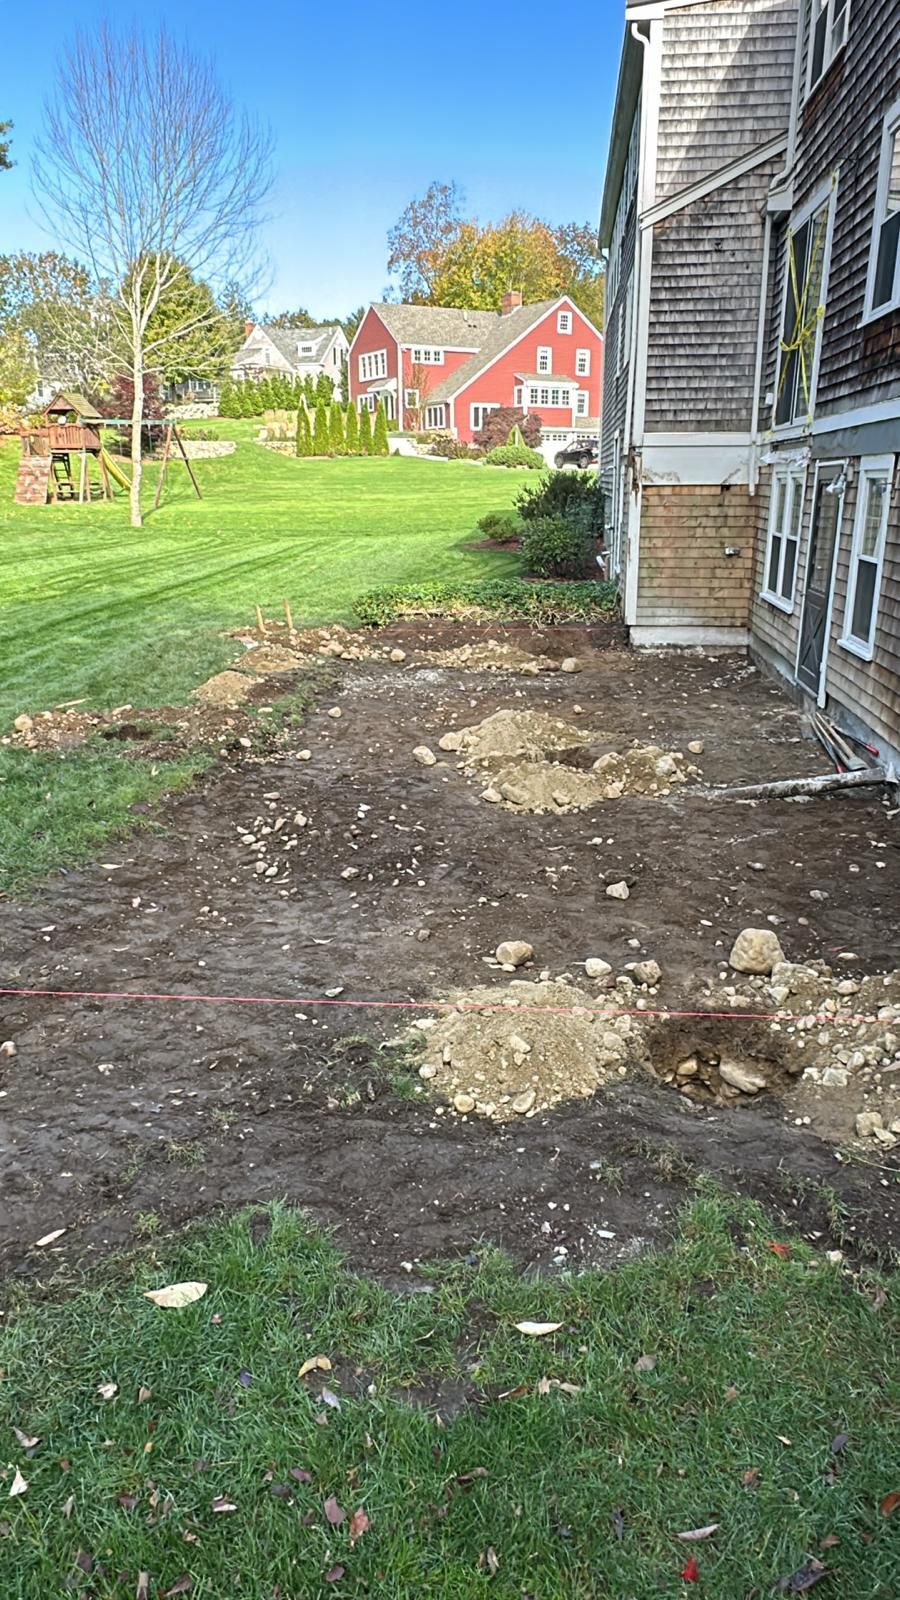
Our first step was to meet with the pool company to address potential issues that could affect either side. The main challenge came from the property’s limitations: in addition to the wetland, the backyard had a septic tank. This added complexity due to sewer pipes in the area and the 20-ft setback requirement between a pool and a septic tank.
Once again, the client saved the day by having the septic as-built plan, which mapped all the pipes. This allowed us to create a safe excavation plan, ensure the pool company could work around the septic system, and identify if any deck footings were near a sewer line.
This, again, saved time in the process. If you have a similar scope—such as adding a pool close to a septic tank—you need to provide your contractor with the septic company’s name. If you don’t have it, either you or the contractor must contact the town to request permitting records. They will likely have an as-built plan on file.
If the town cannot find any records and you don’t know the septic company’s name, you will need to hire a private underground utility locator. Unfortunately, this will add an extra cost to your project scope.
After a couple of rounds of back-and-forth to align details with the pool company, we started the construction process, which will be covered in the next topic.
Construction Phase
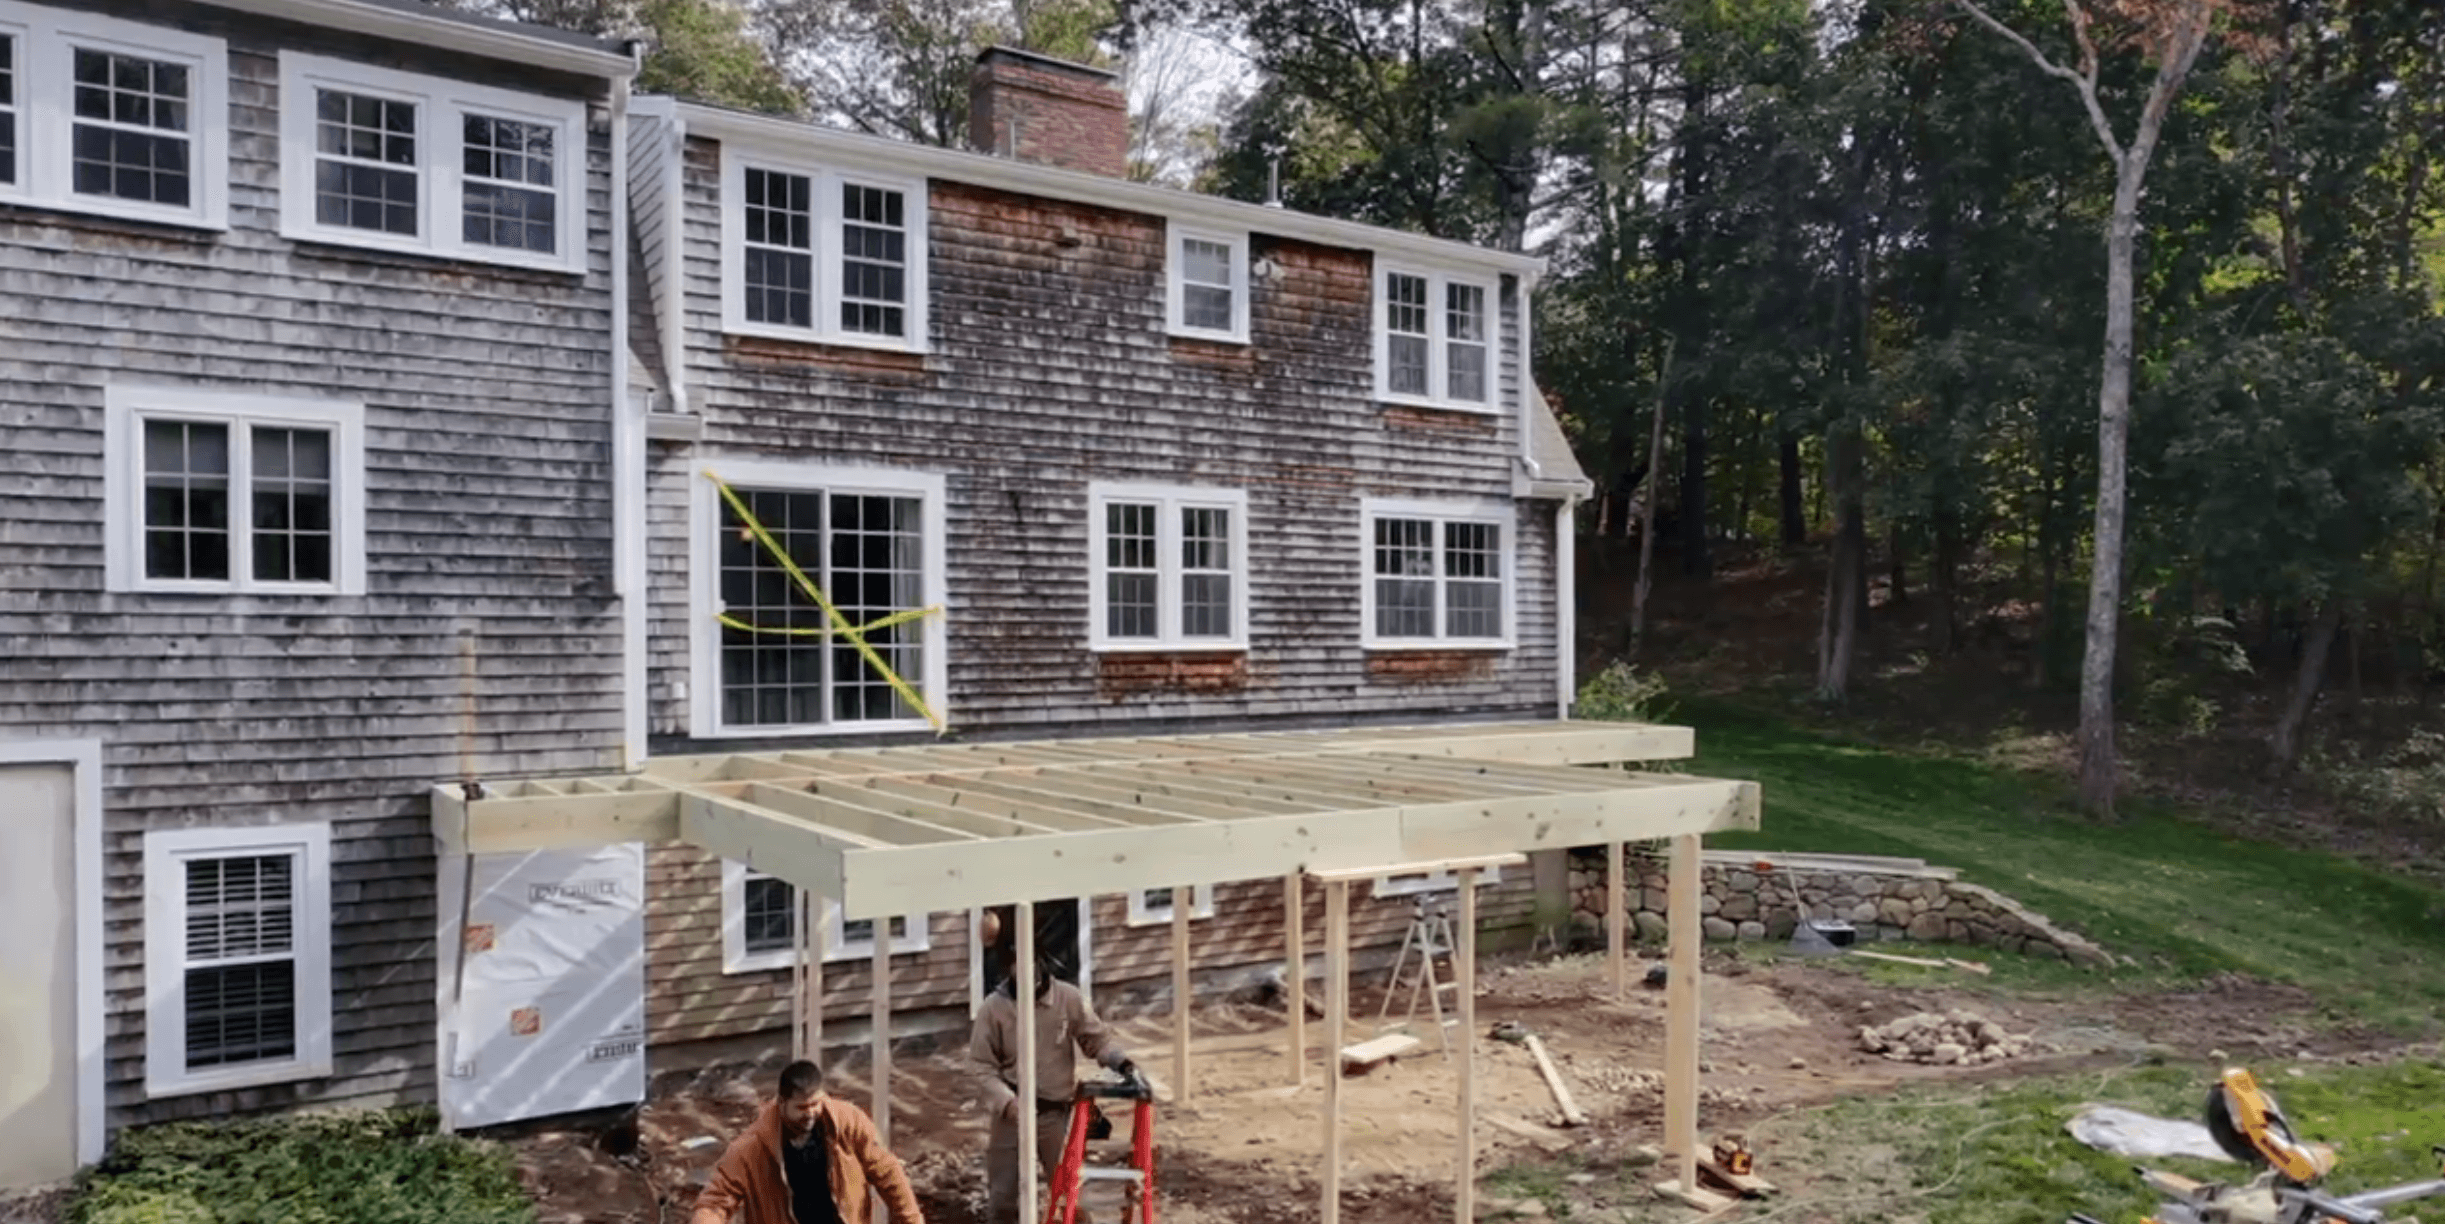
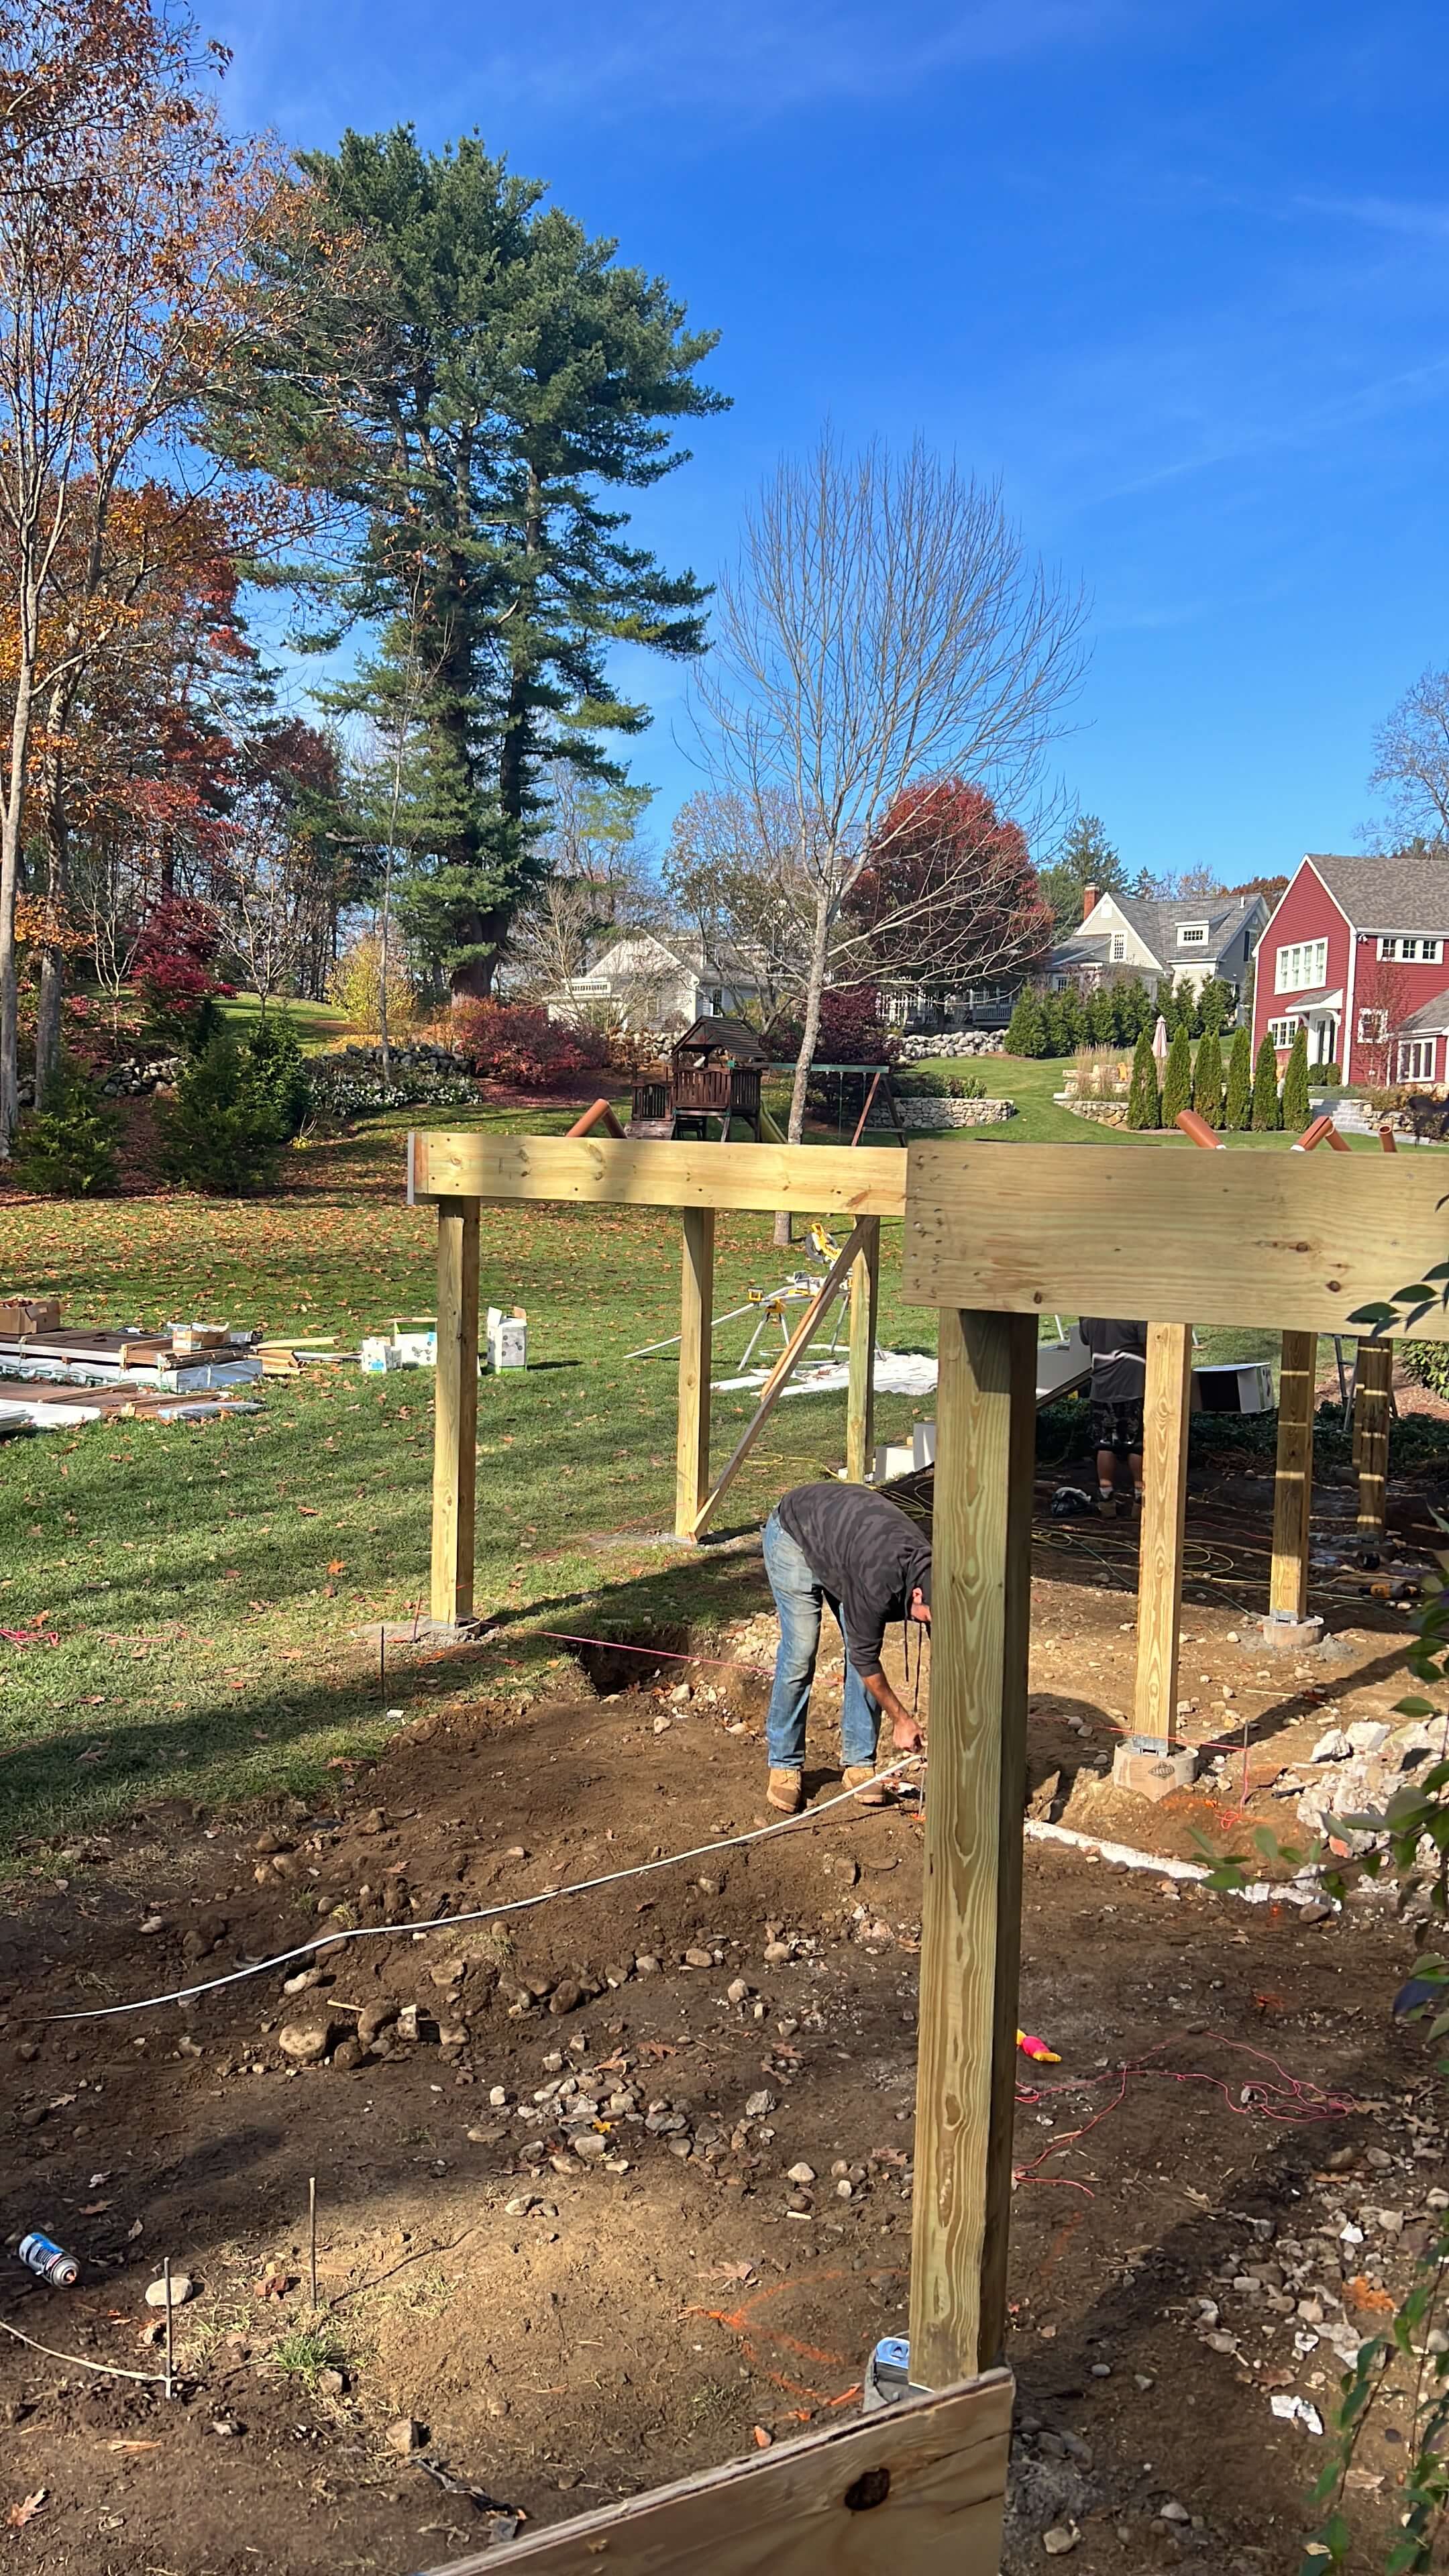
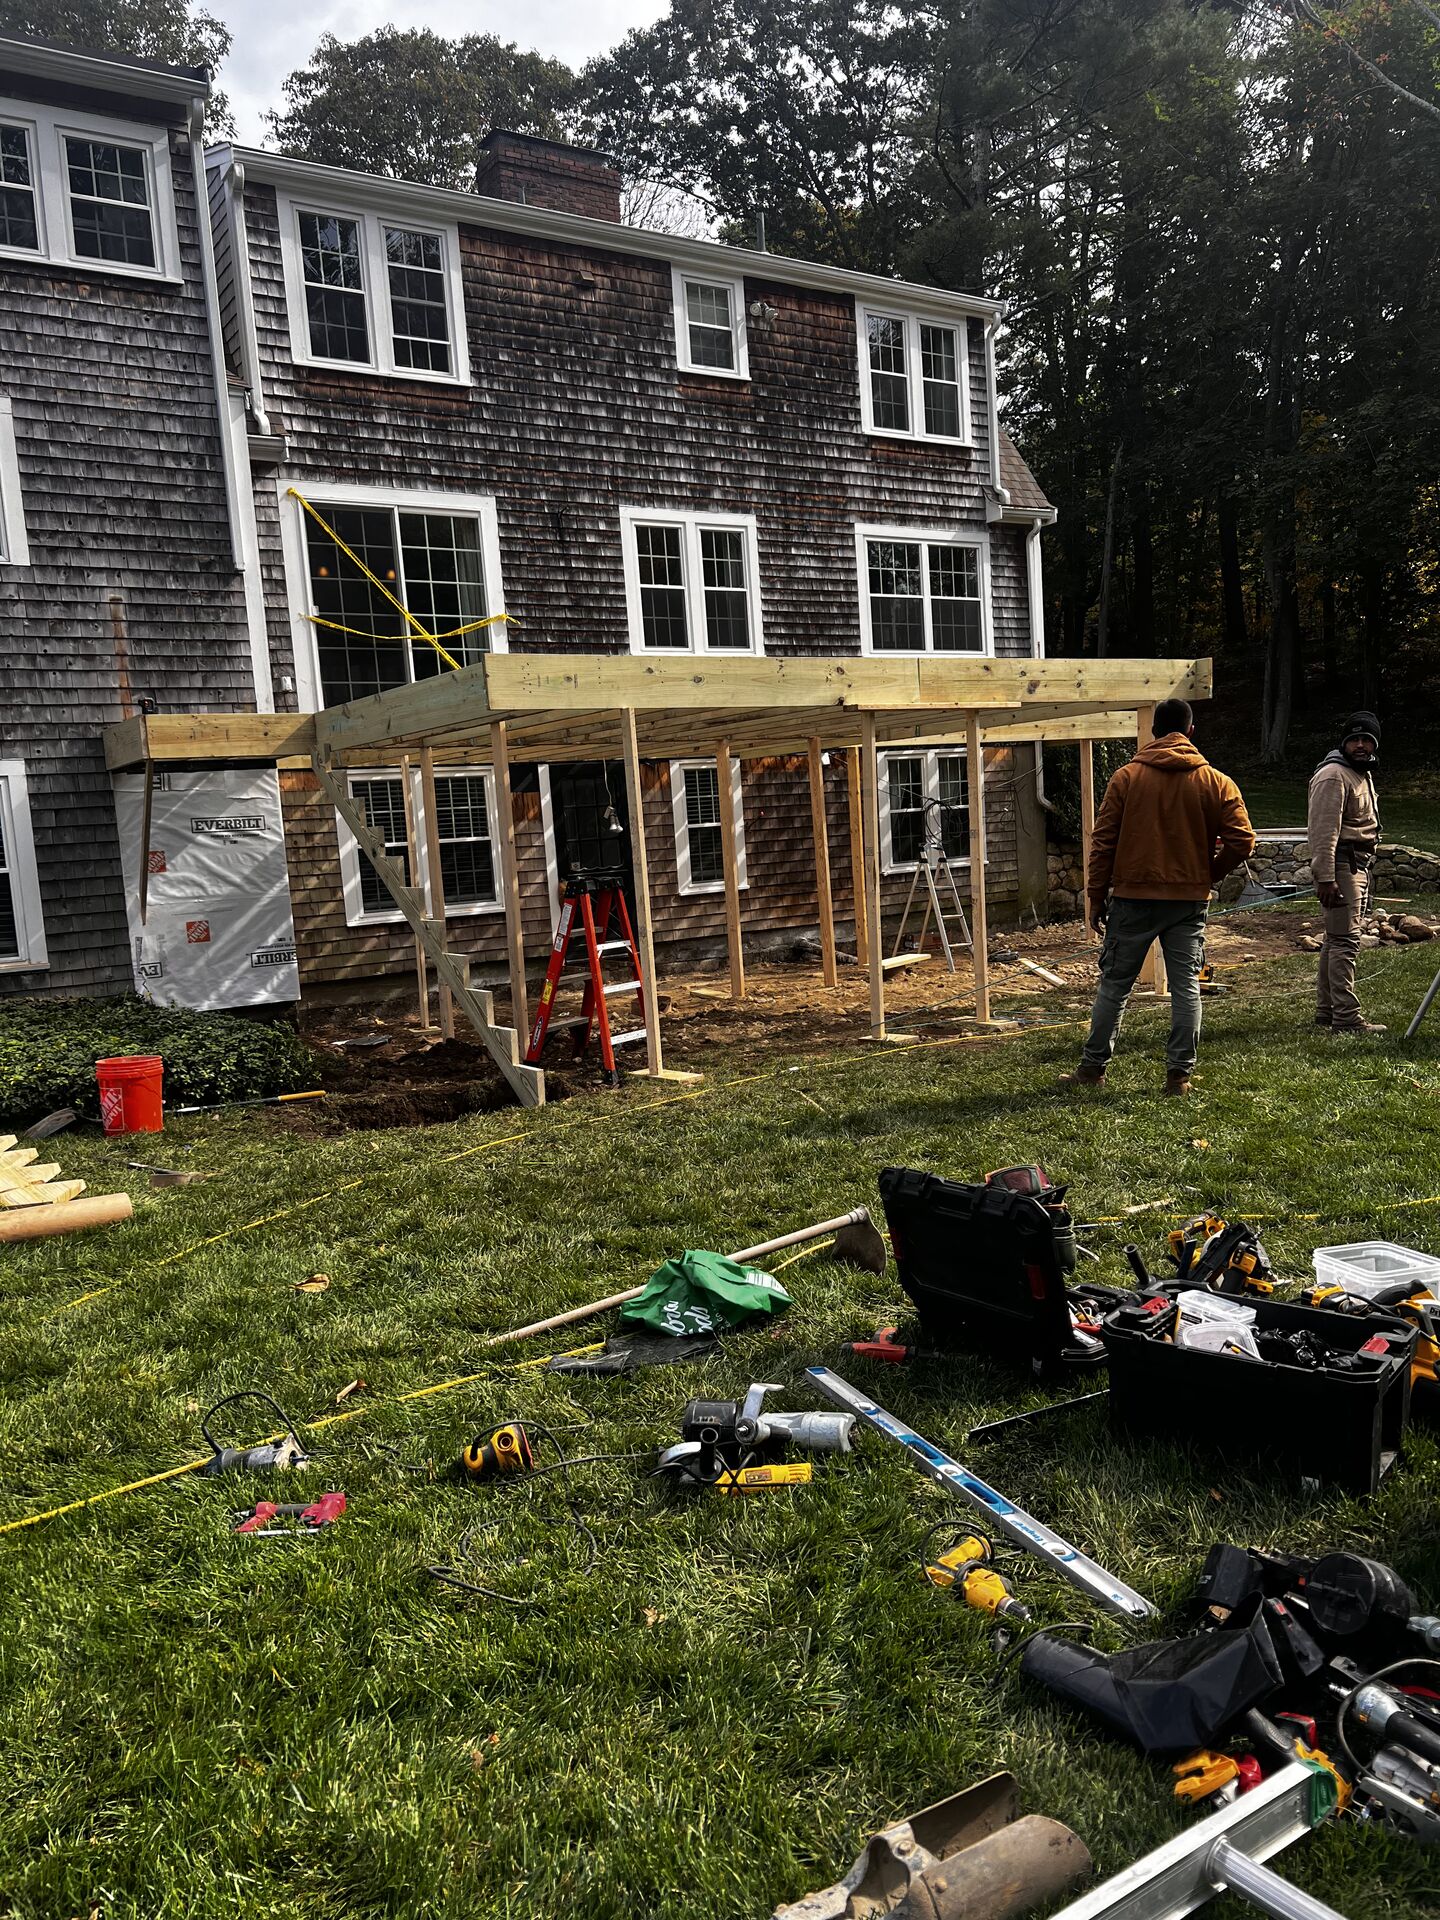
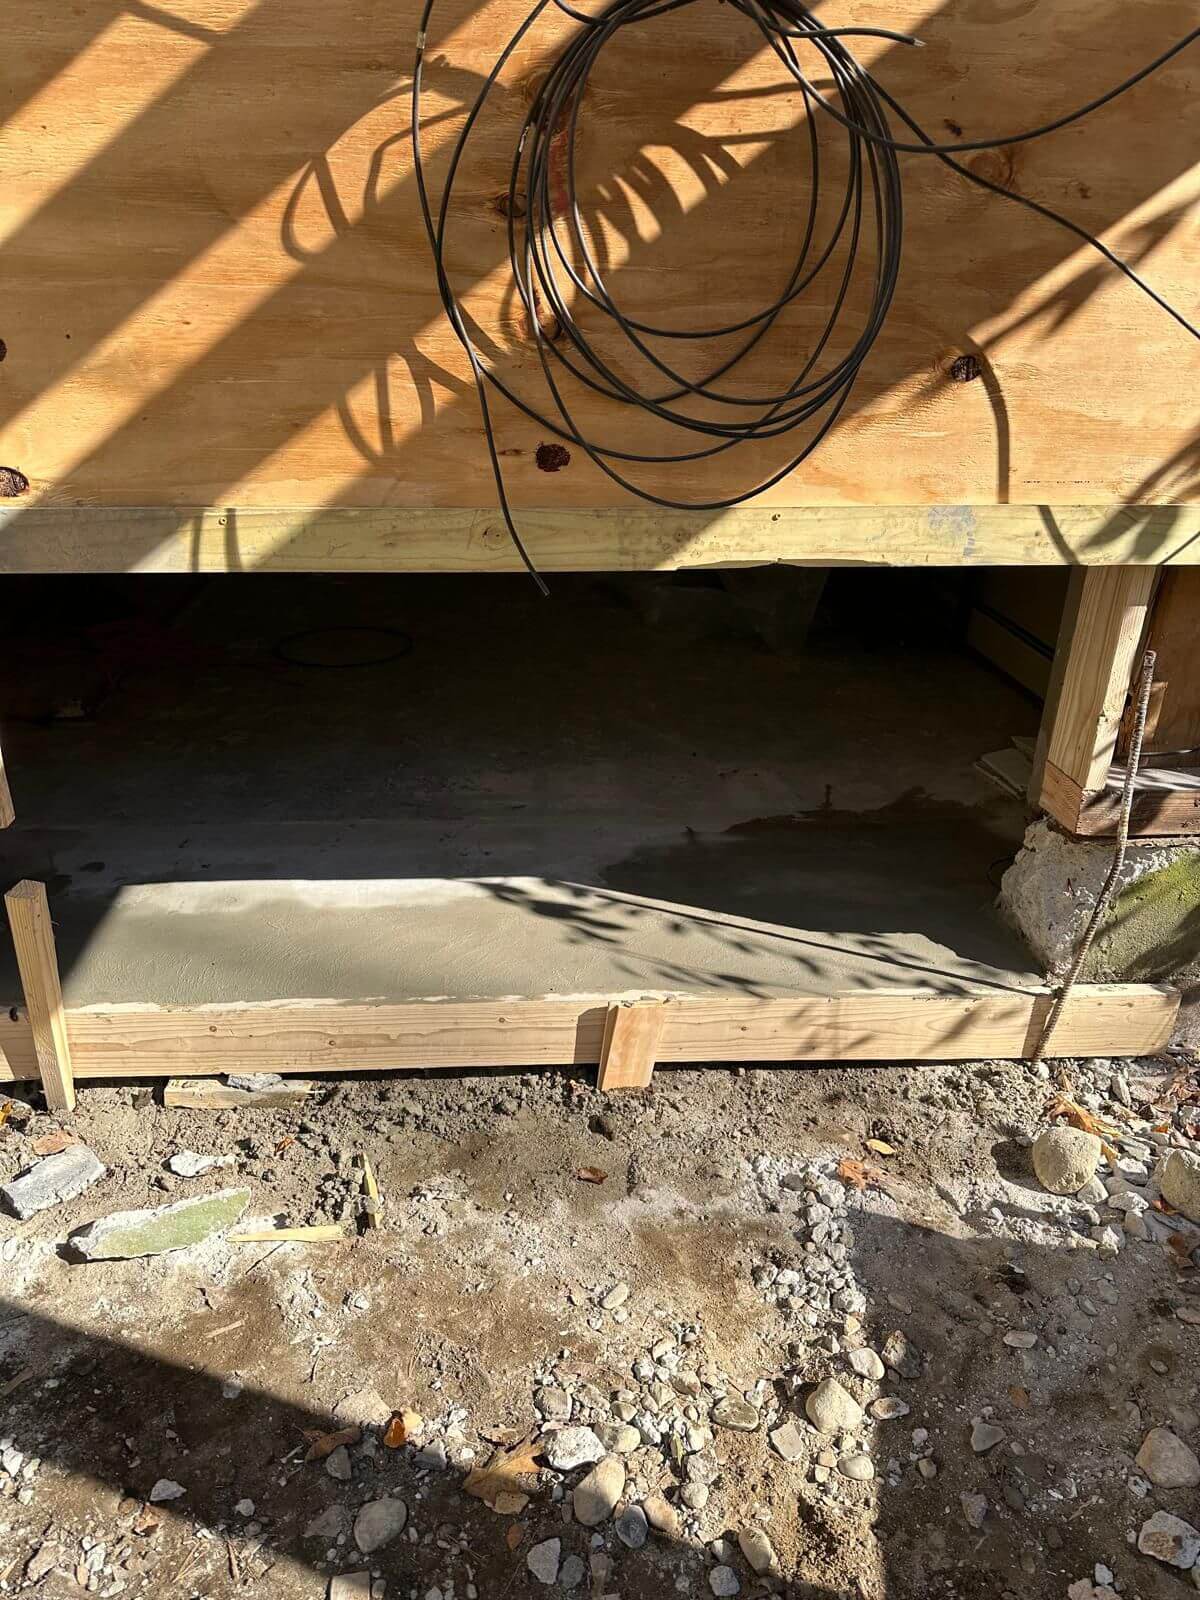
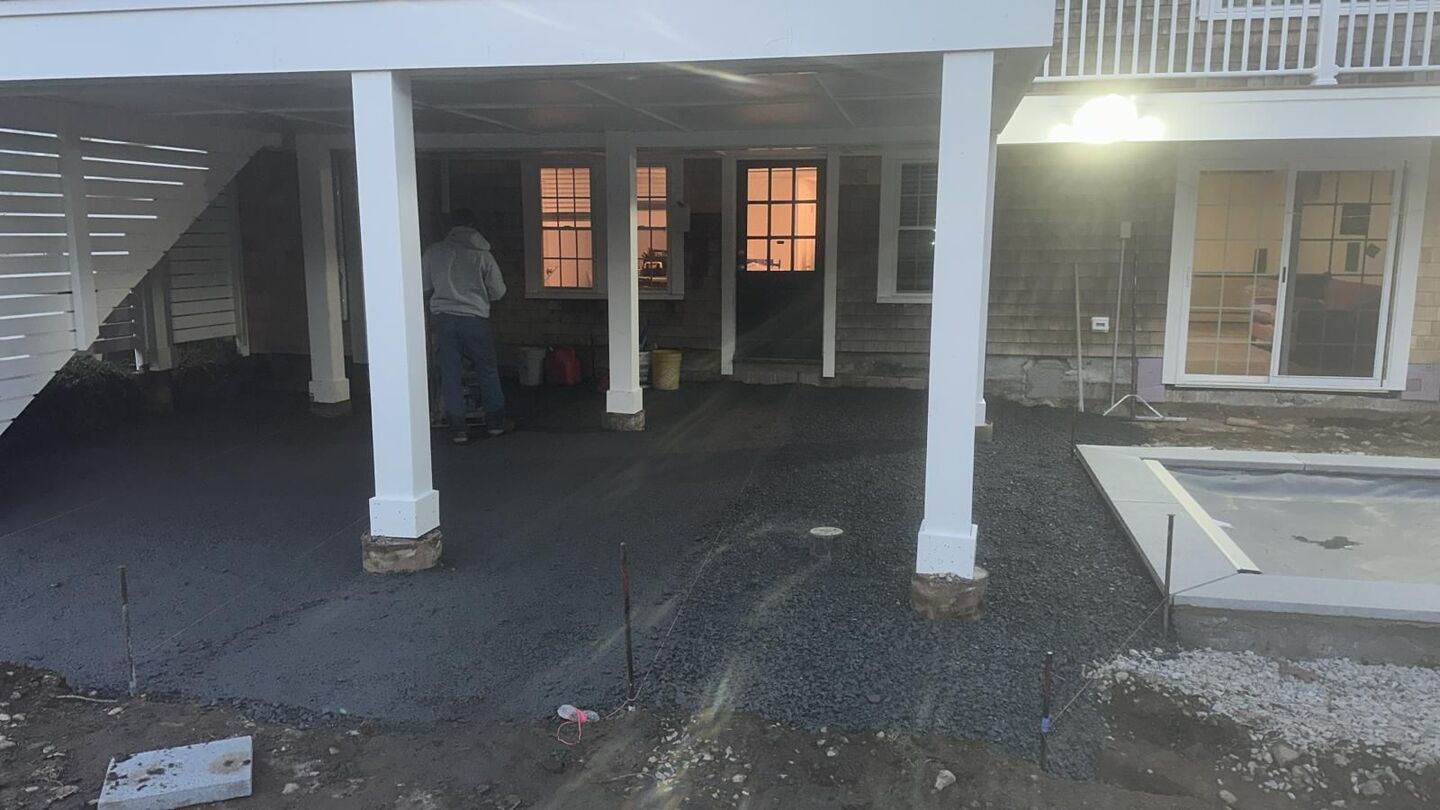
Phase 1: Footing and Framing process
The footing process was quick and safe, with all materials already on-site. The footing inspection was completed promptly, and once it passed, we moved on to the framing stage.
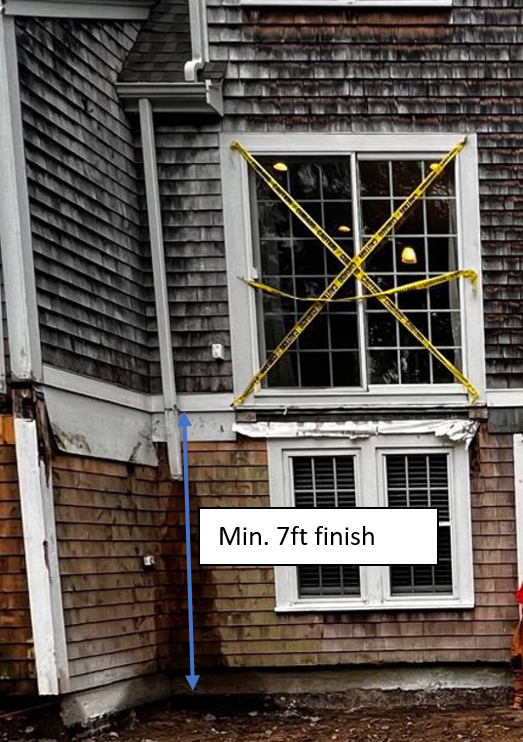
The framing consisted of a 2×10 joist system spaced at 16″ O.C., with a main 9-1/2″ Glulam beam supported by 6×6 PT posts set on 12″-diameter footings with Bigfoot bases to handle the load. The only special detail we needed to monitor closely was the final deck height, which by code must be a minimum of 7 ft finished, as well as the minimum height for the second-floor sliding door threshold, which must be at least 4″ by code.
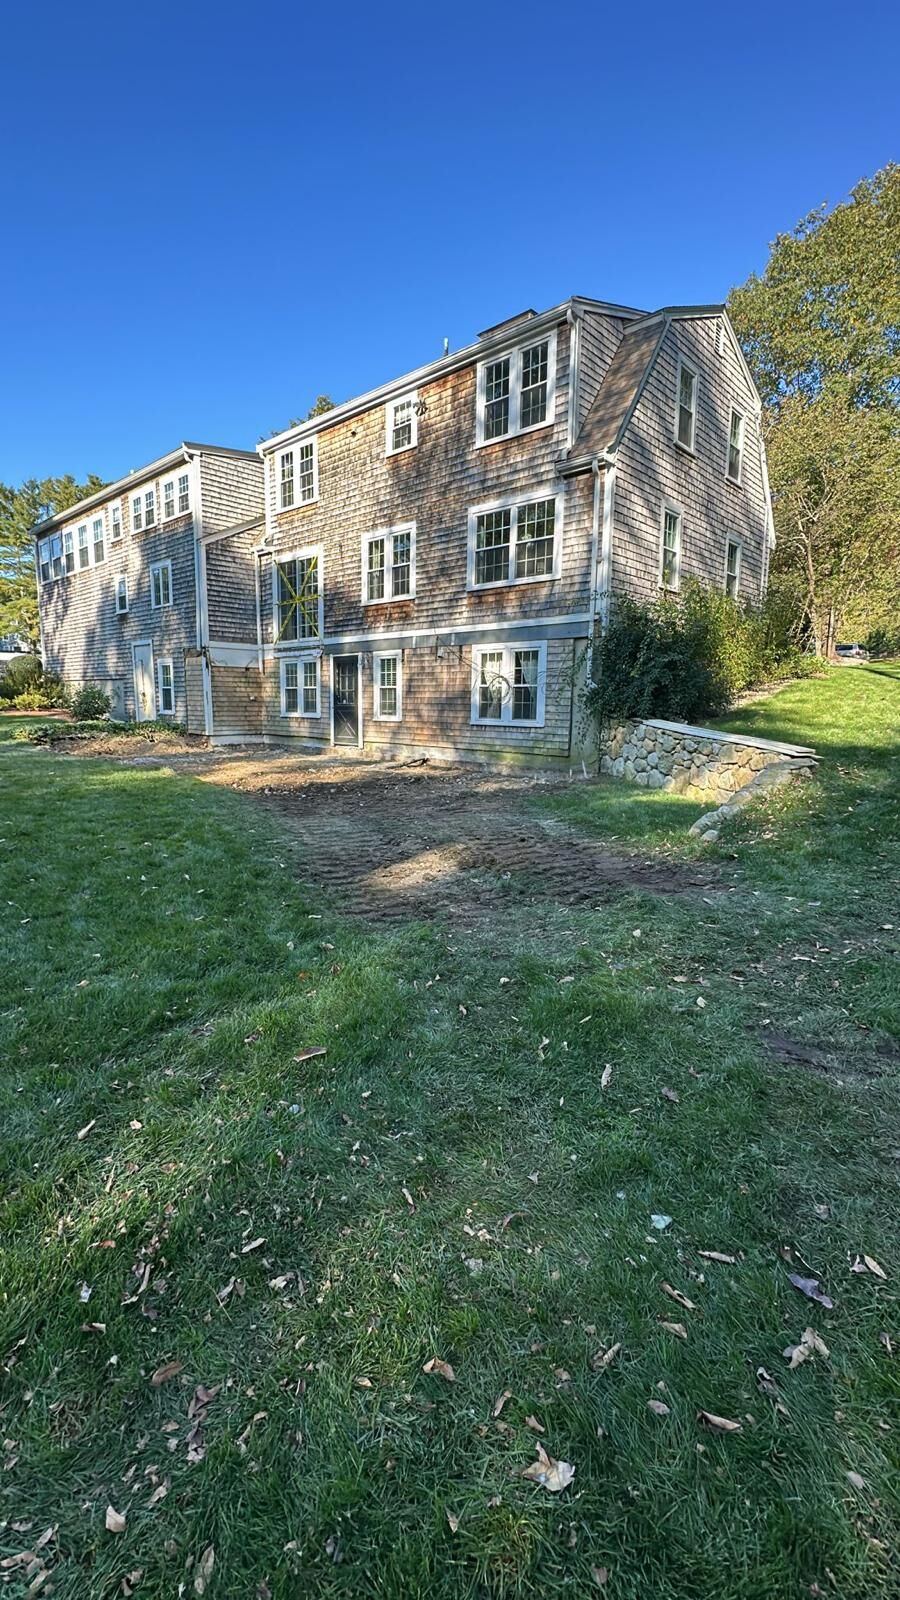
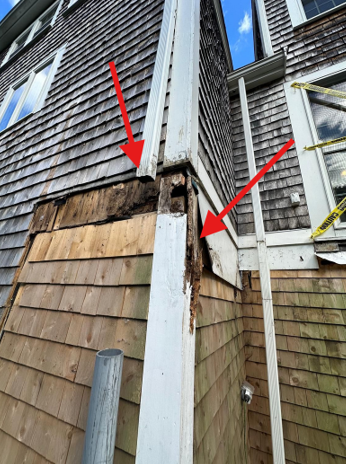
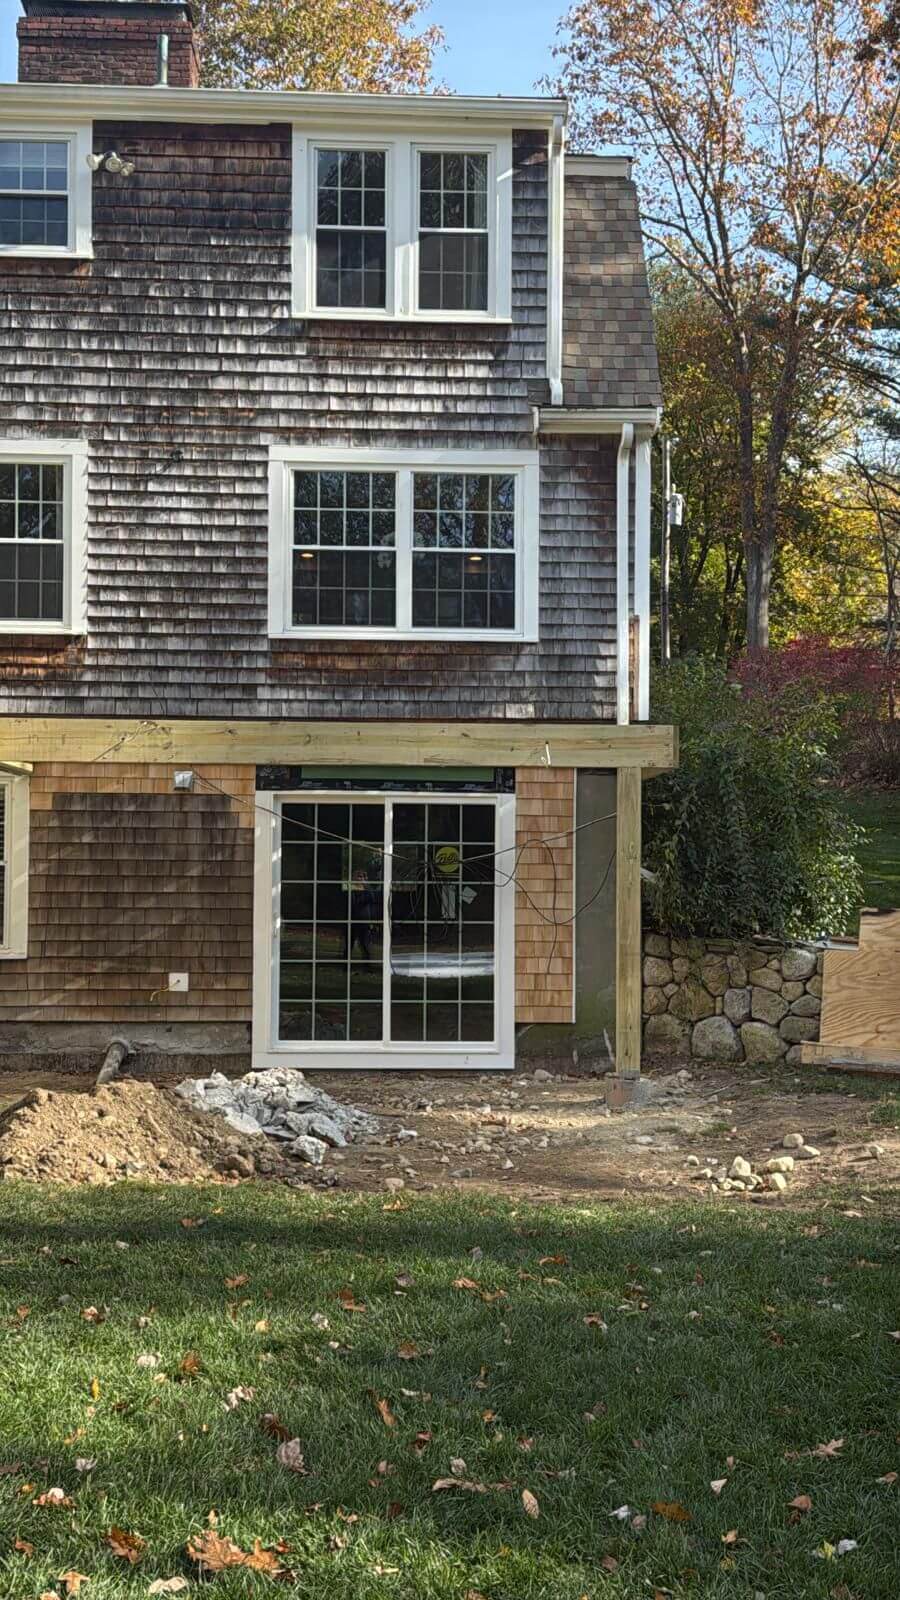
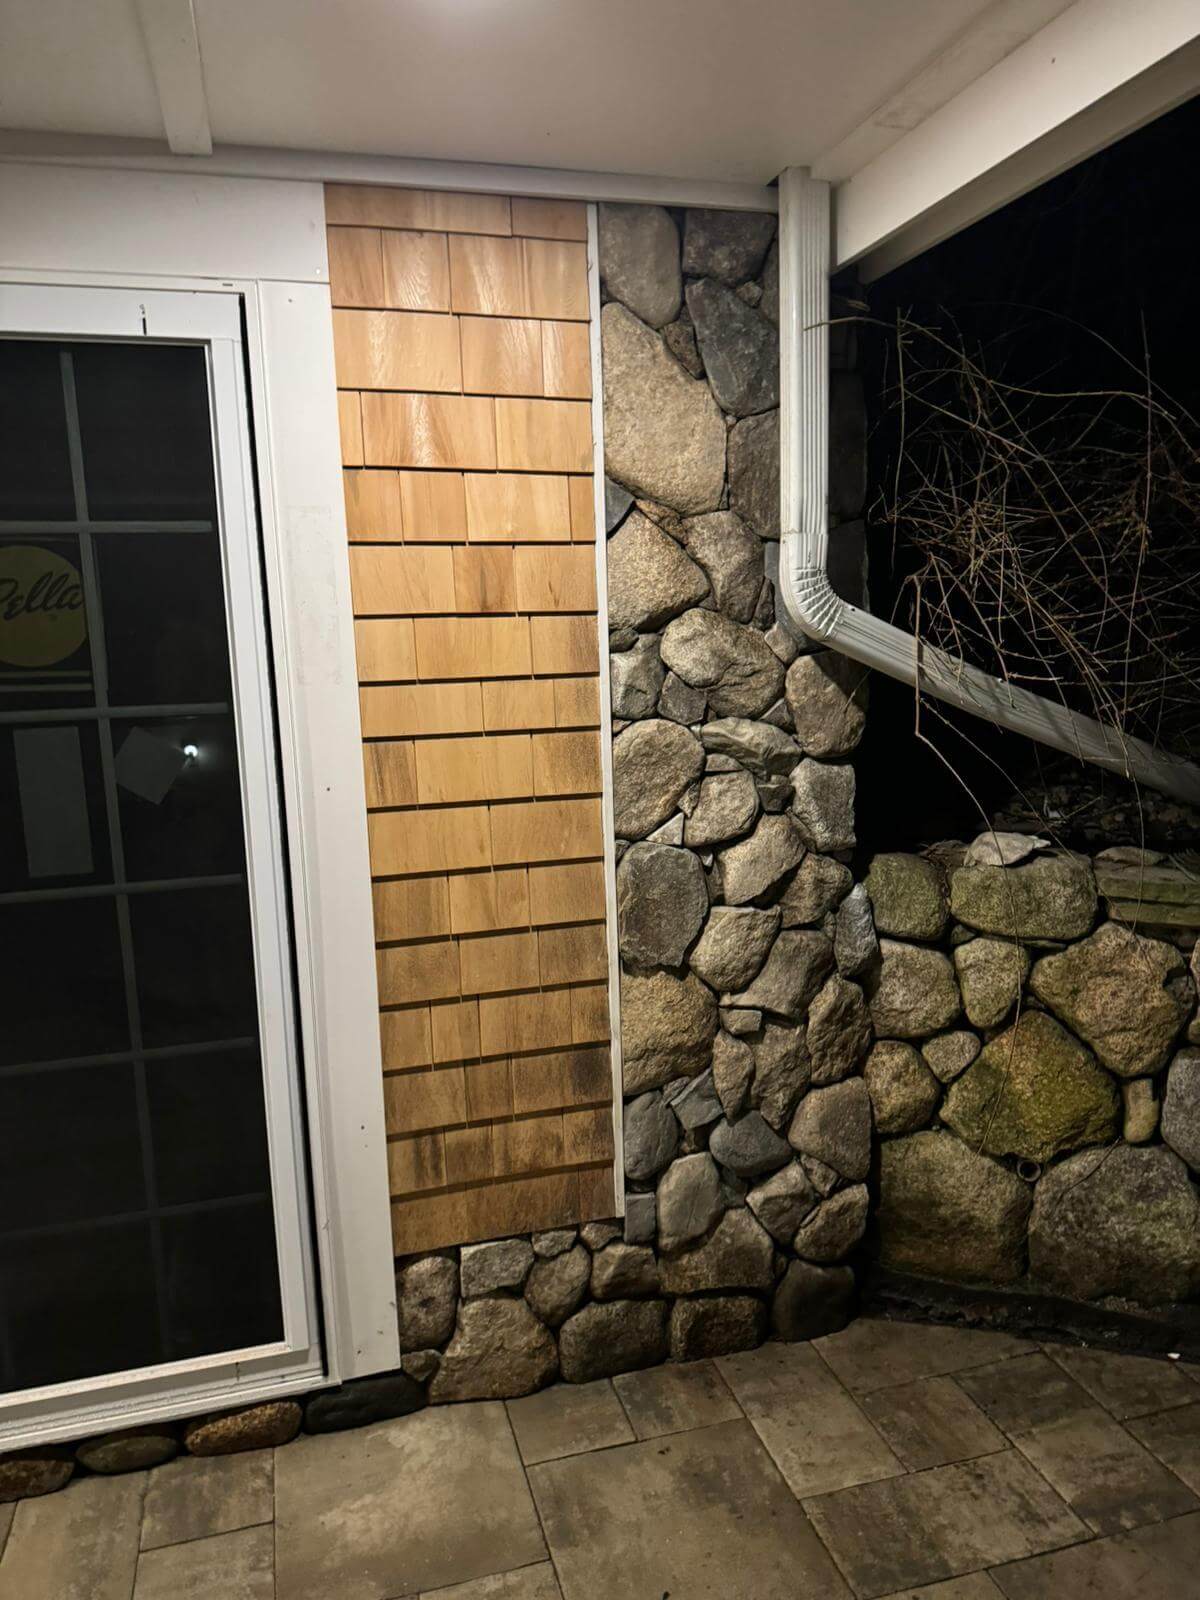
Another issue we encountered during framing was a couple of rotten studs. This meant we had to remove a small section of siding to ensure the structural ledger would be attached to solid framing. Any rotten wood in the way had to be replaced or reinforced with new studs before attaching the ledger. This process could potentially require replacing a small section of siding—or, in cases where rot is present along the entire wall, it could mean a complete siding replacement on that wall.
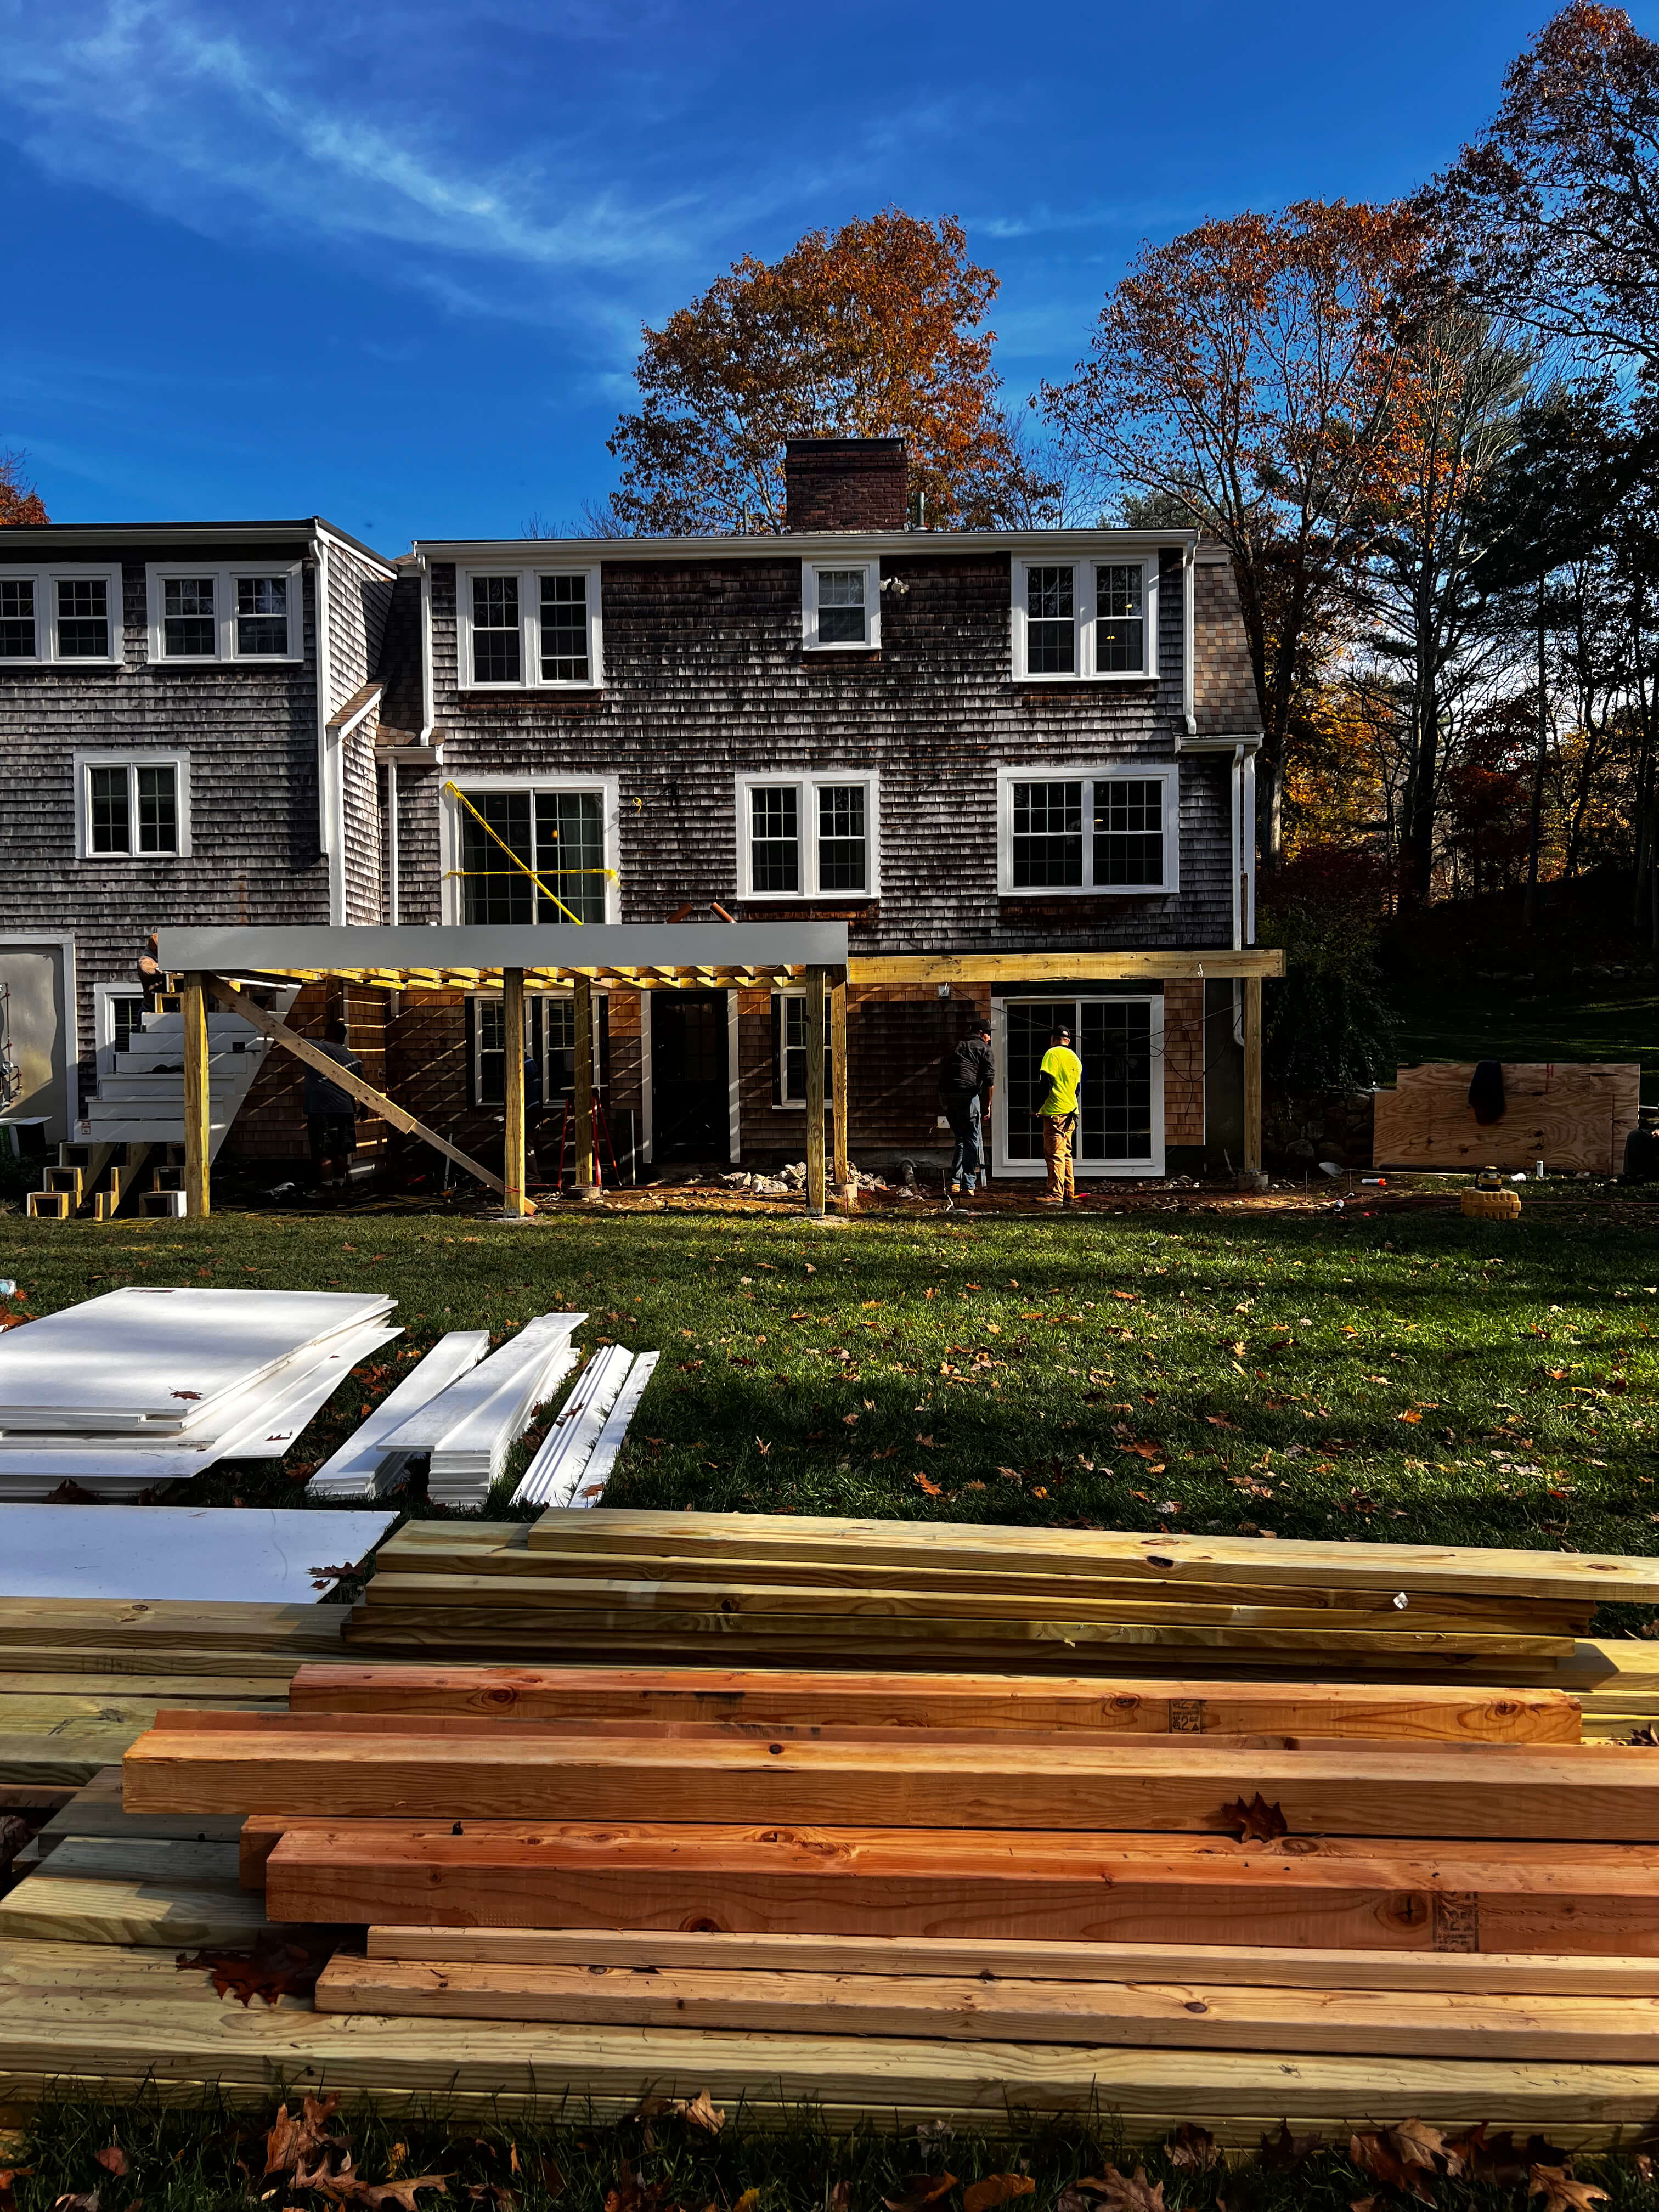
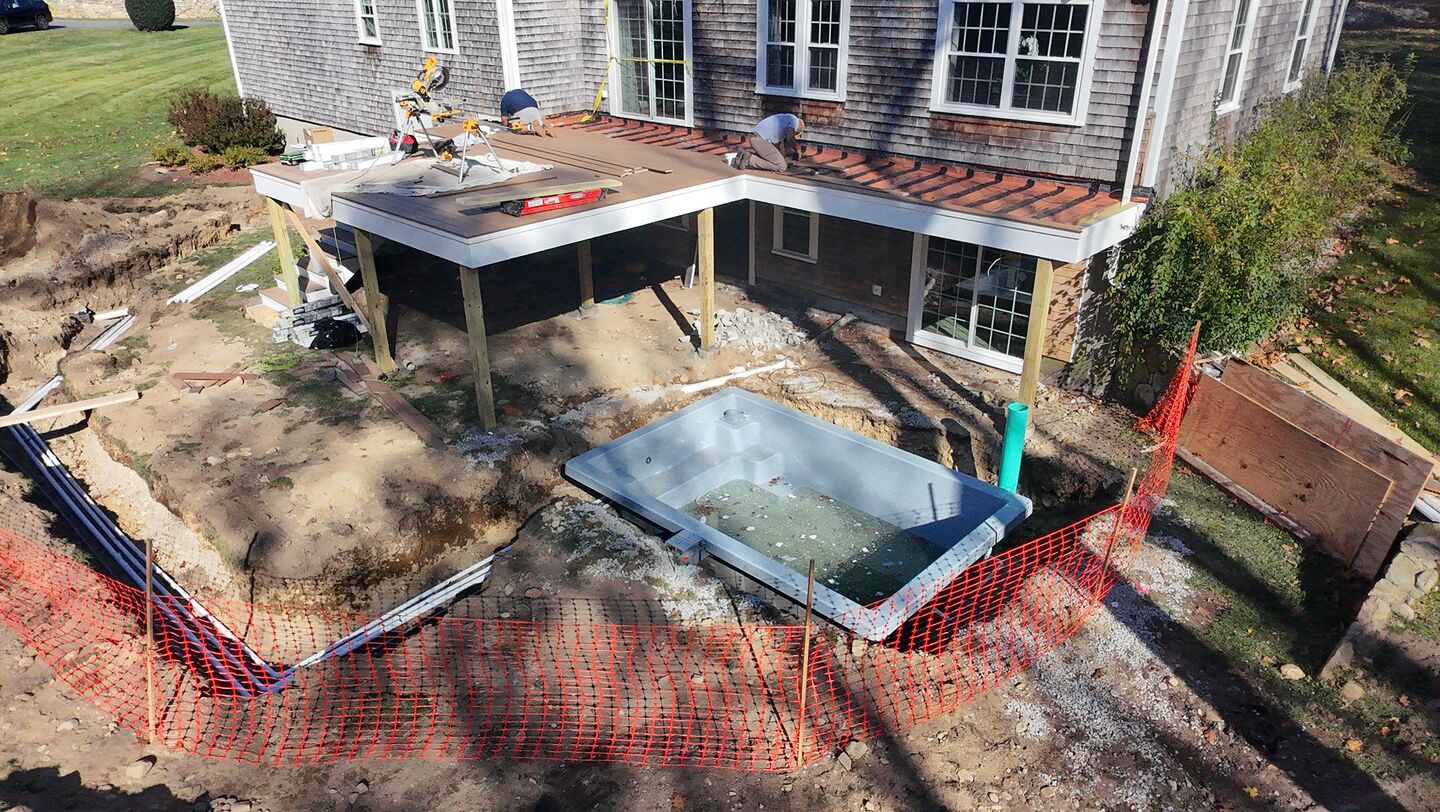
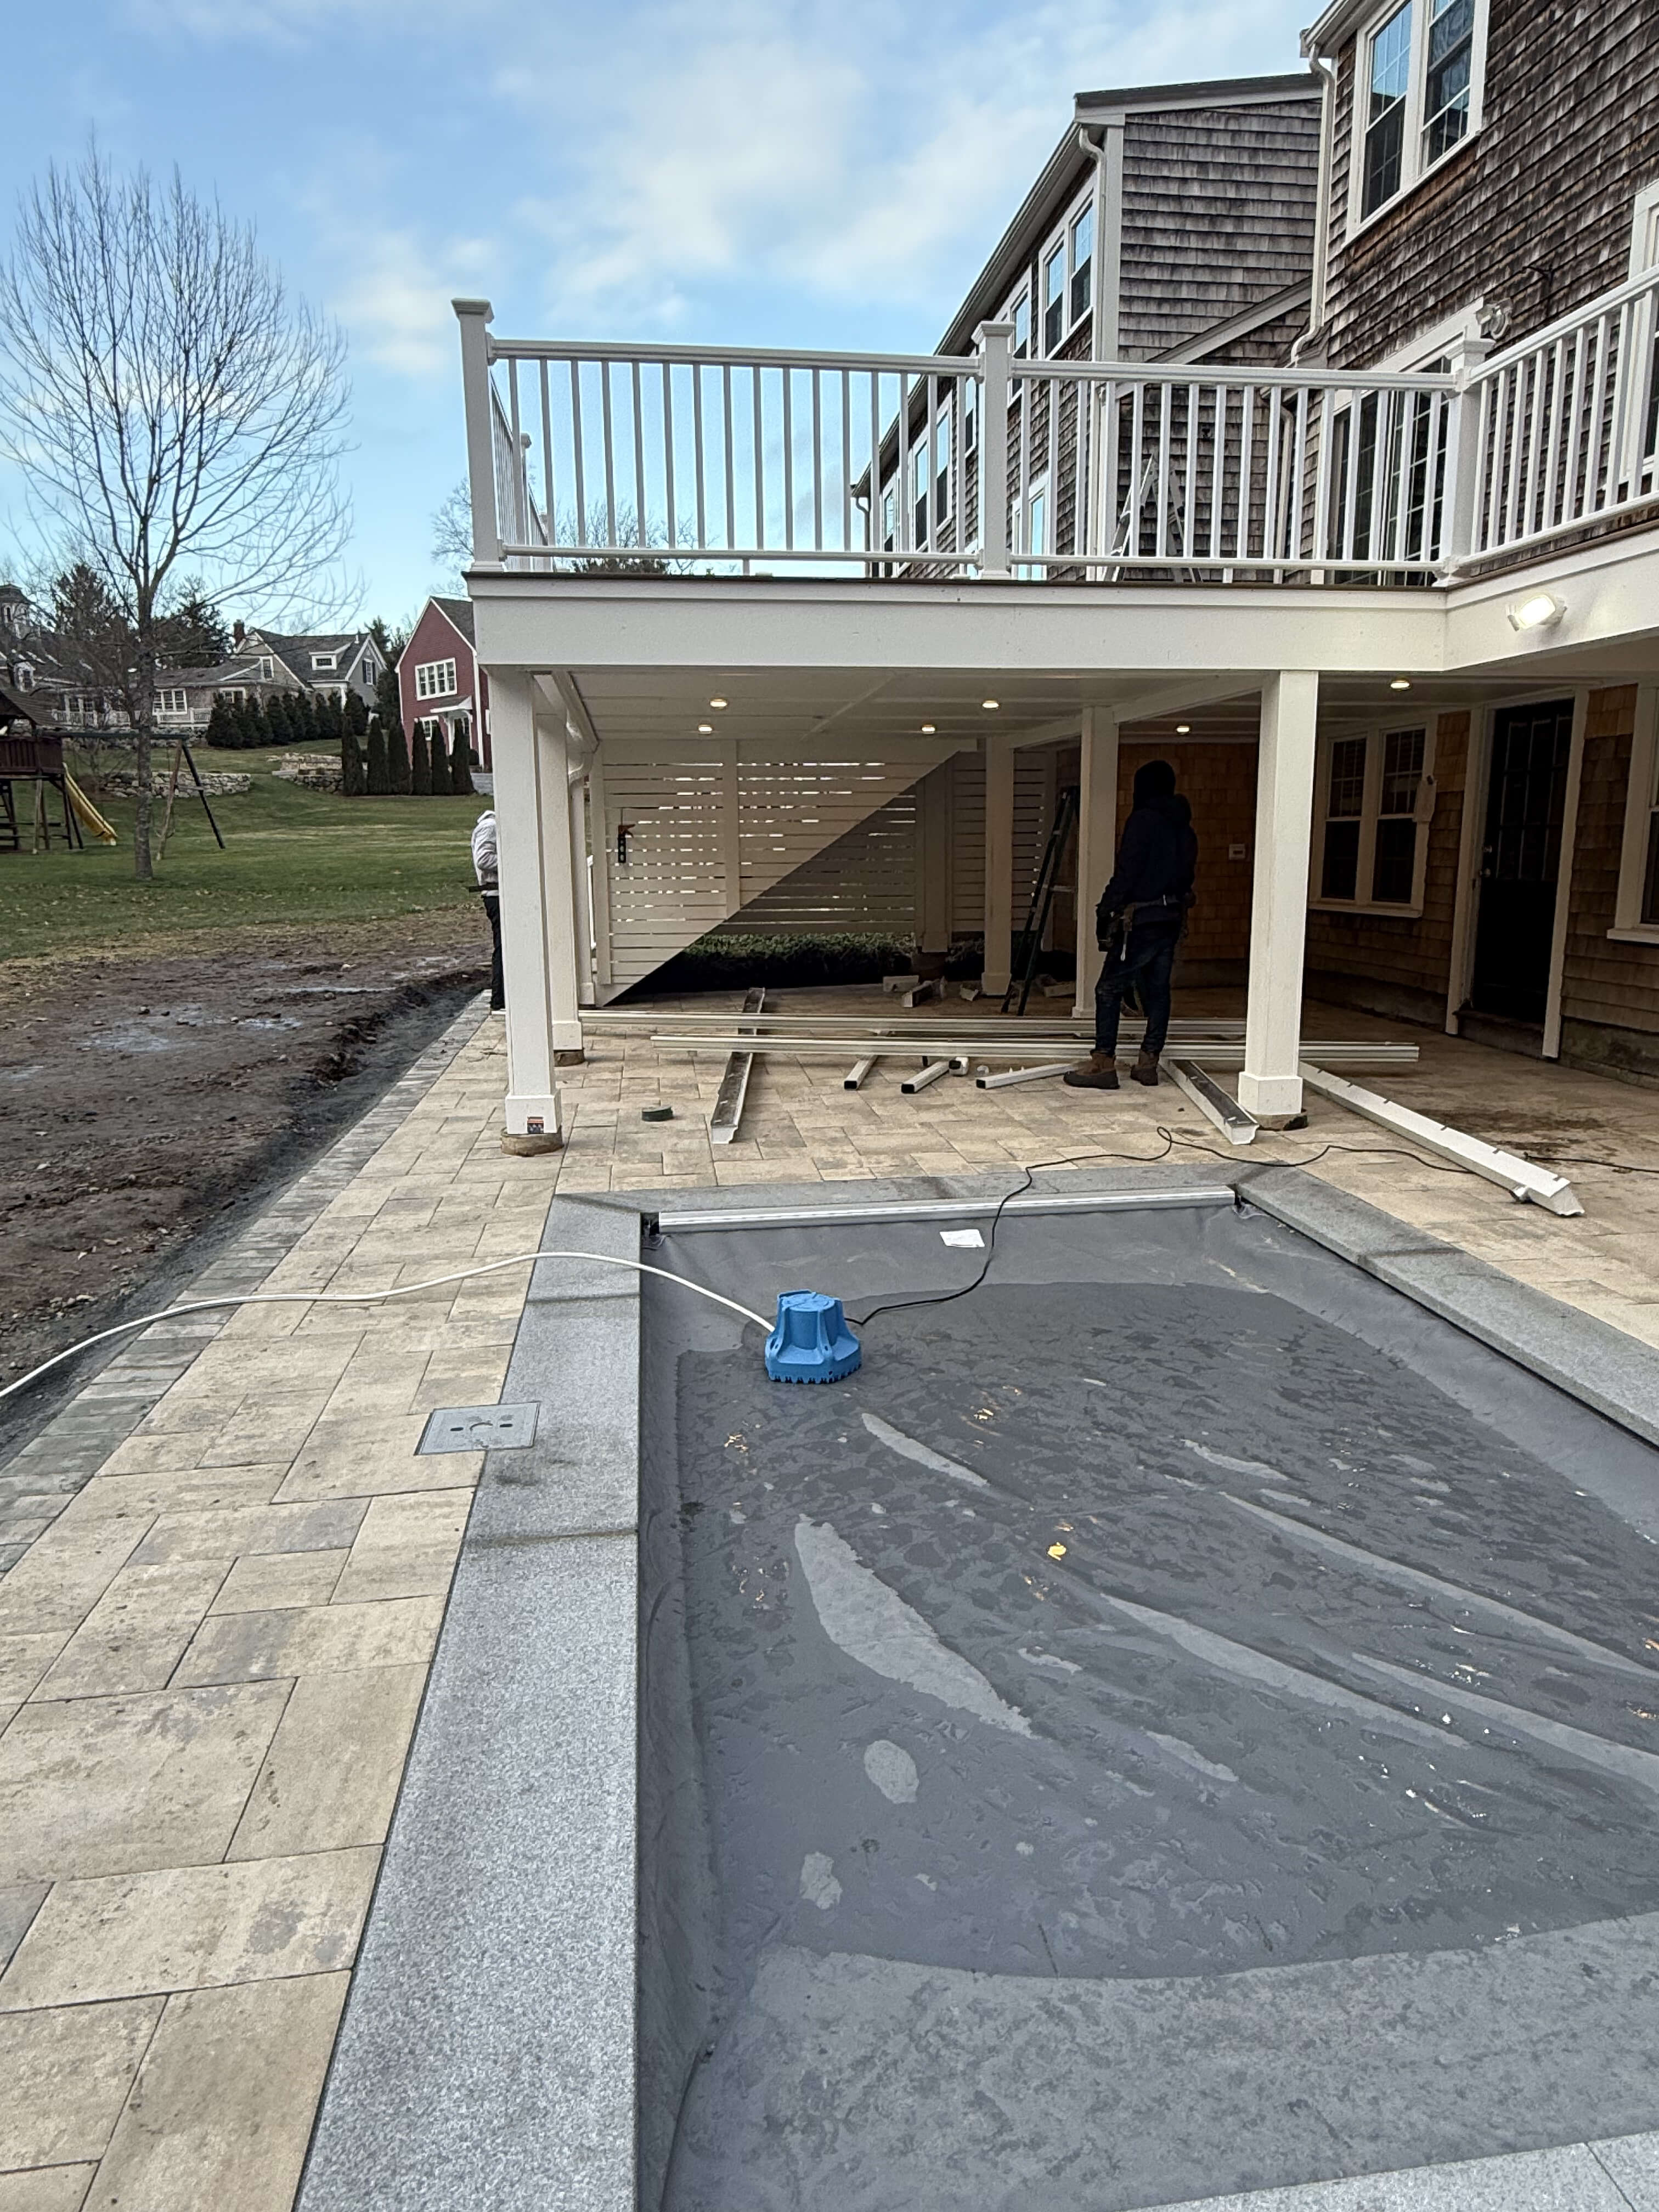
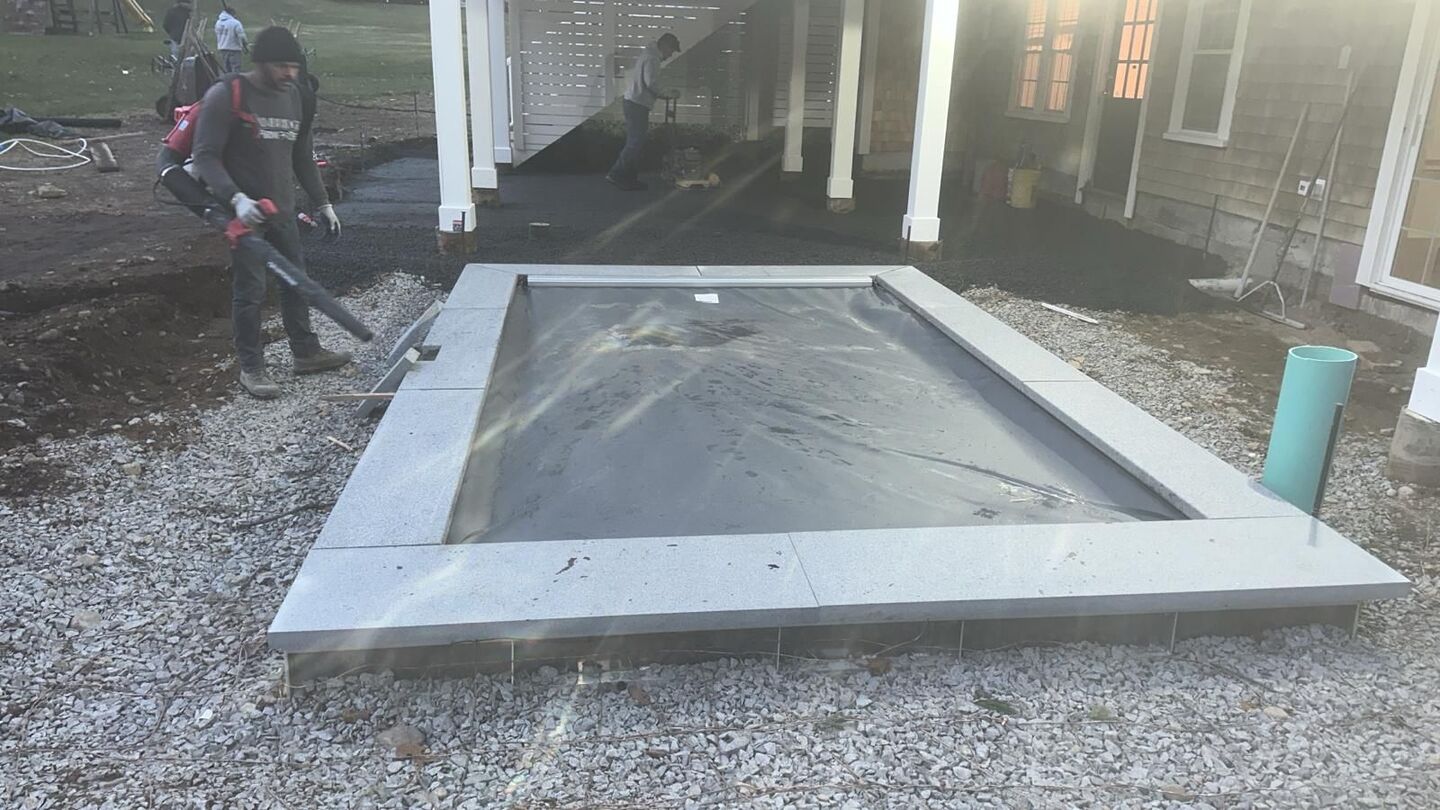
Phase 2: Raincape System and Pool Excavation
After completing the framing, we scheduled the framing inspection, which passed without any changes. At the same time, the pool company had their pool permit issued and began the excavation process. It was a large-scale excavation, but as planned, our crew continued working on top of the deck, installing the Trex RainEscape system to provide drainage for the under-deck area. This system is especially recommended when planning to install lights under the deck and to keep the under-deck lounge dry on rainy days.
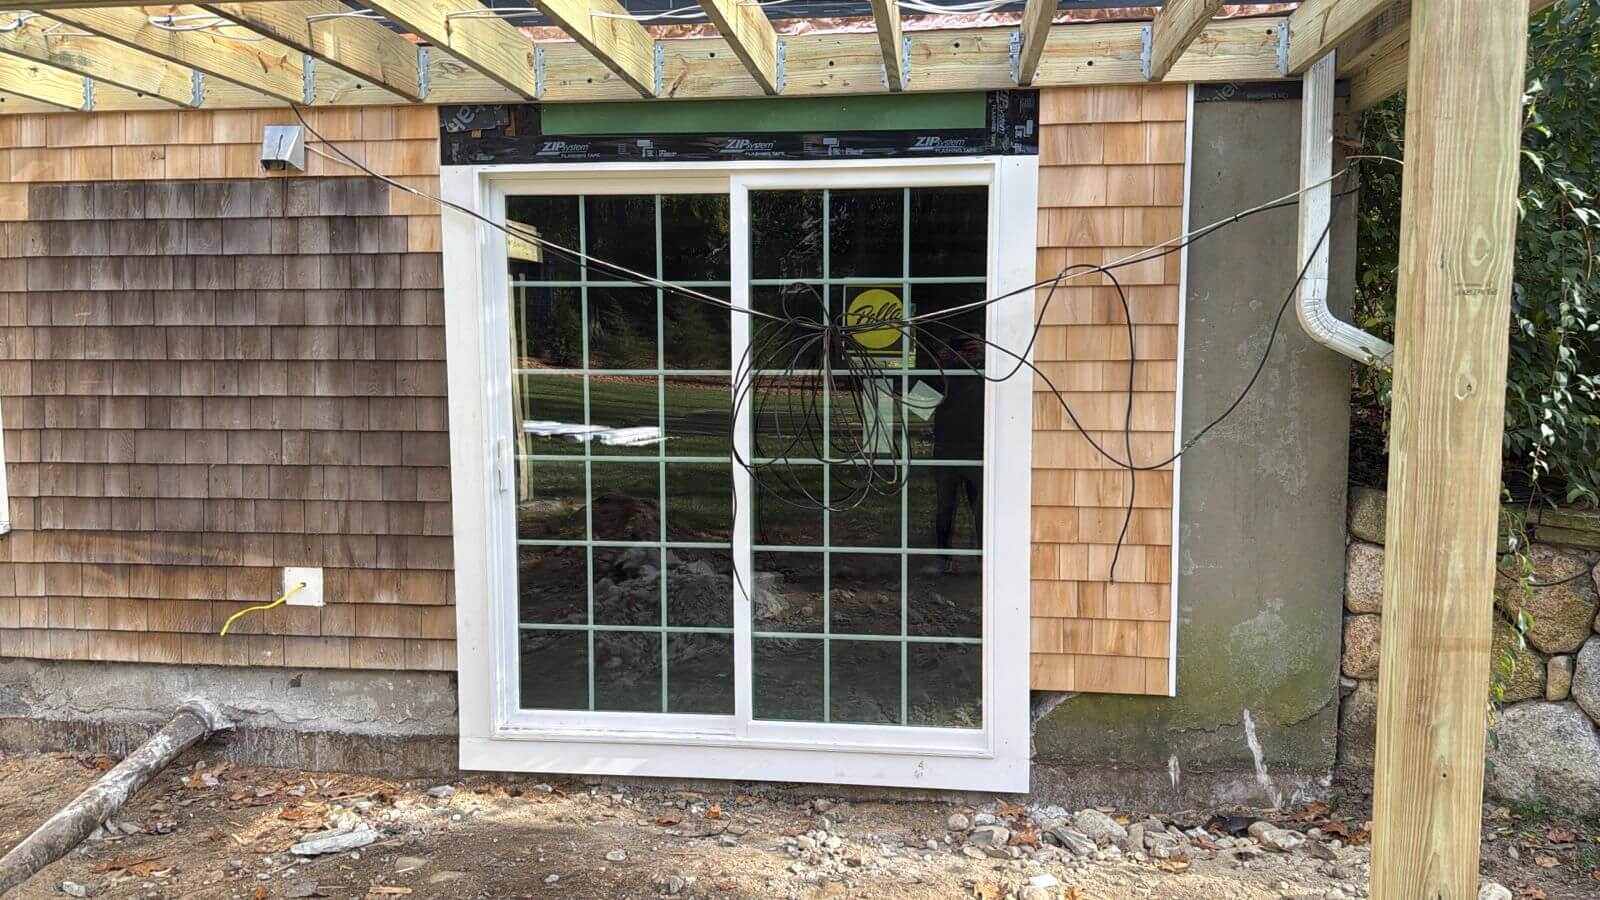
Phase 3: Deck Finishes and Under-Deck Sliding Door
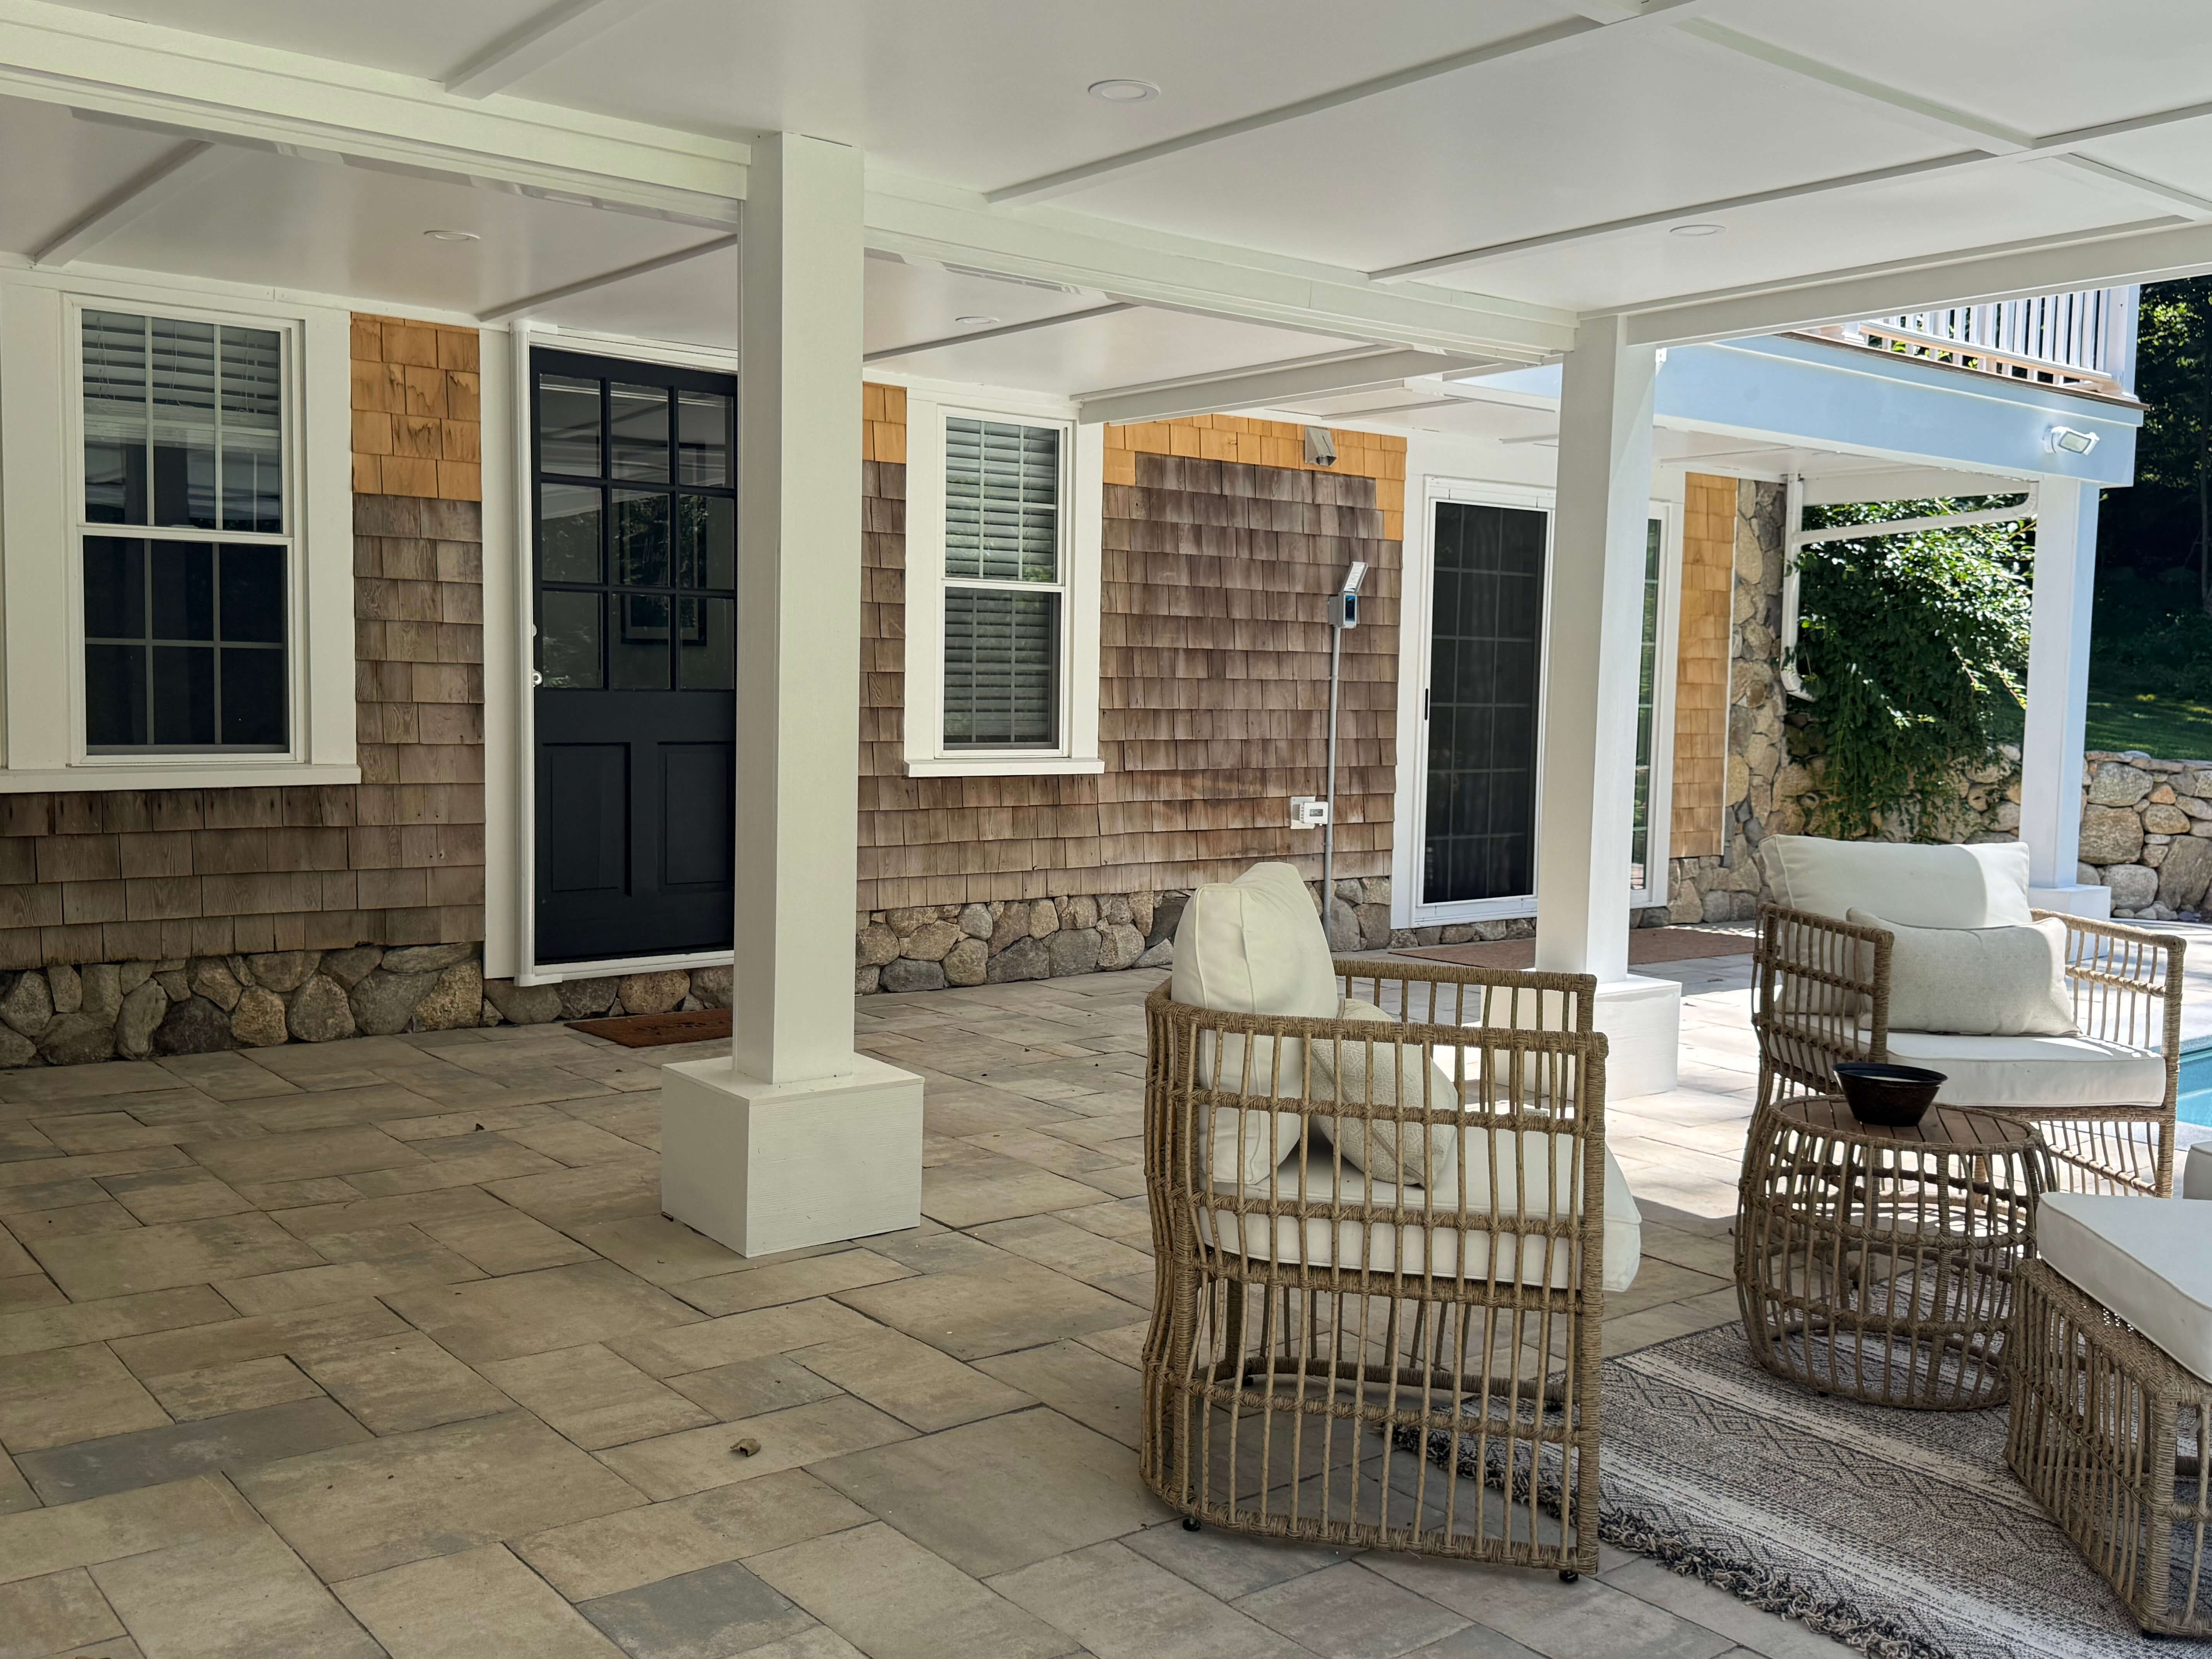
The client chose the beautiful TimberTech Antique Leather, a composite decking board that is both stylish and easy to work with. Because of the RainEscape system, we used clips to install the decking boards. For trims, we wrapped the fascias, posts, and soffit with Azek boards.
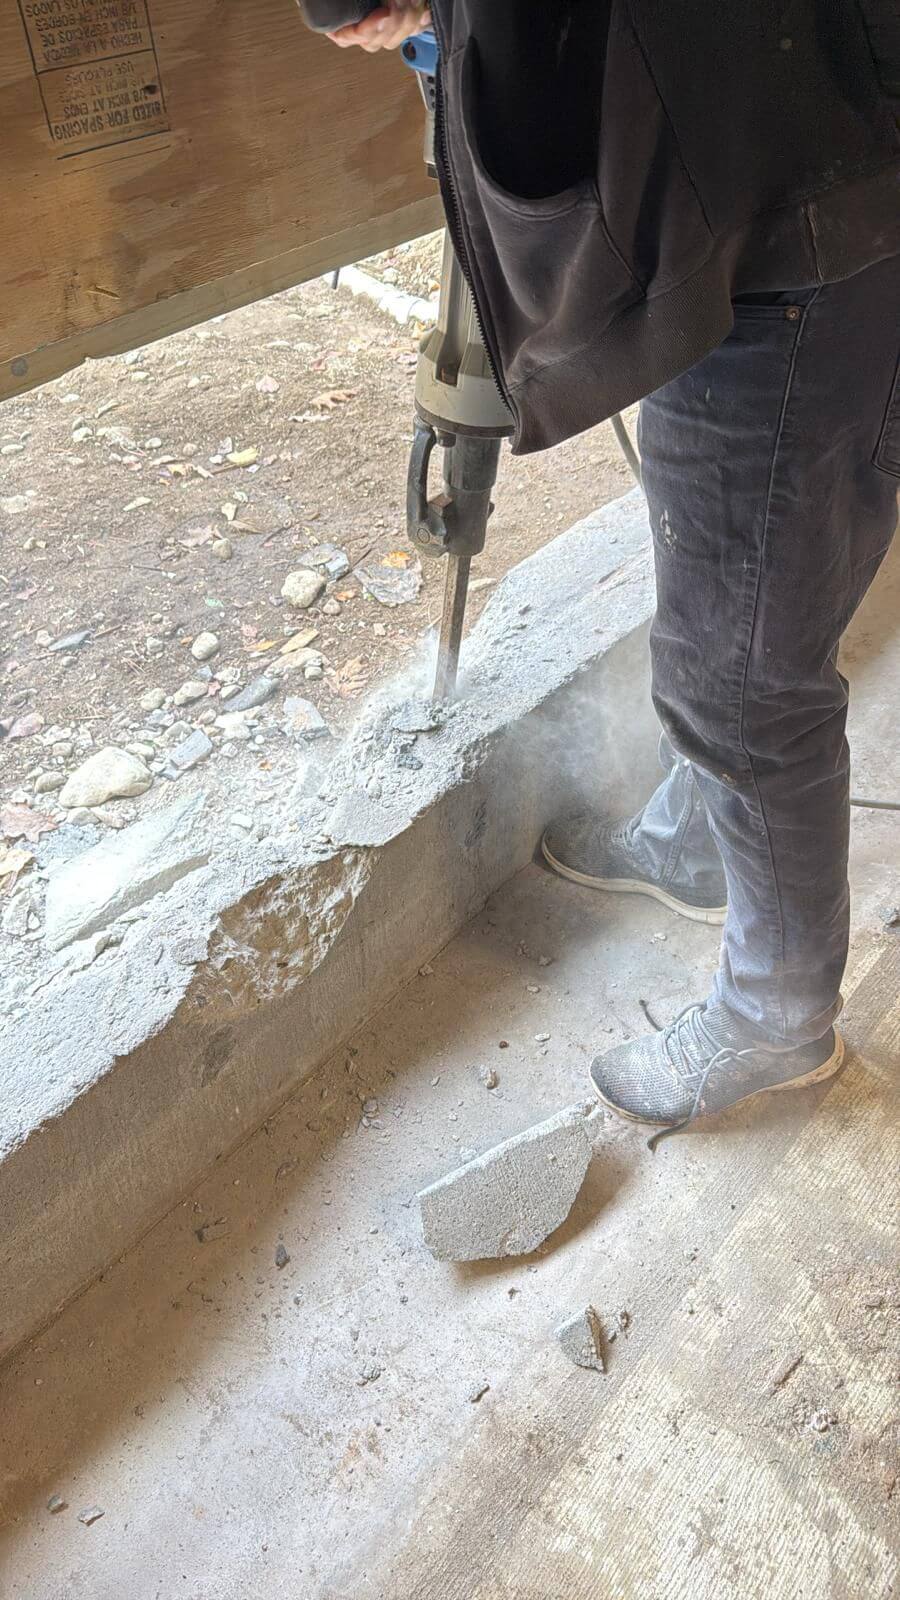
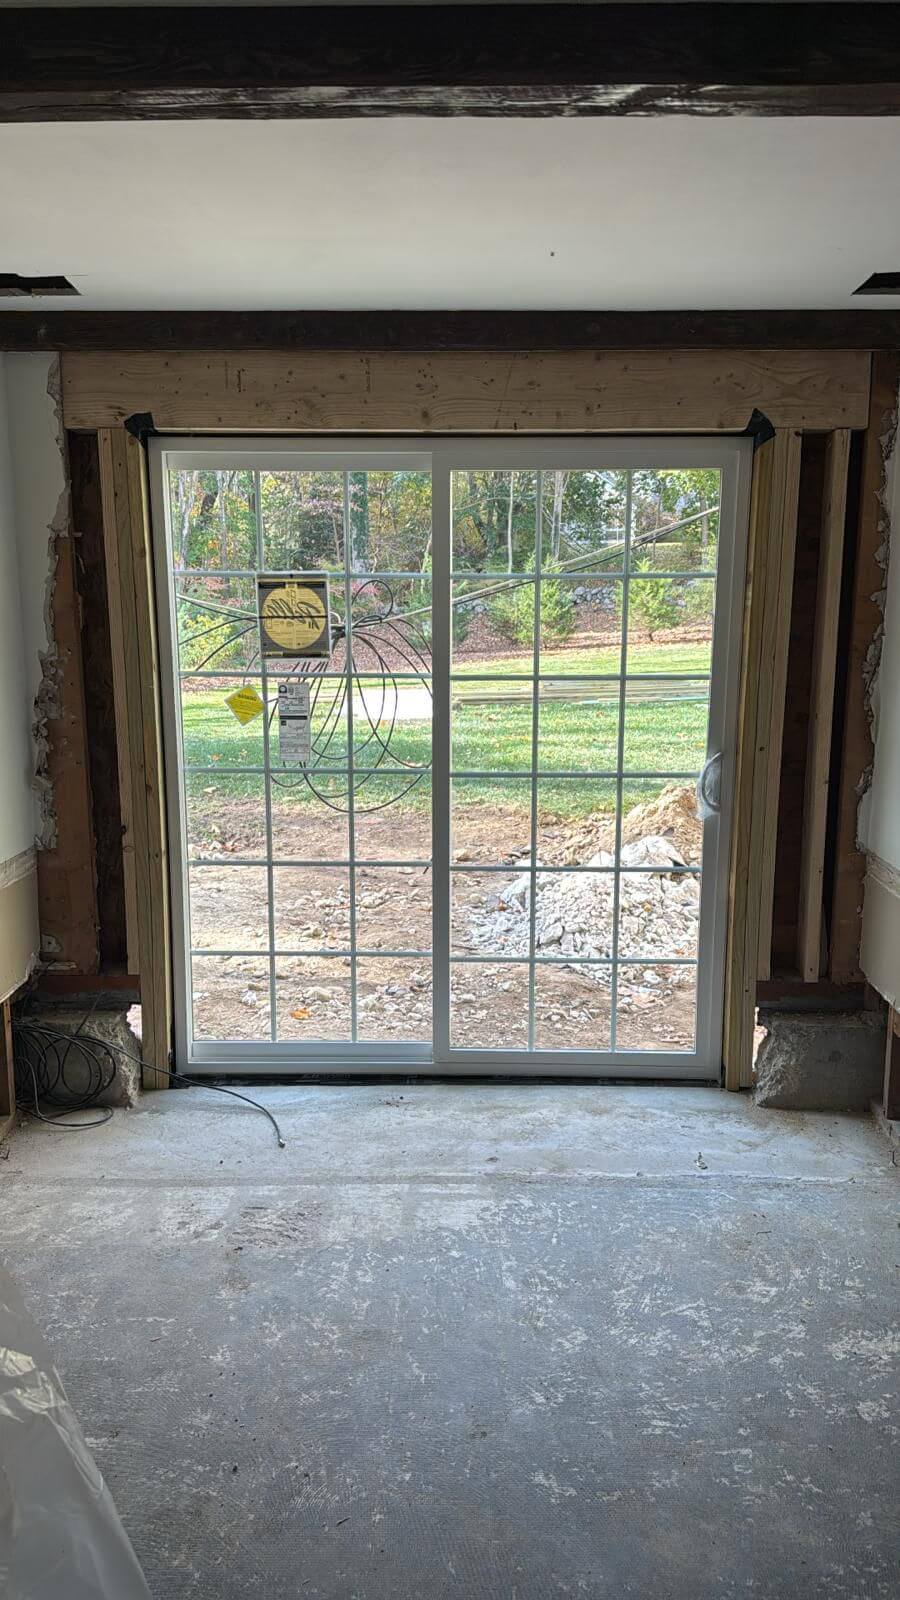
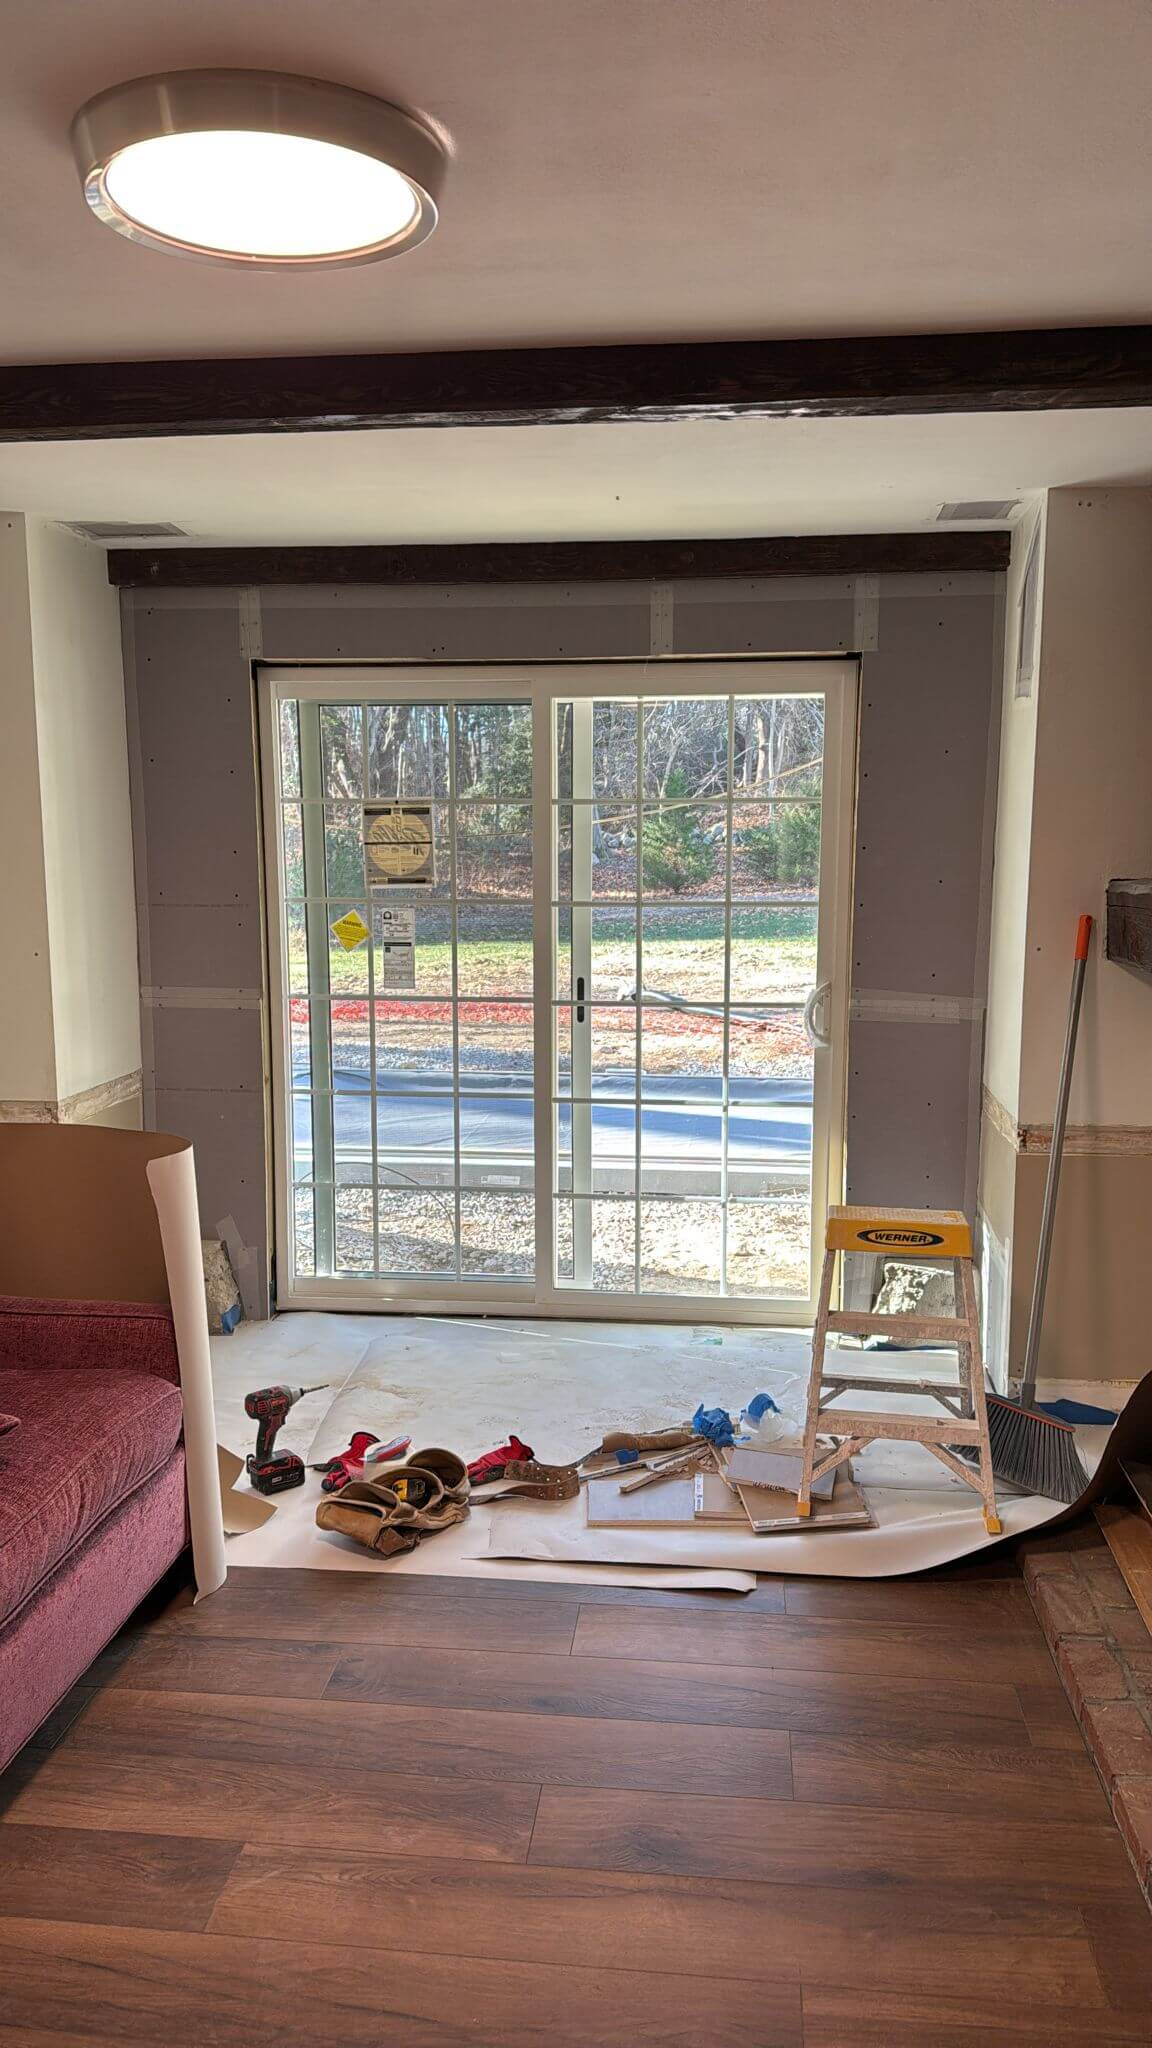
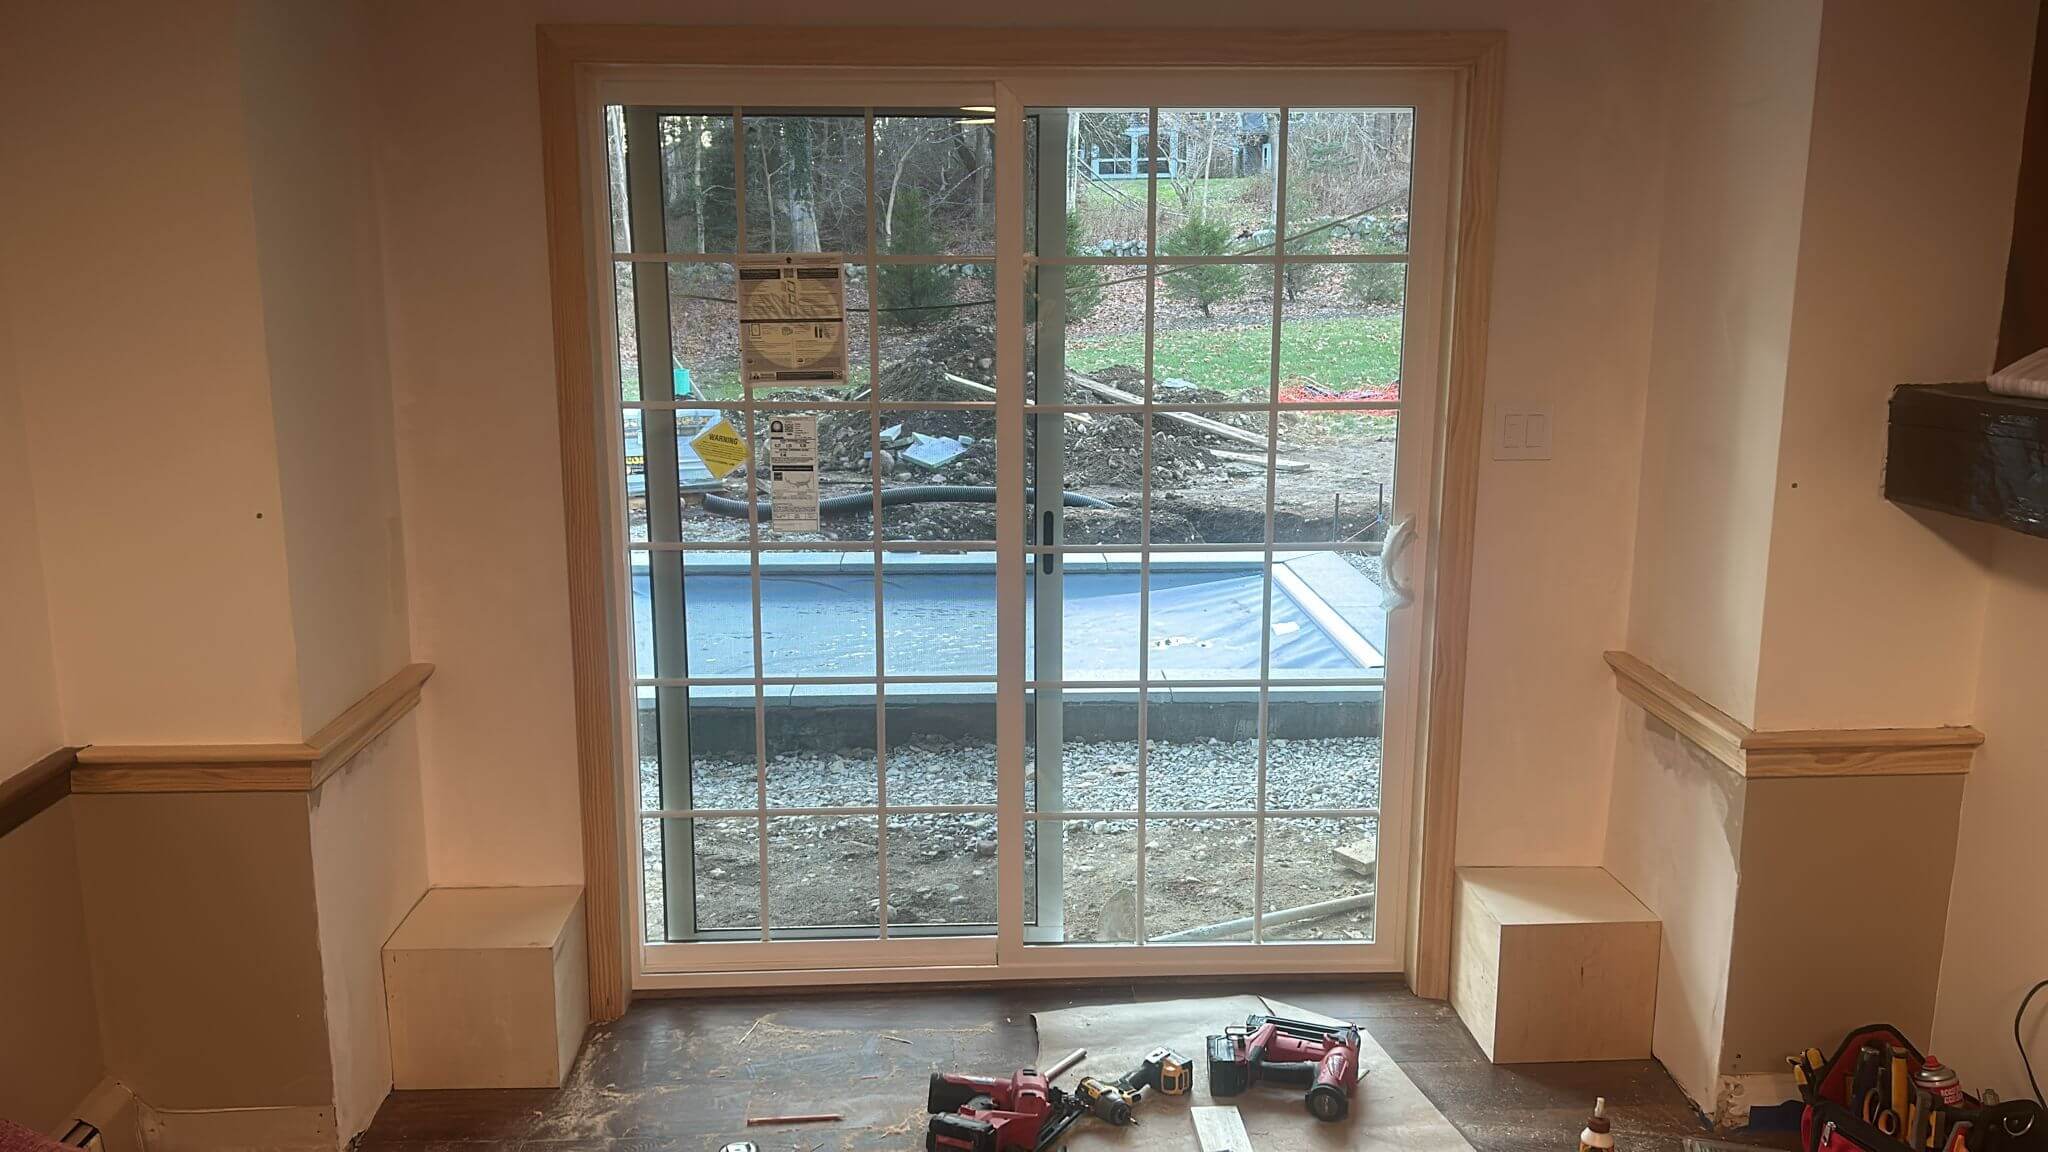
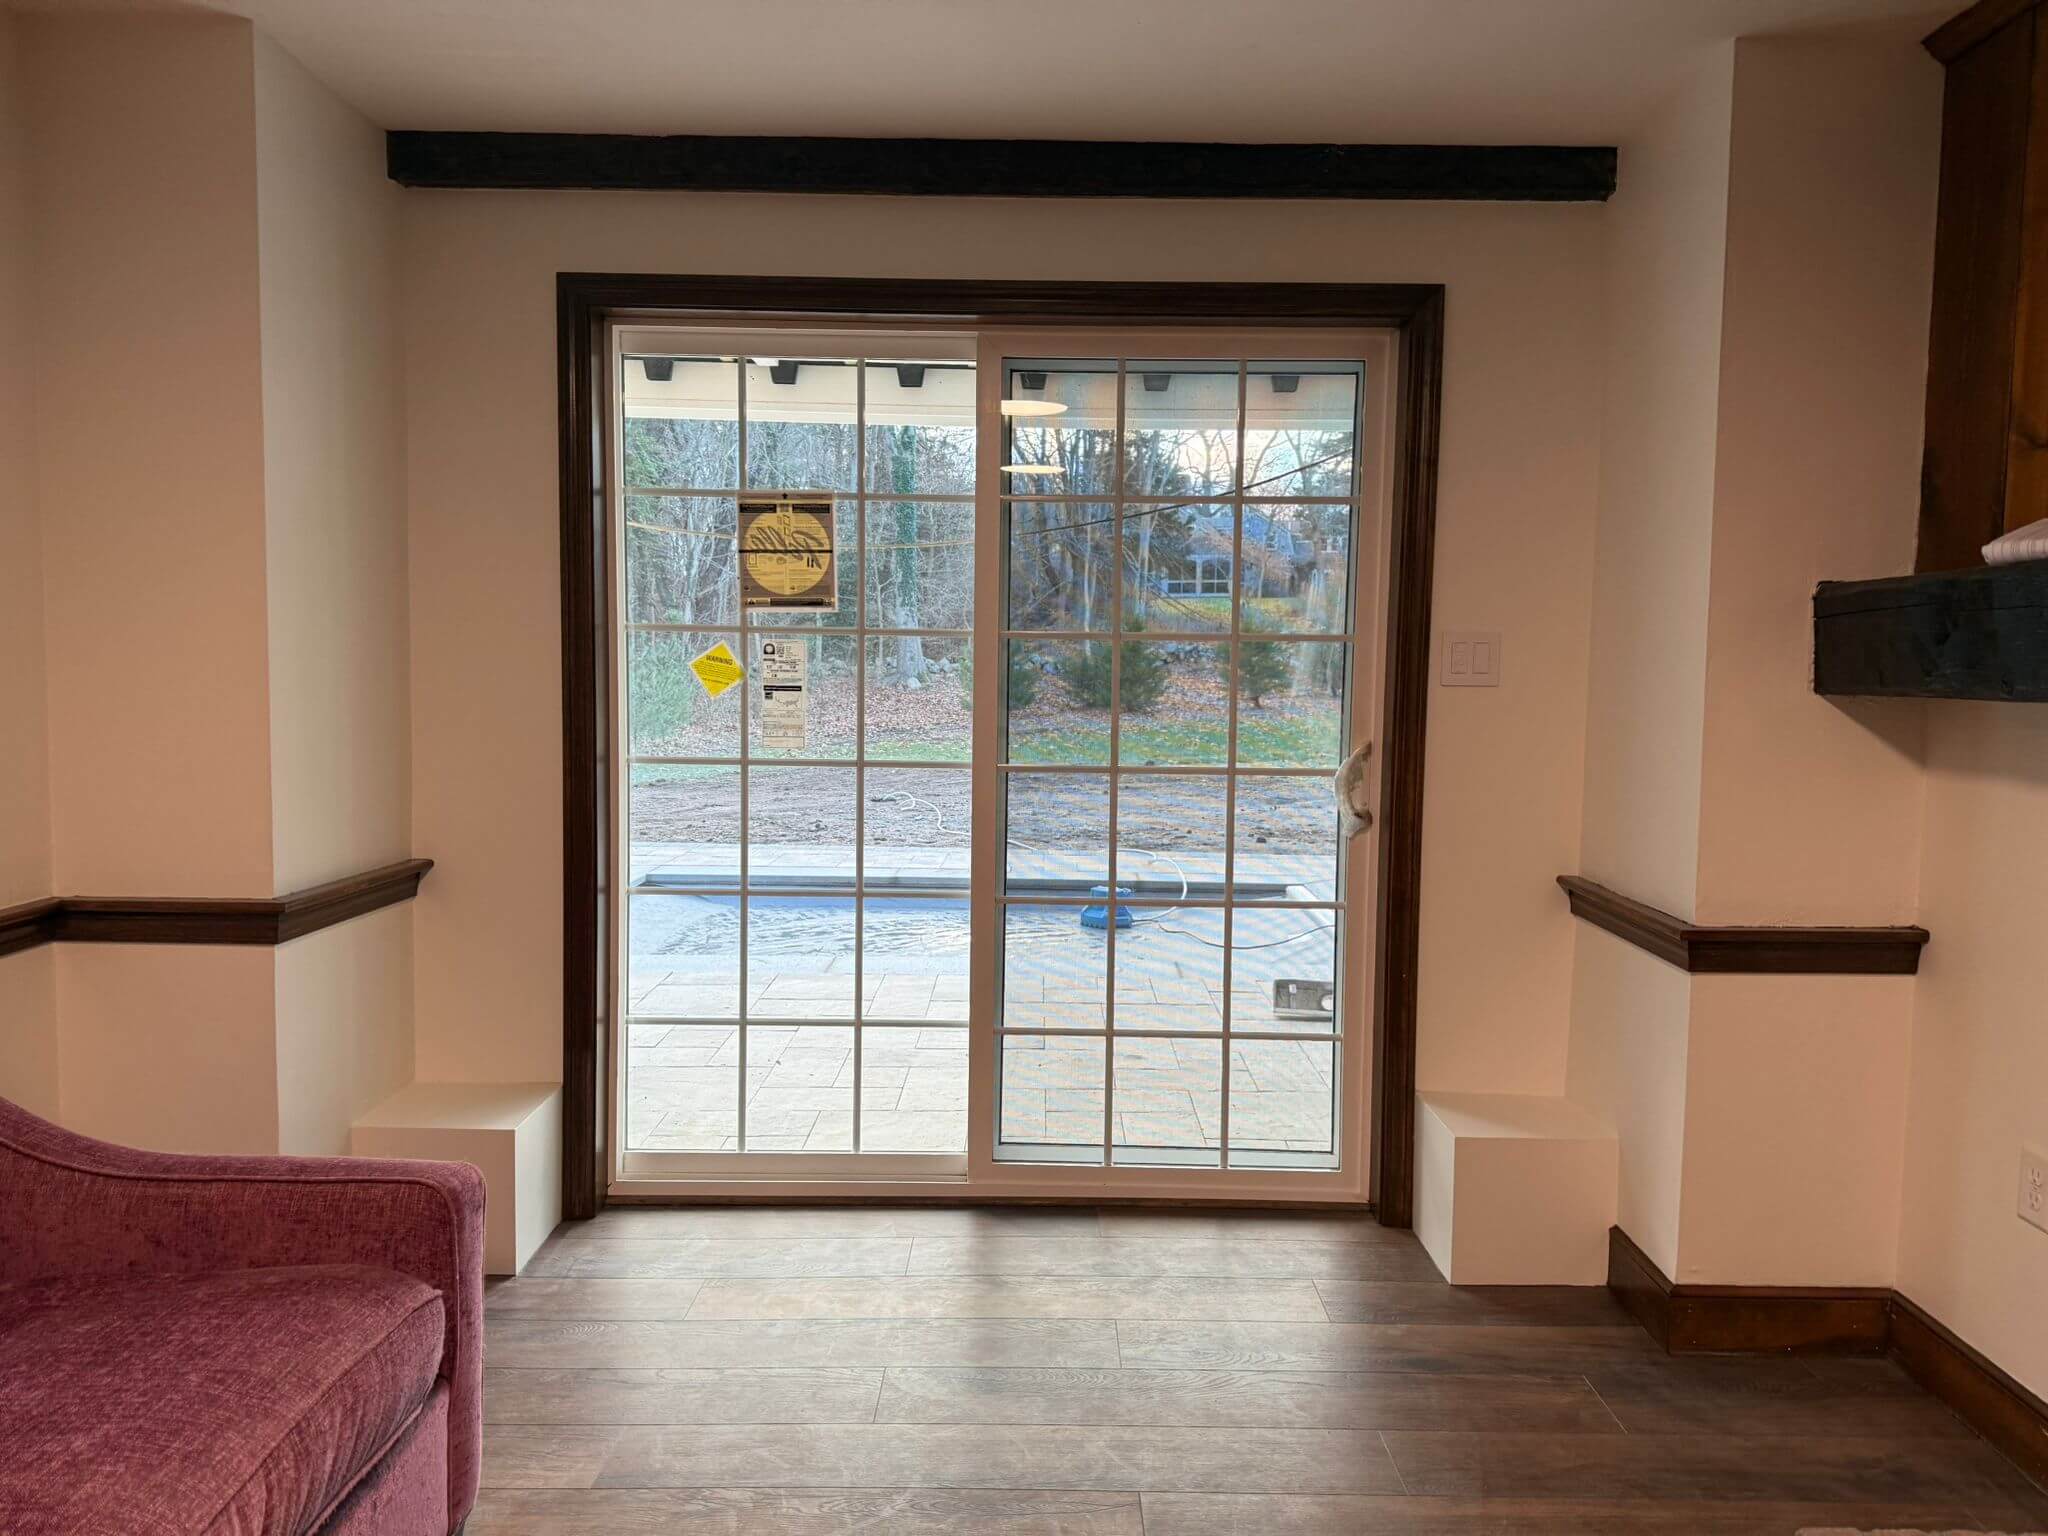
We also installed a Pella sliding door, which required cutting a small section of the foundation to fit the opening, then framing a proper structure and finishing the door wall.
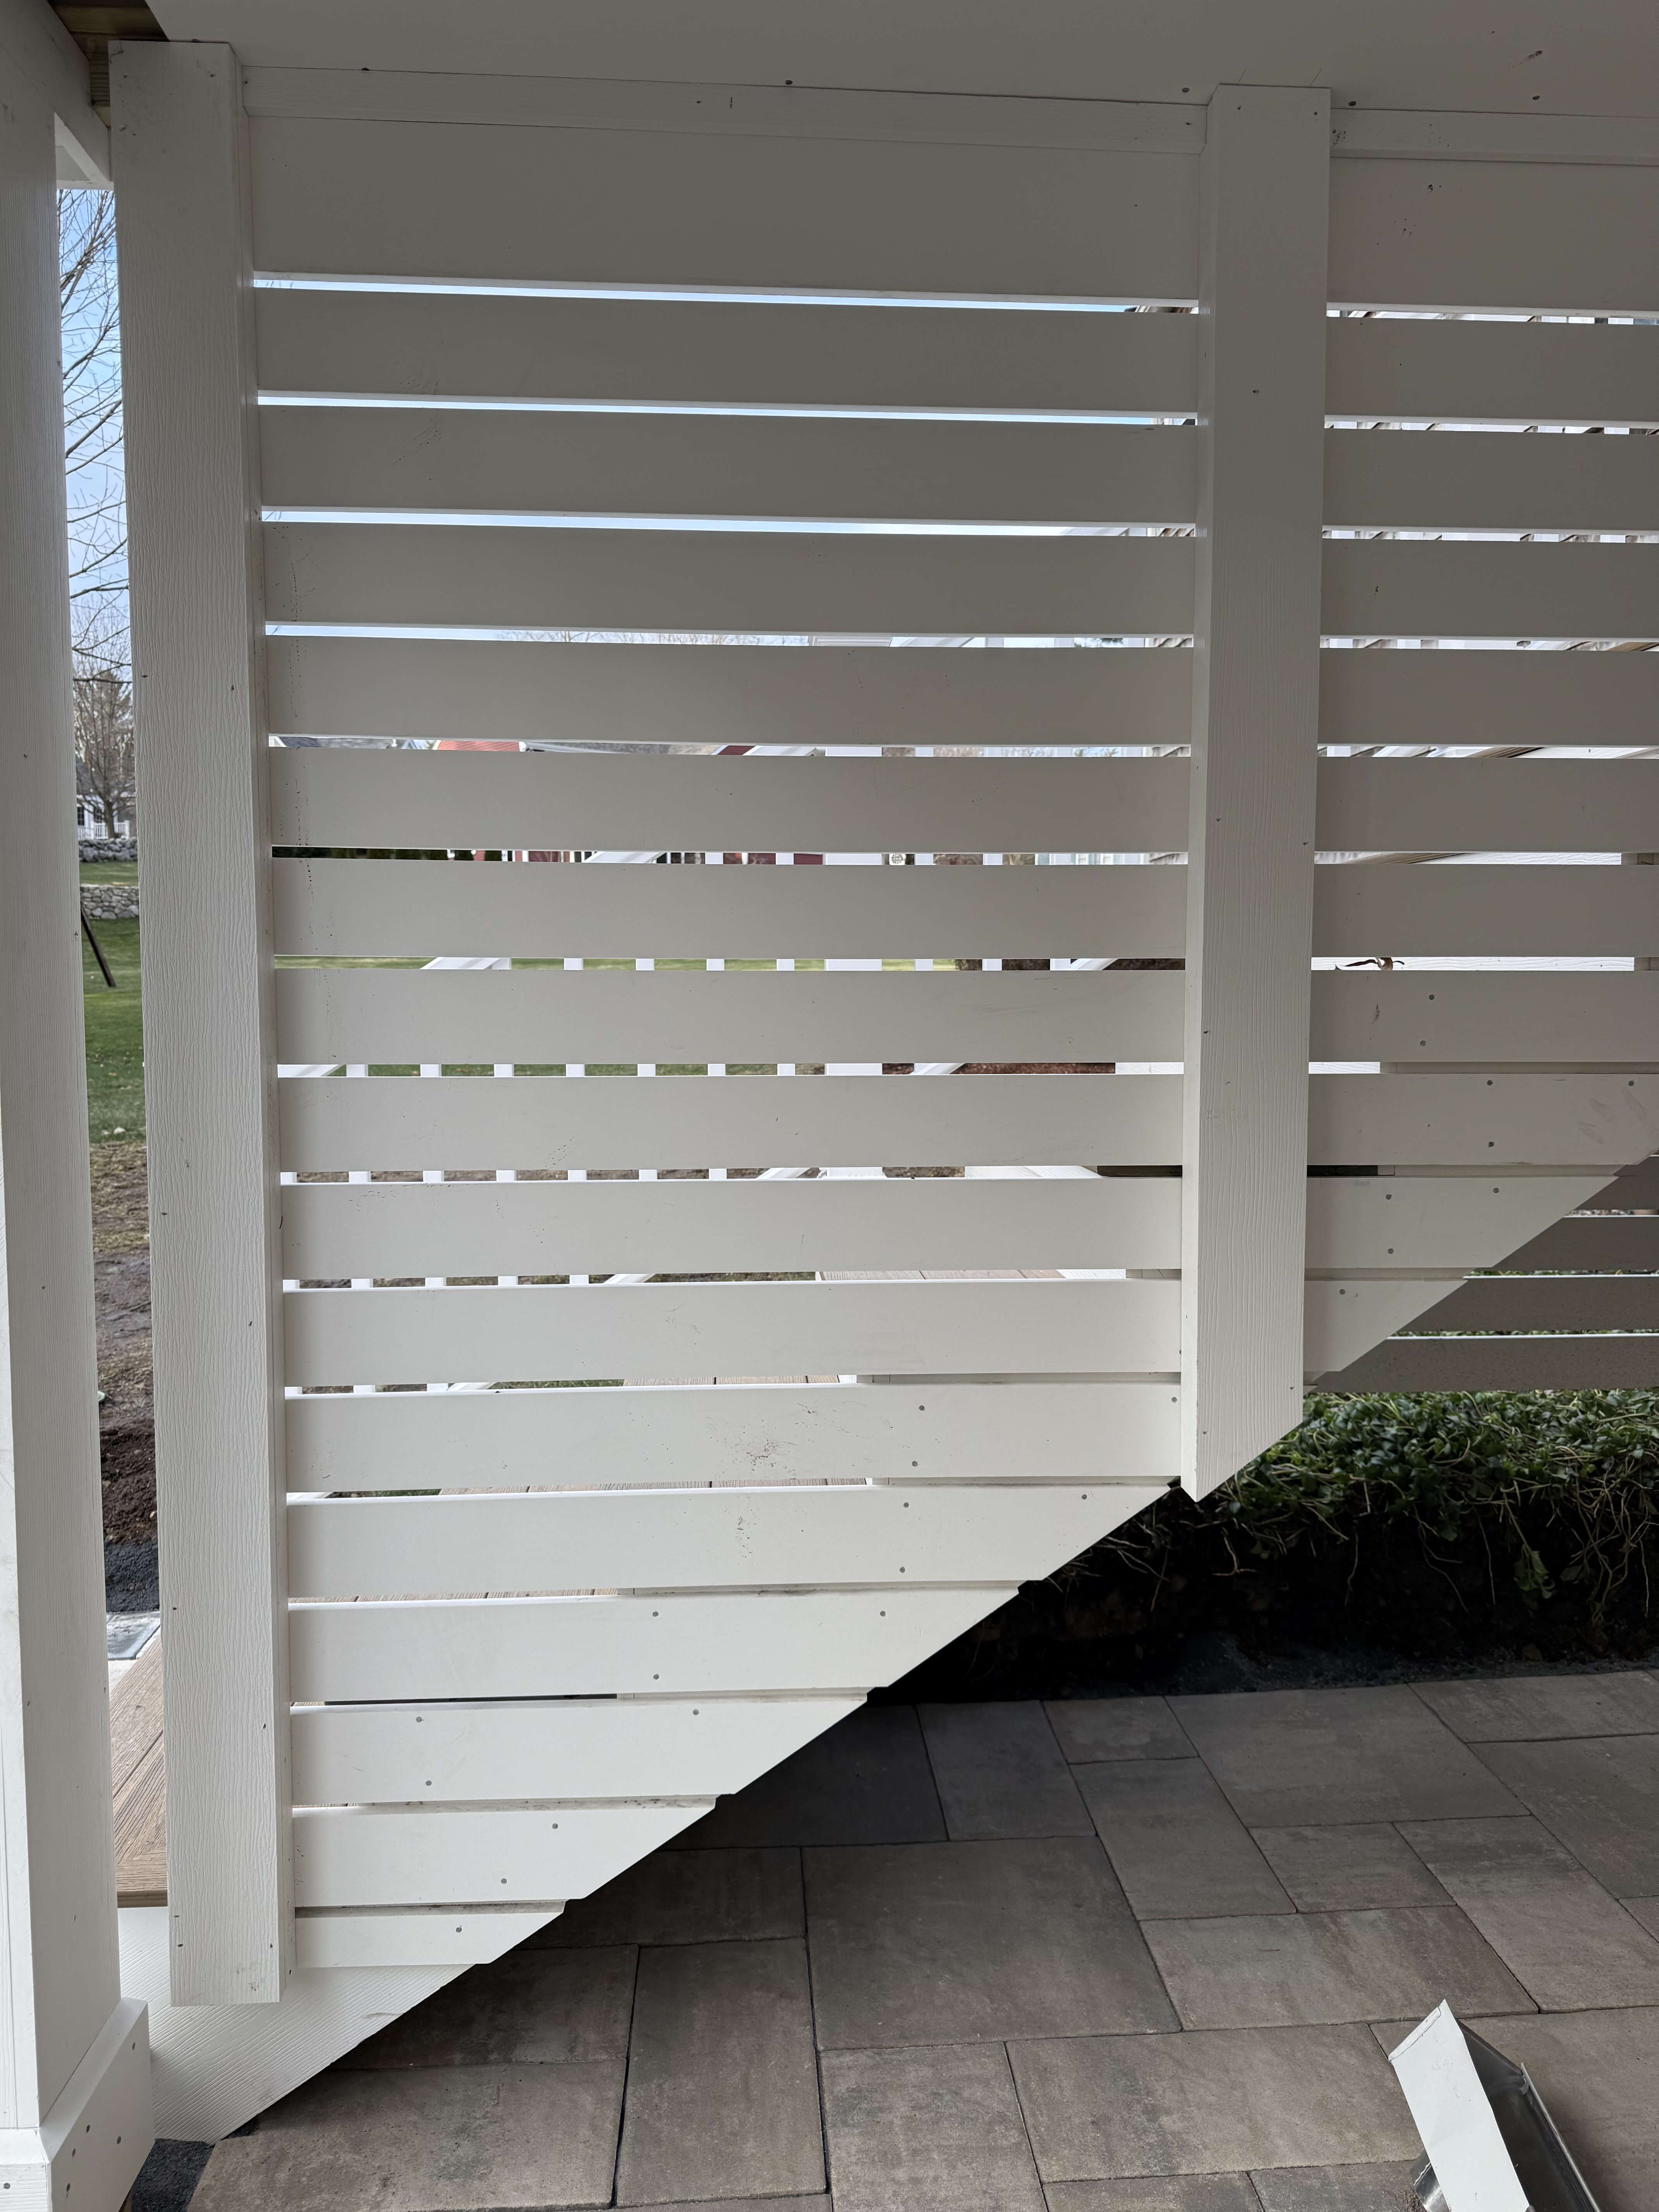
For the railings, we used RDI Finyl Line vinyl railings with metal posts as the base for the sleeves and added a flush triple detail along the frame’s border for a clean, finished look.
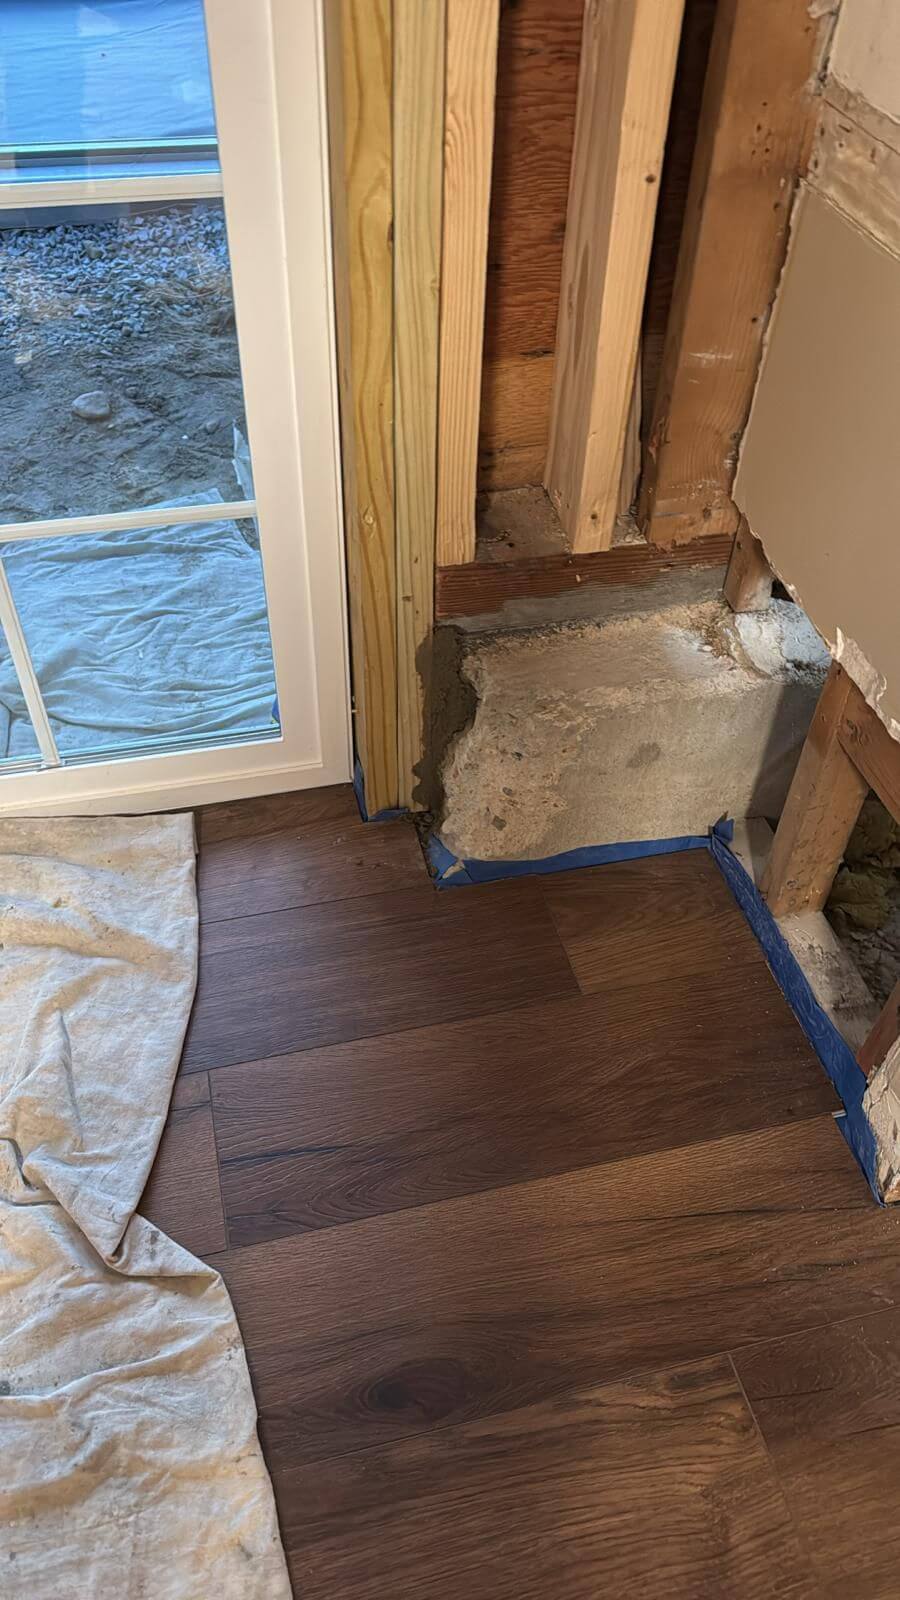
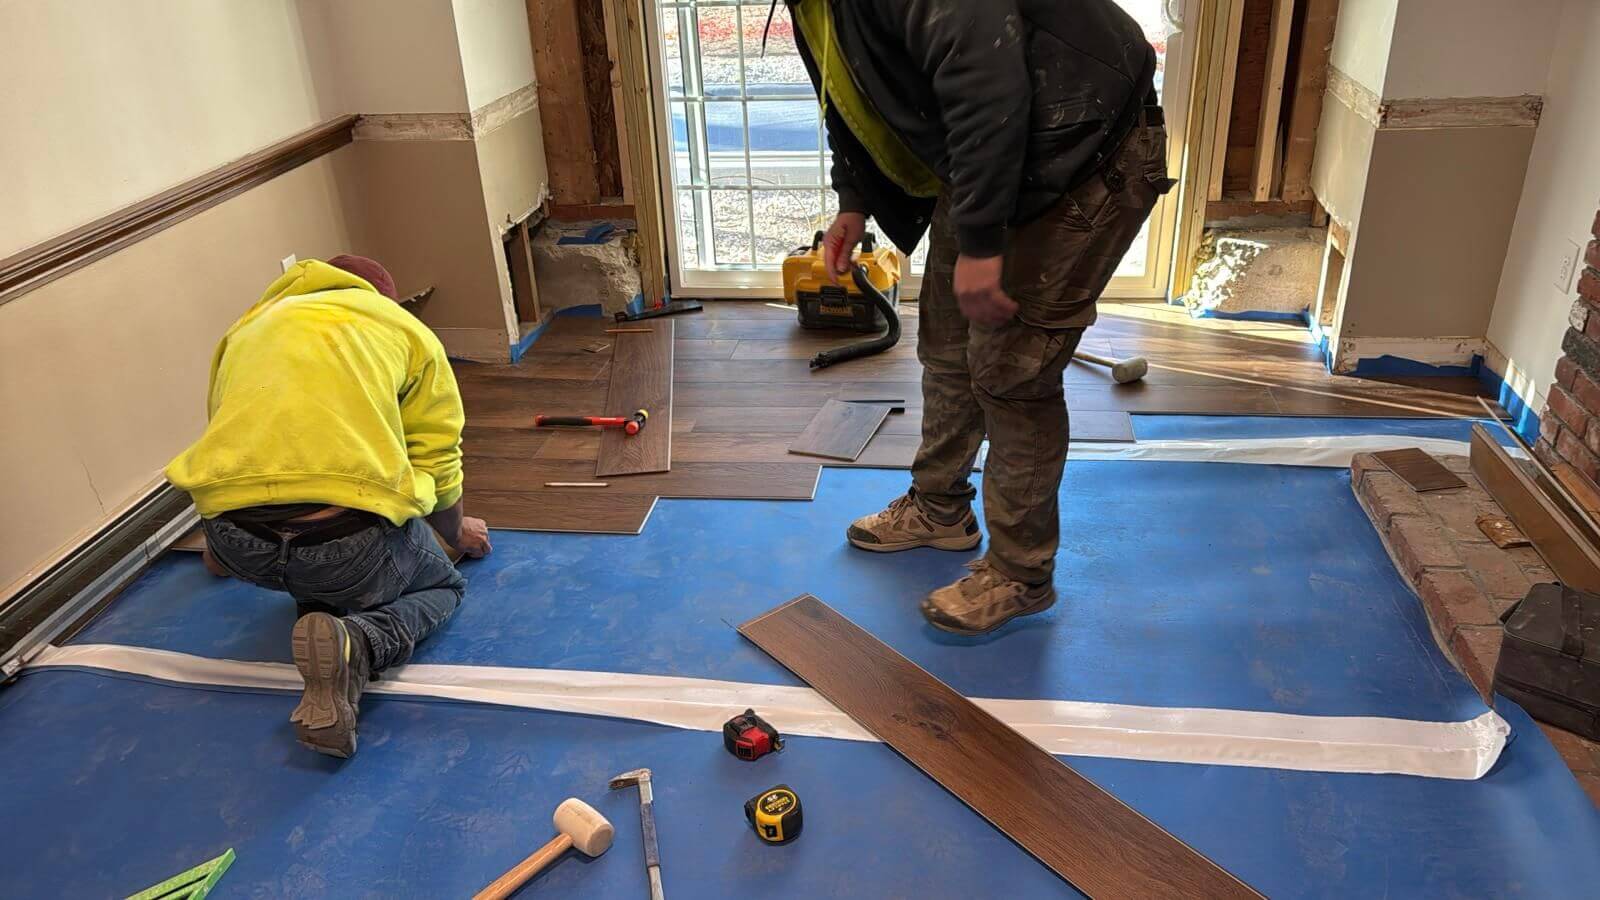
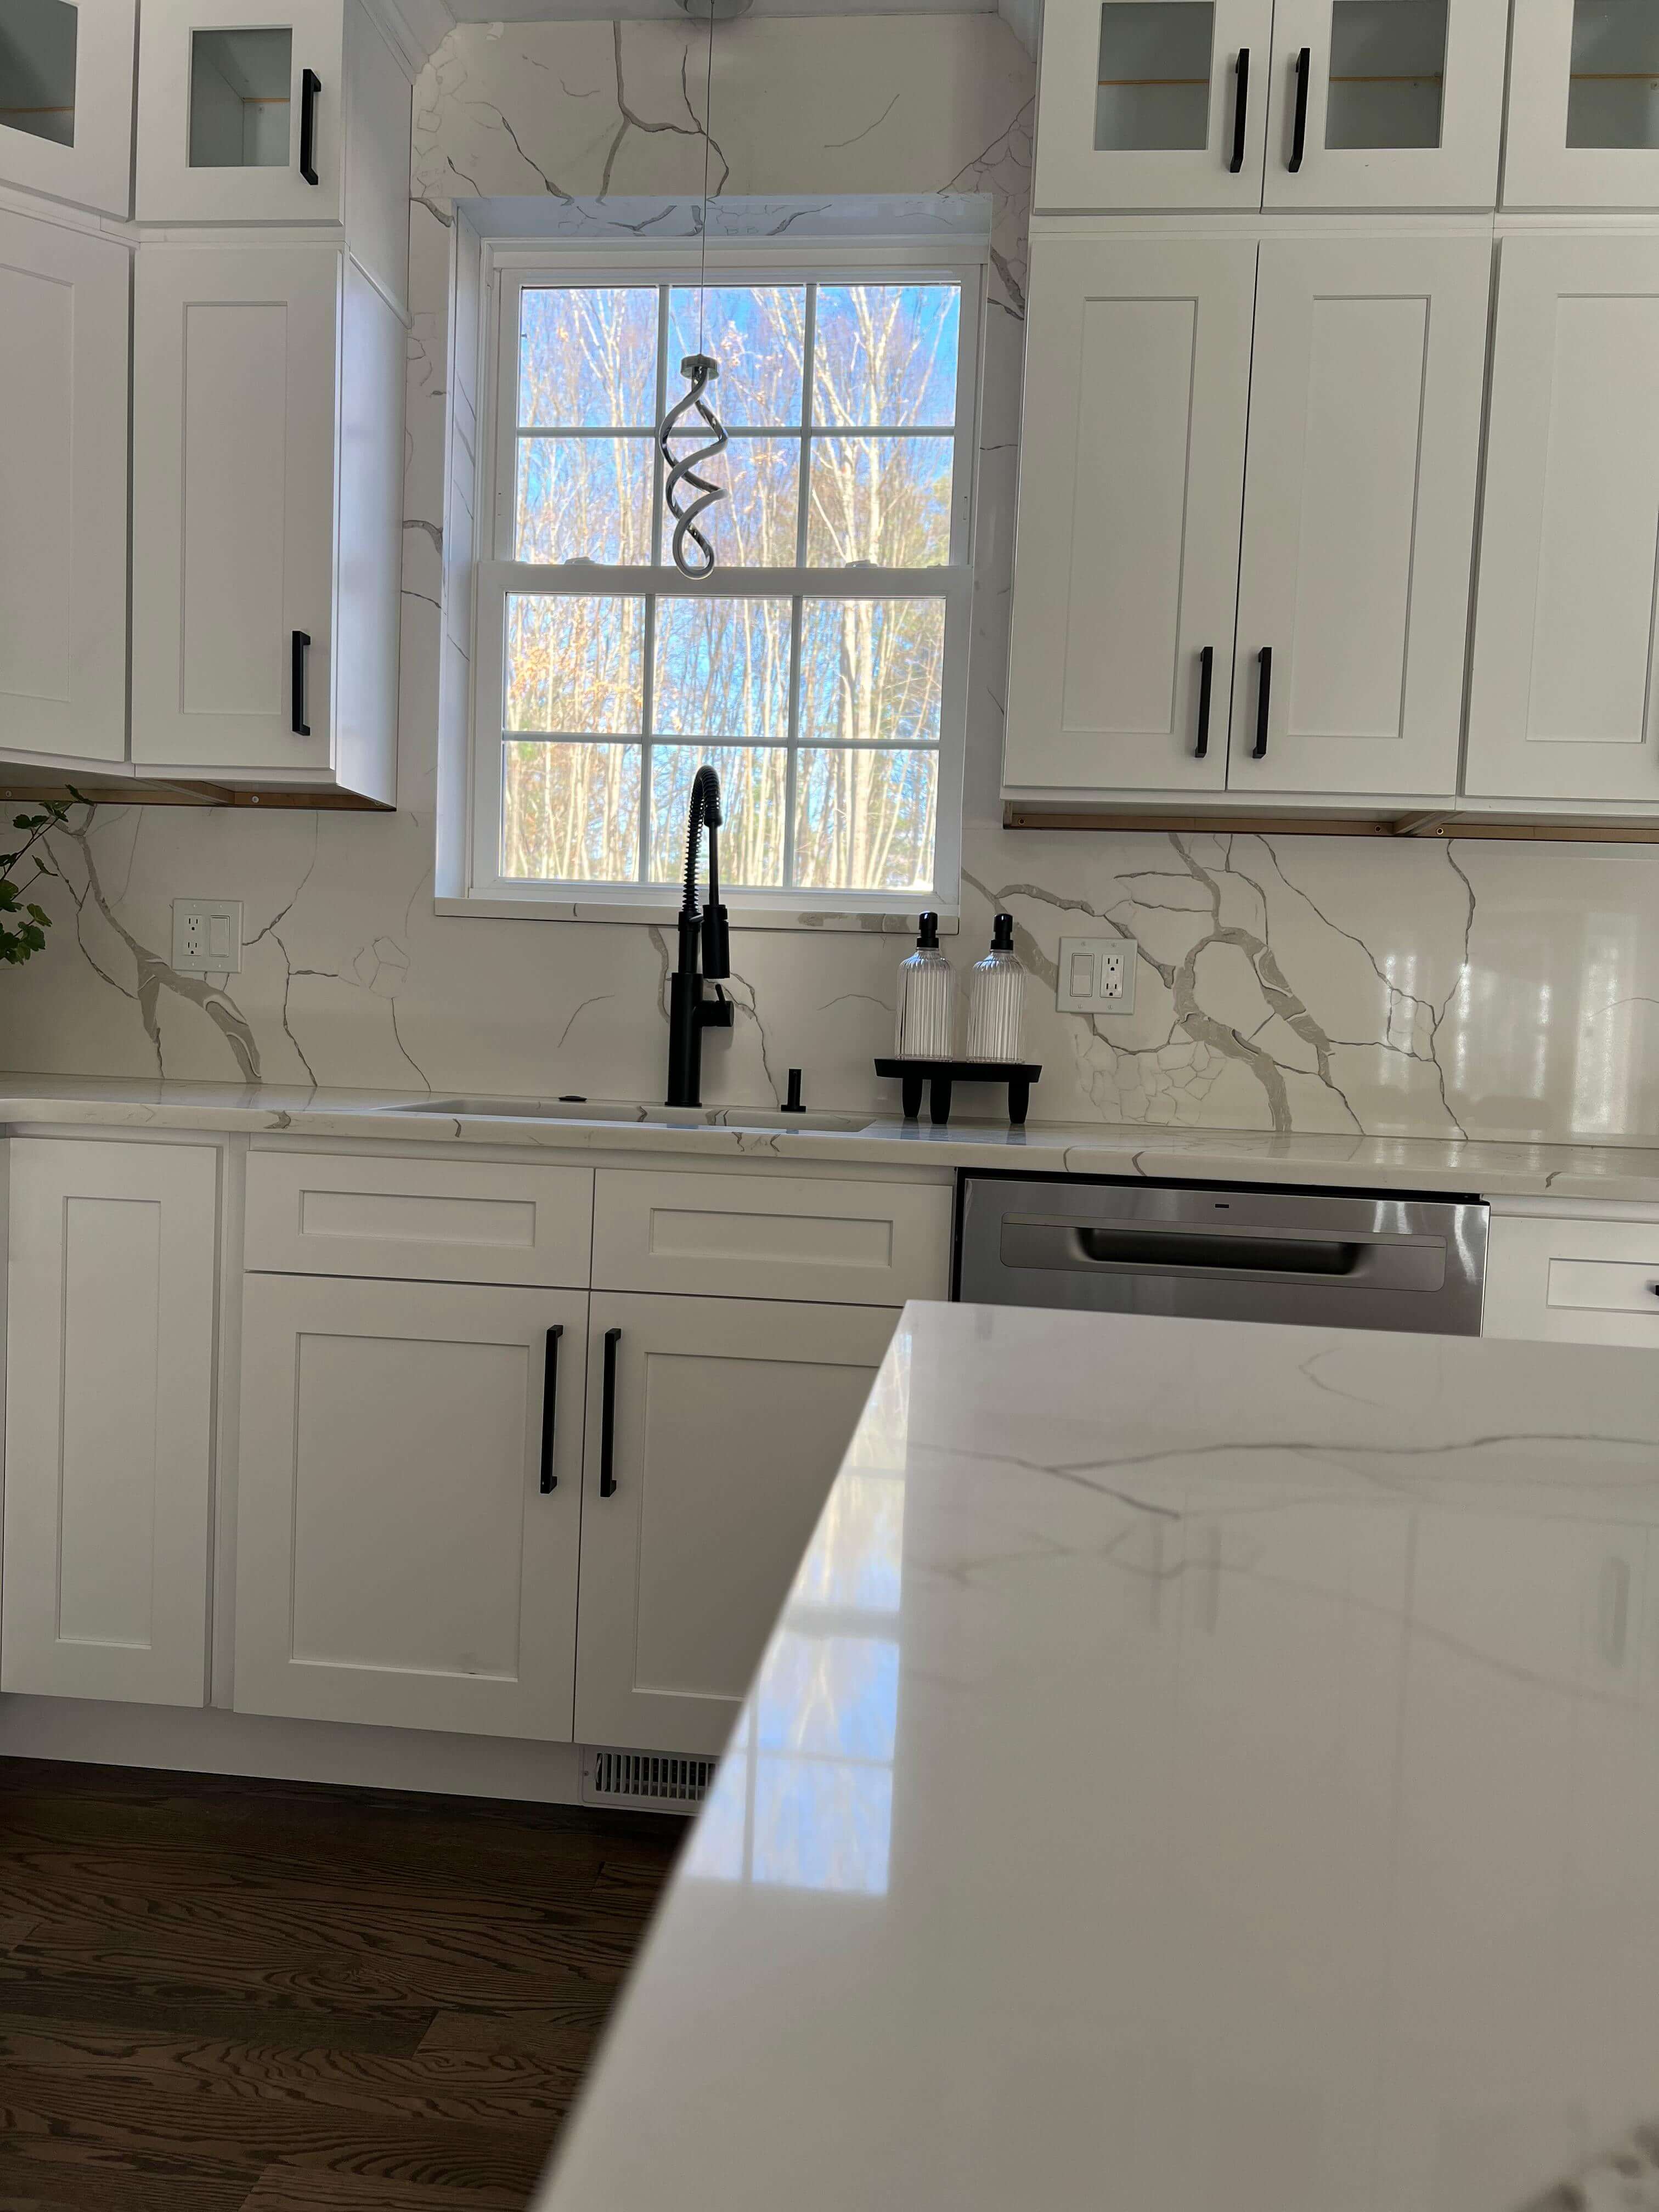
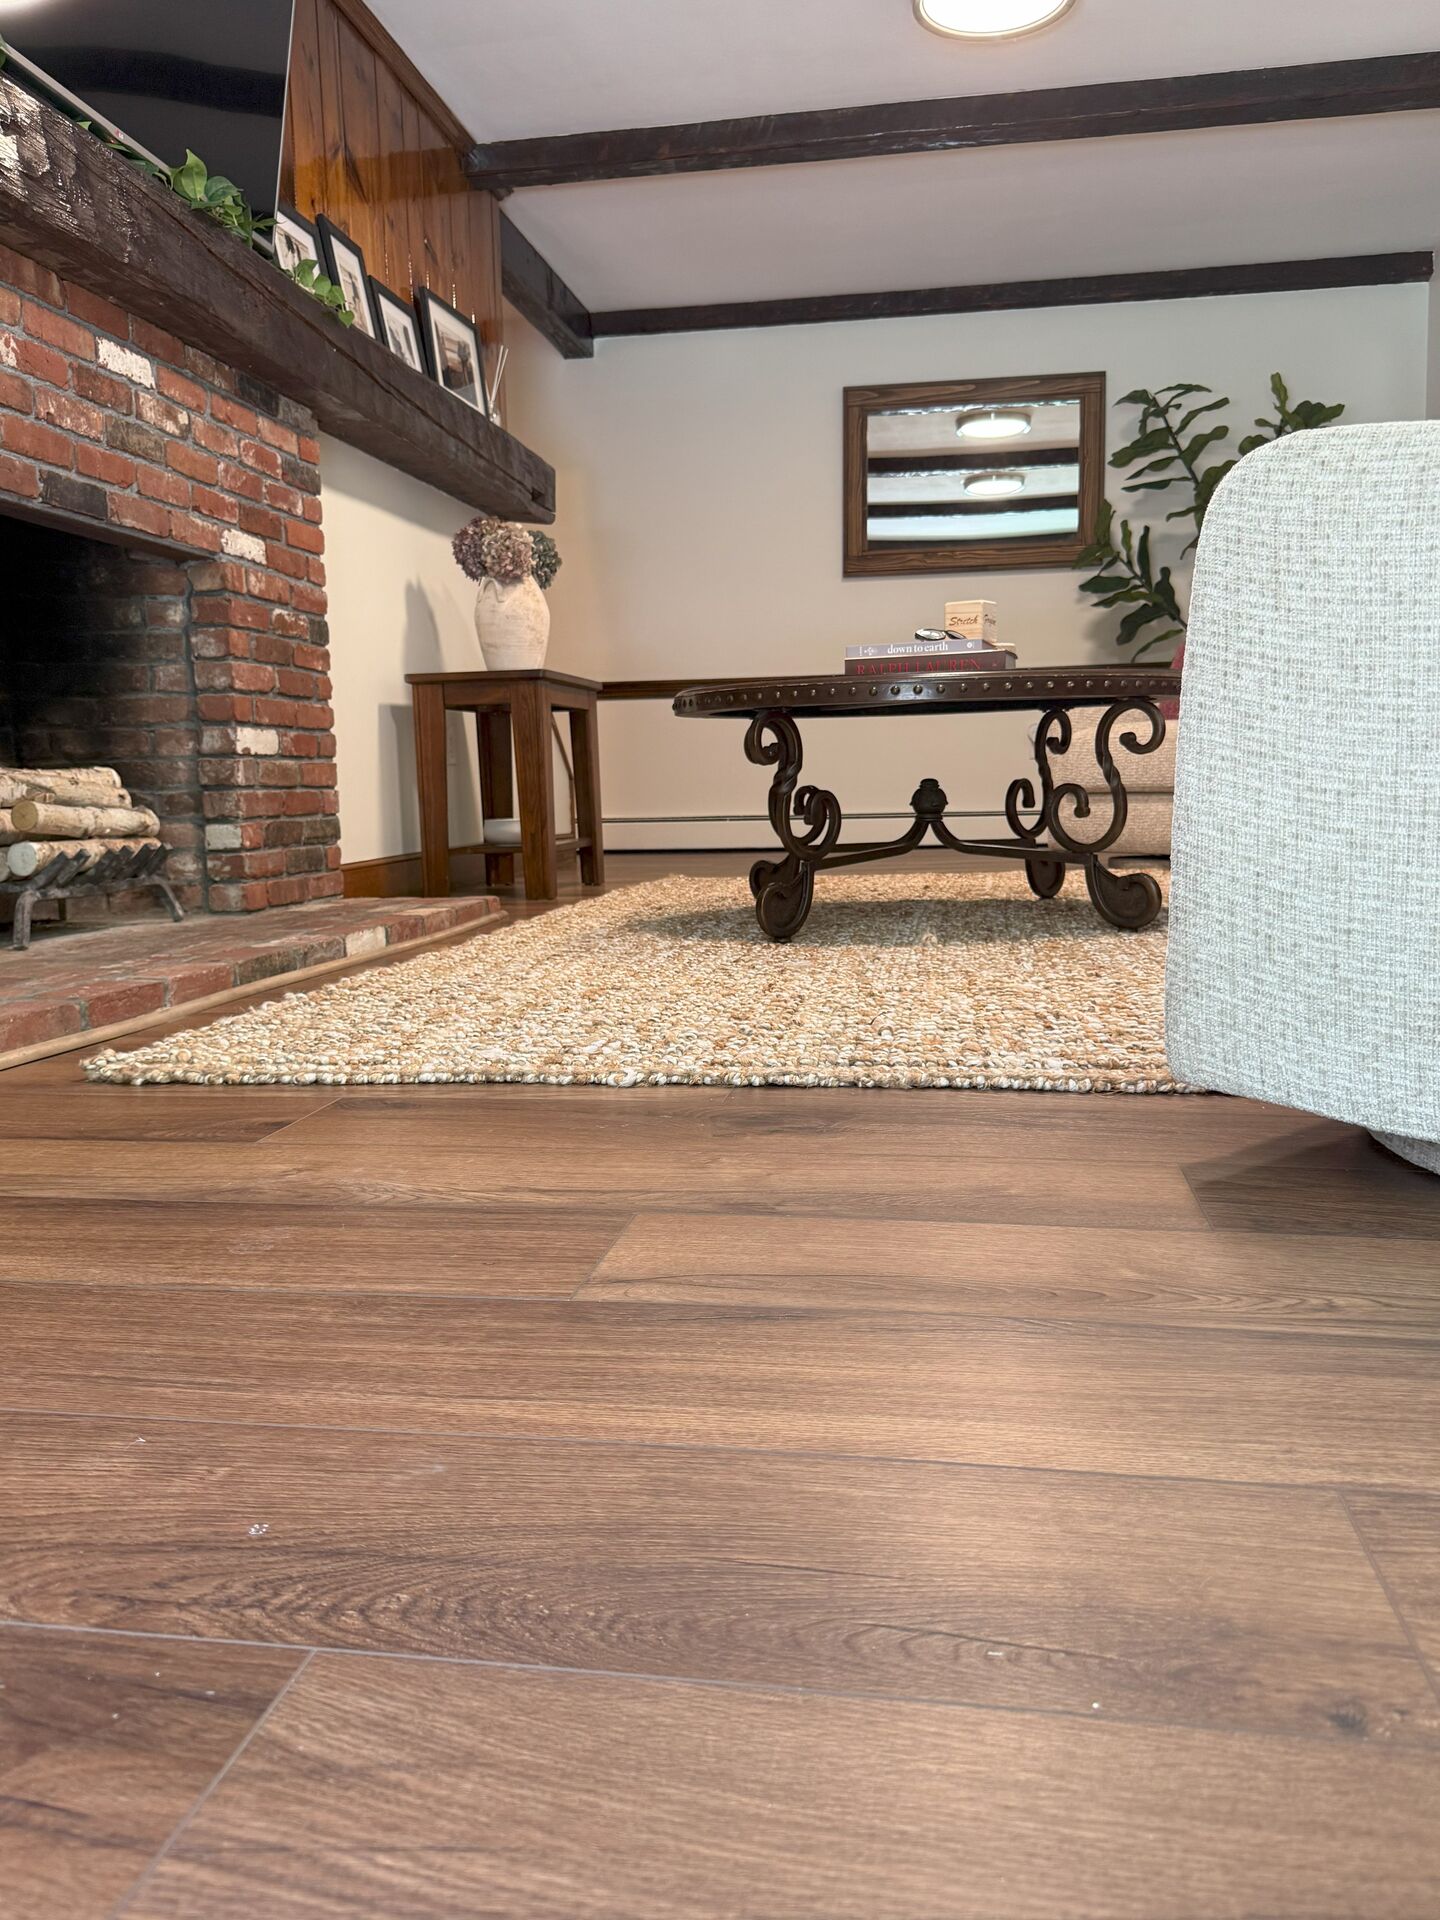
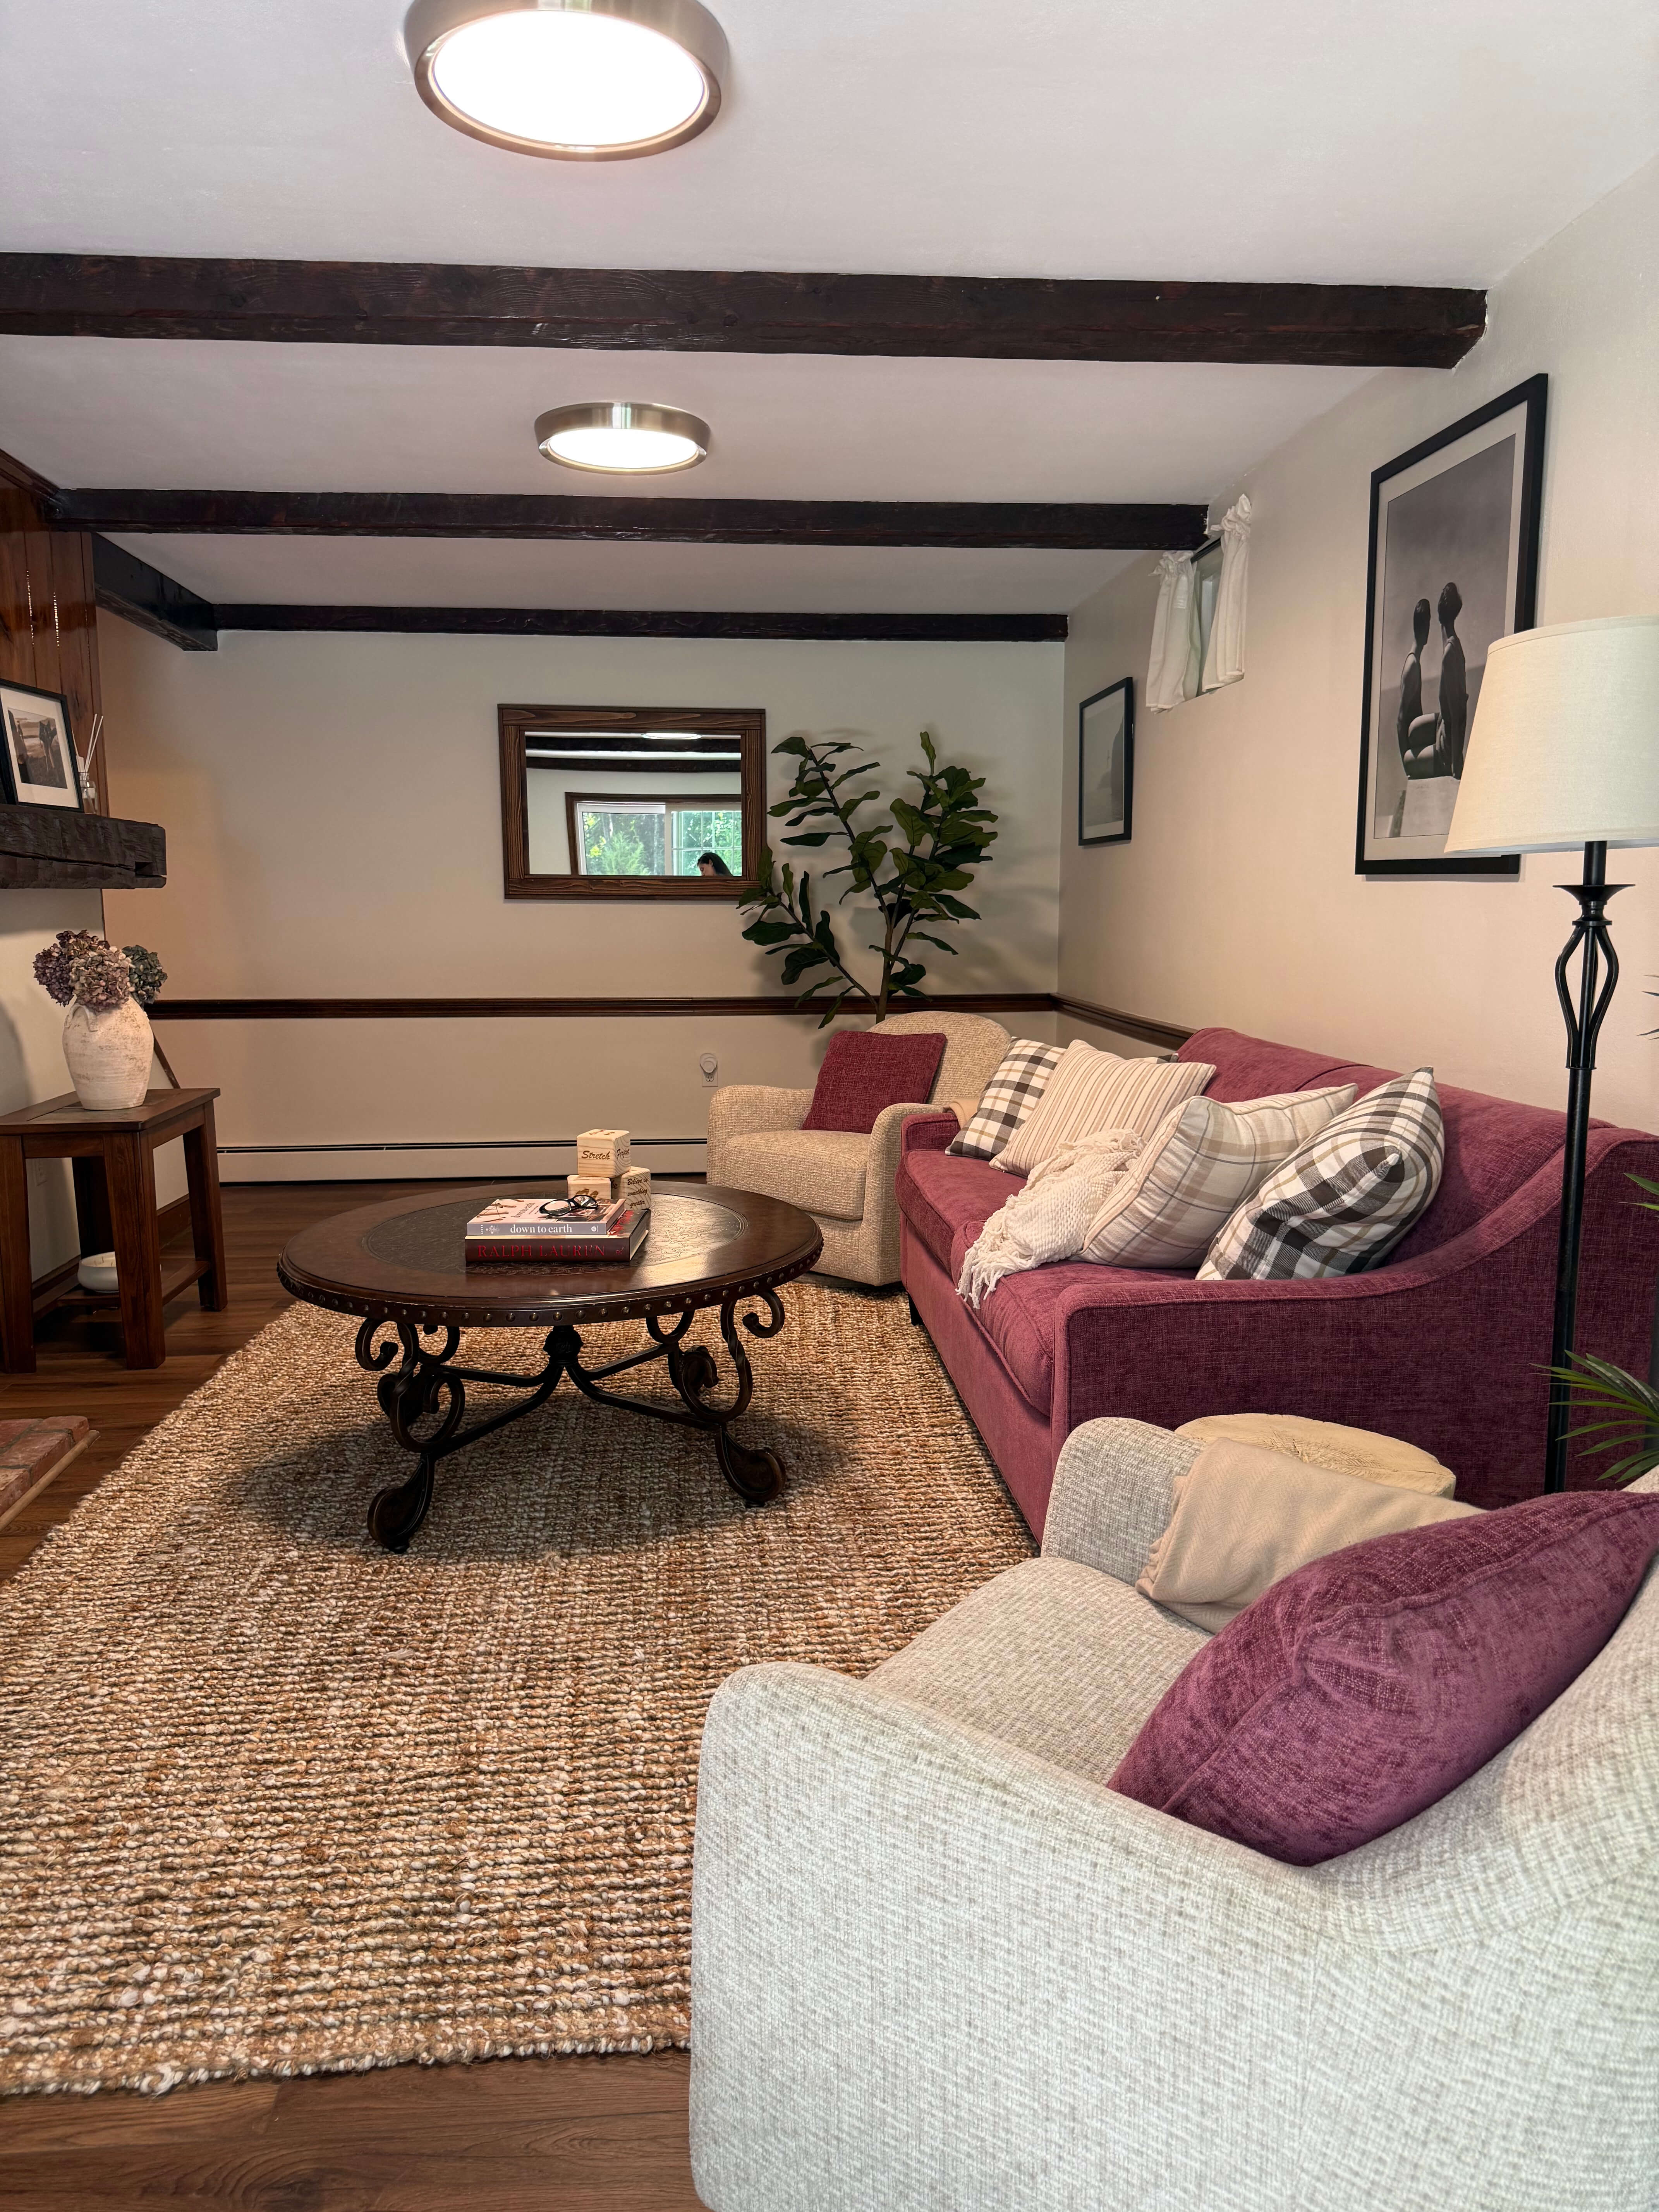
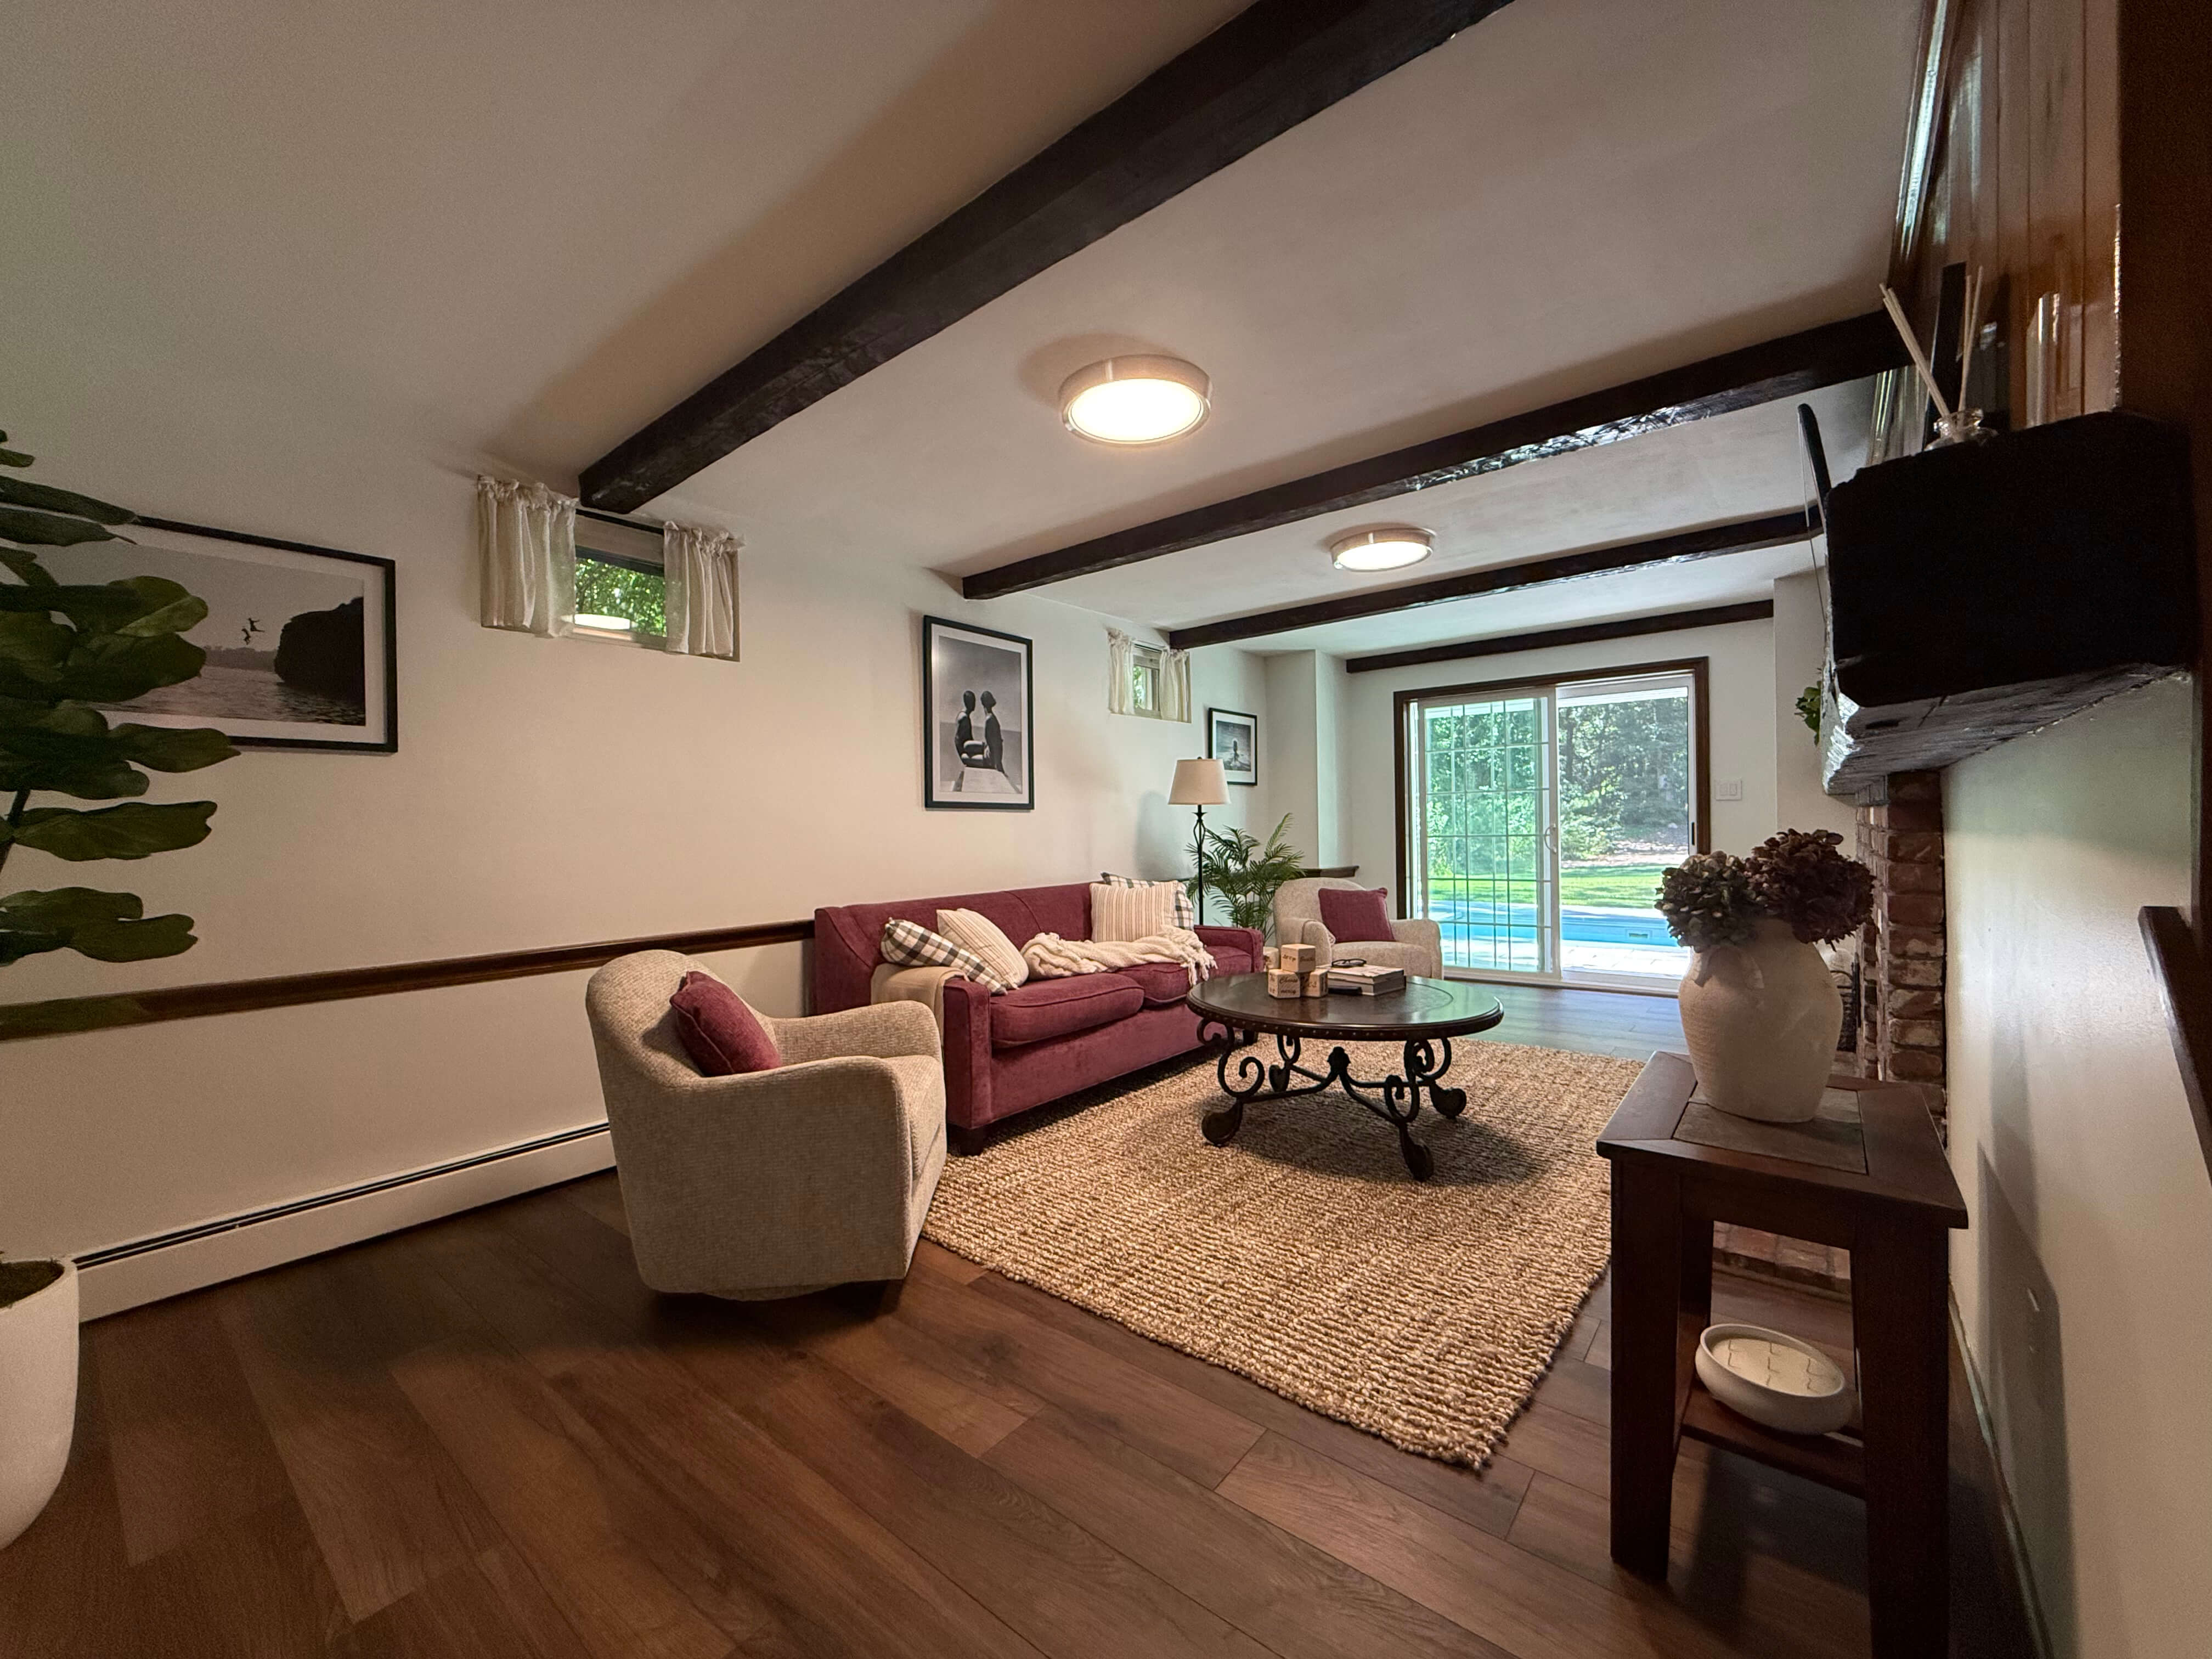
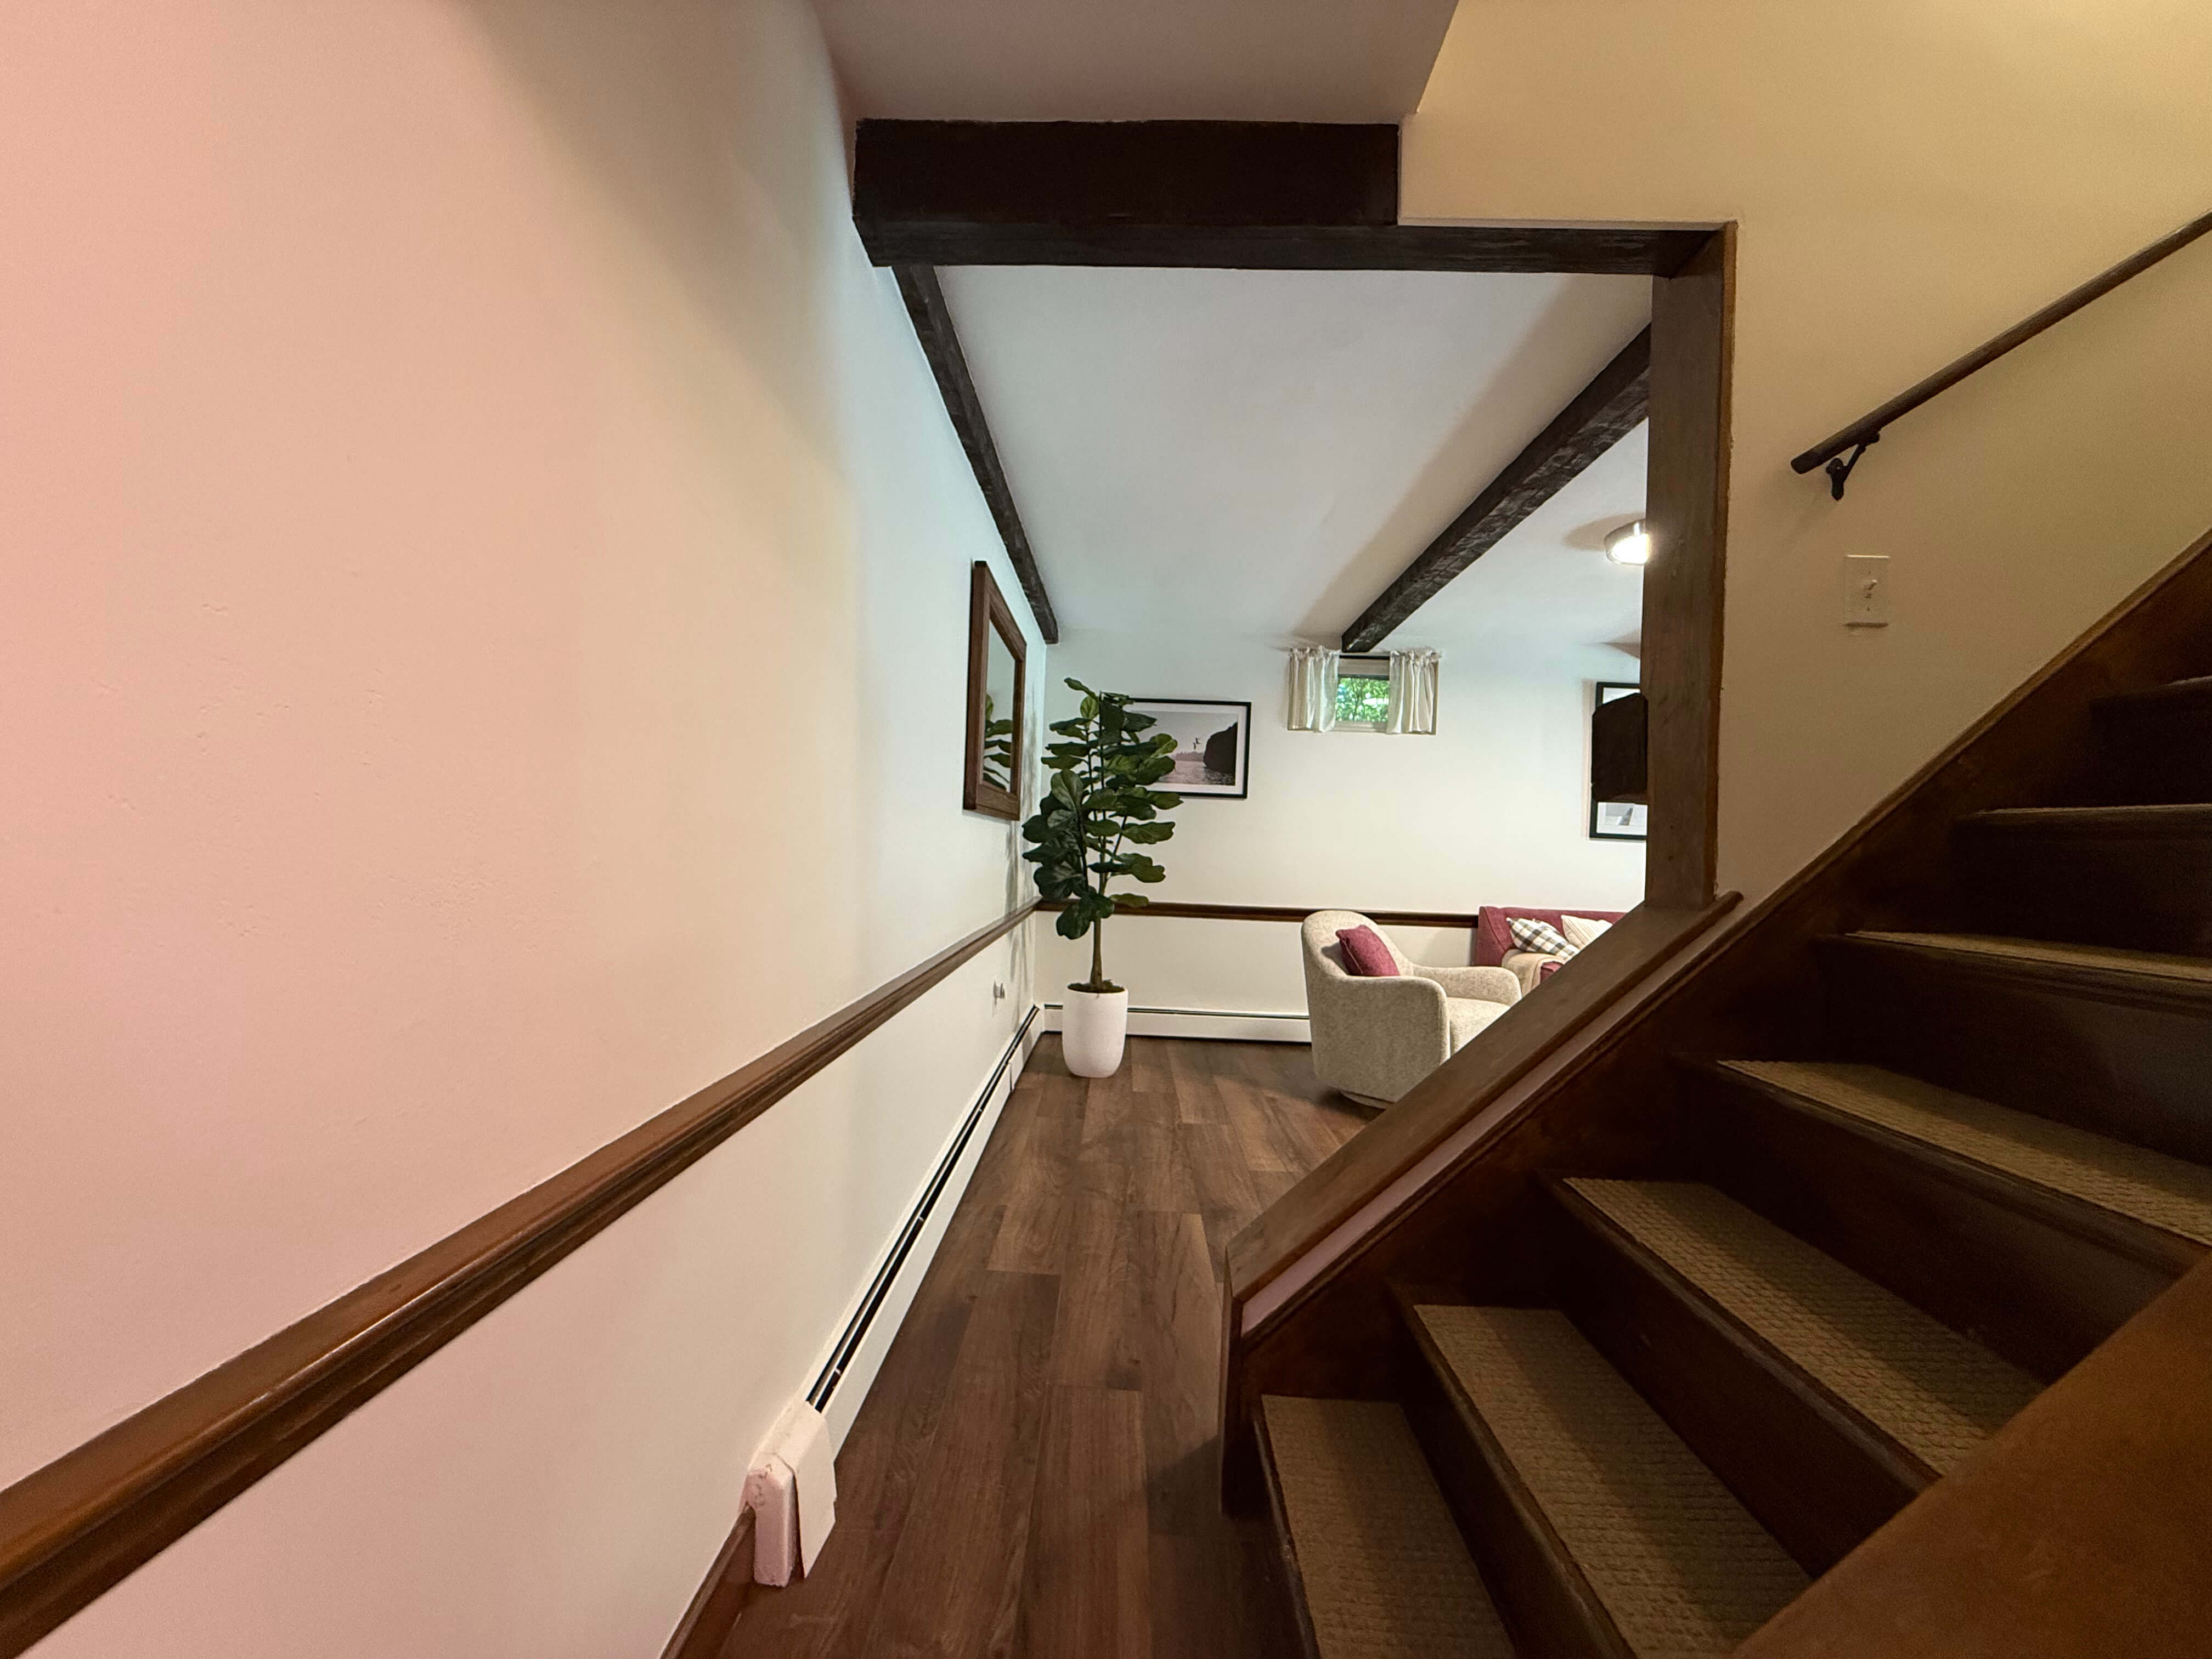
Phase 4: Basement
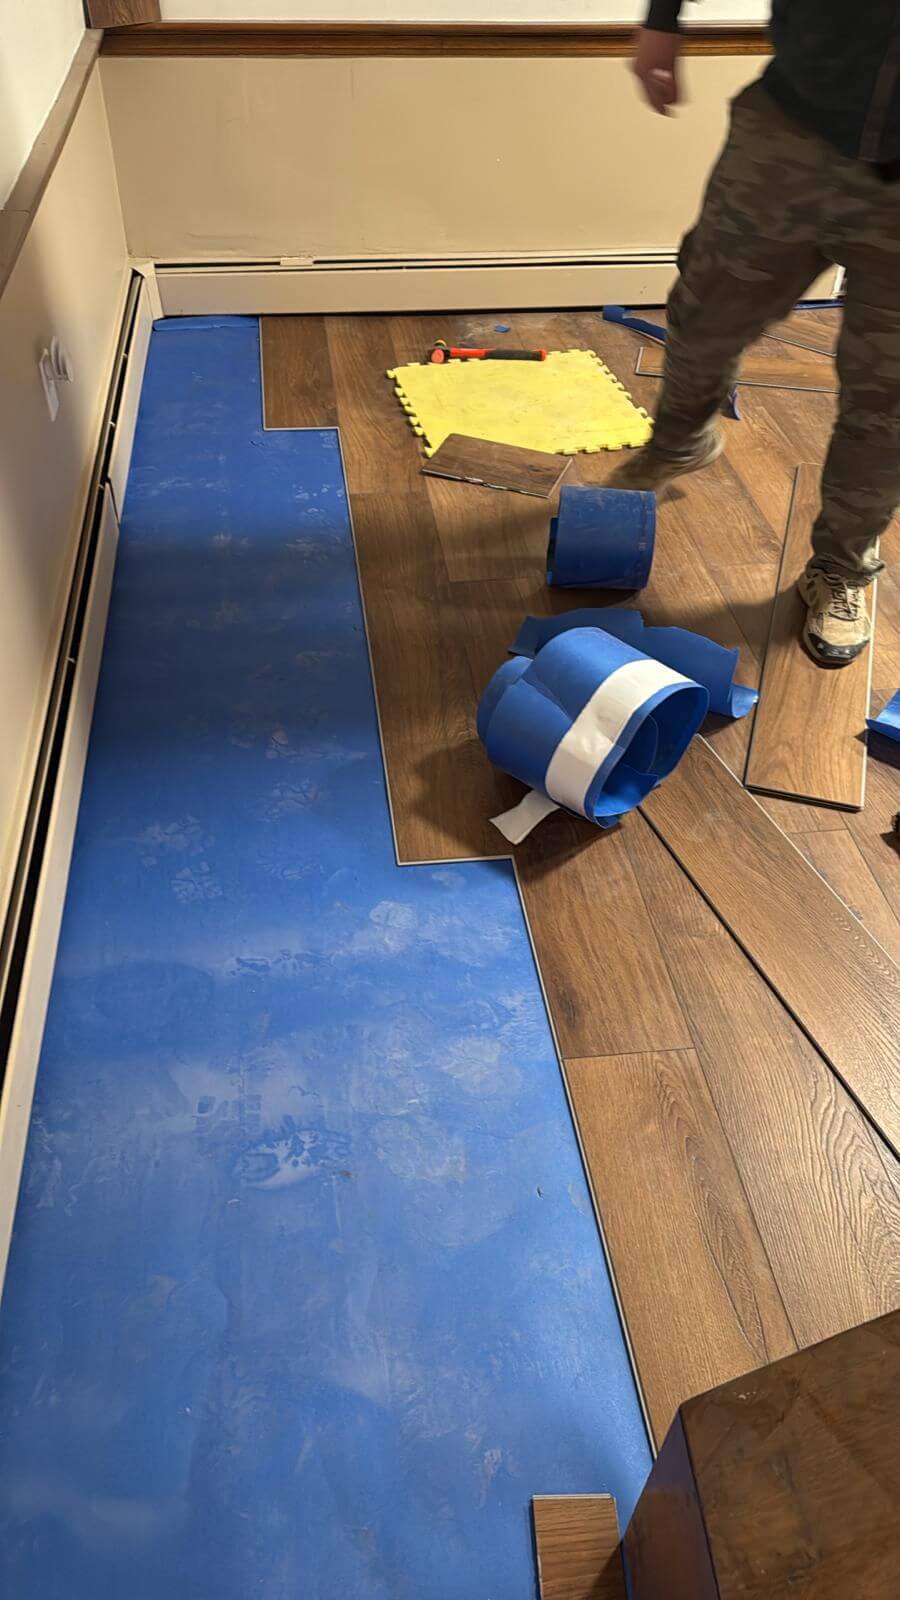
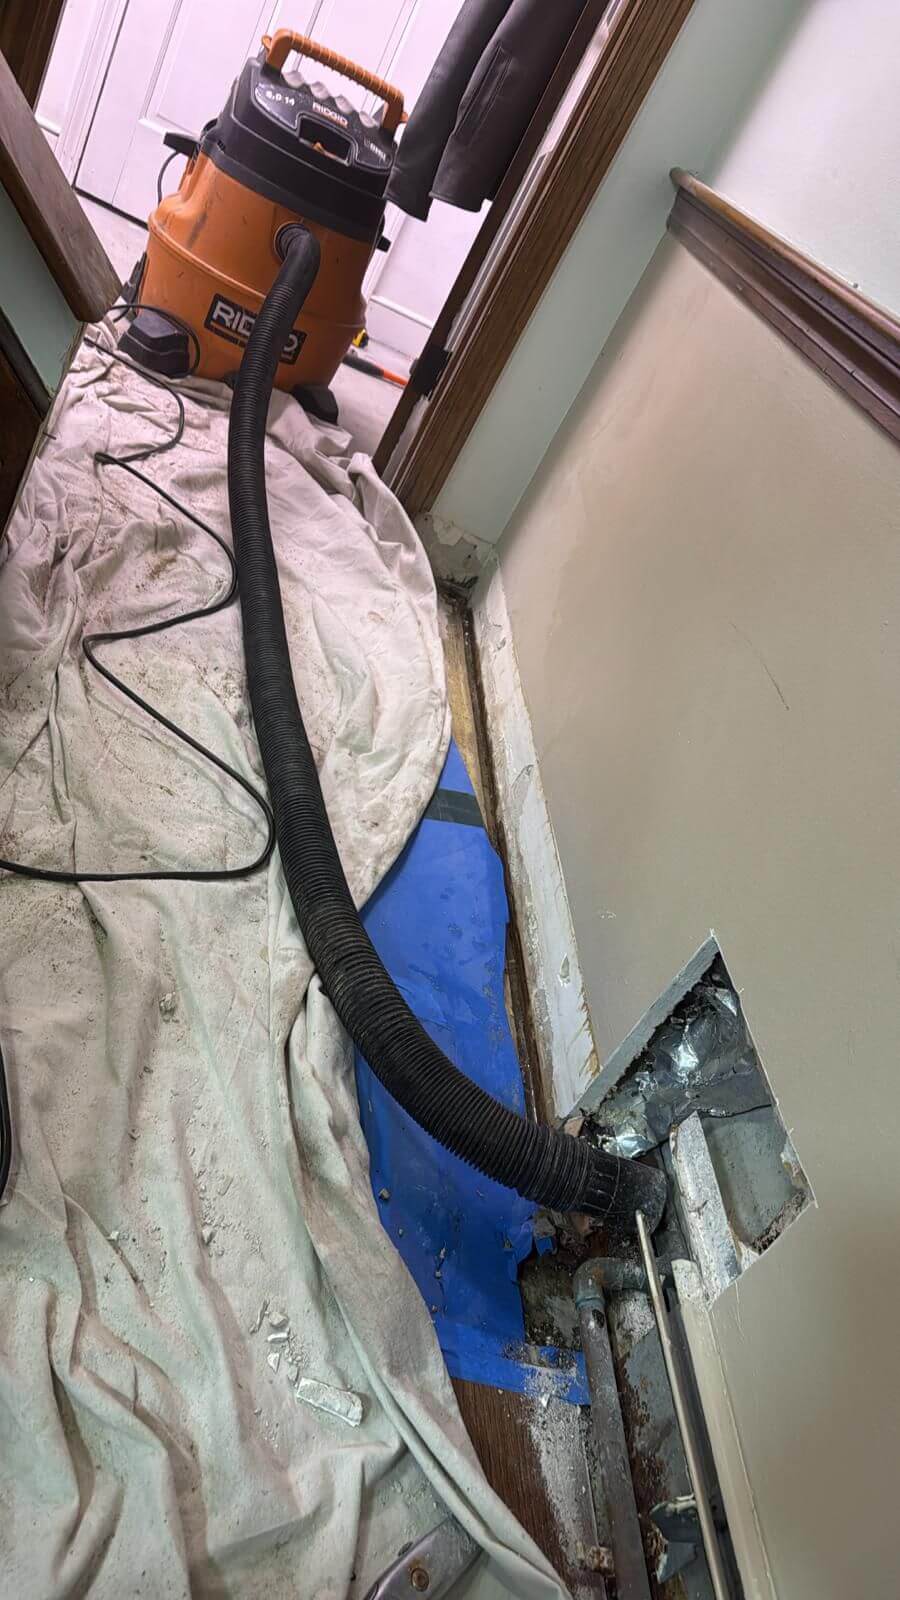
While the pool installation was underway, and the deck was nearly complete—only waiting for the paver installation to finish the trim work—it was time to allocate our crew to the basement. The basement scope included flooring installation, painting, trims, and a sliding door.
We began with the flooring, running a commercial dehumidifier for three days to reduce humidity levels in the basement (especially important after flooding). Once the space was dry, we prepared and installed the vinyl flooring, followed by painting and installing new trims.
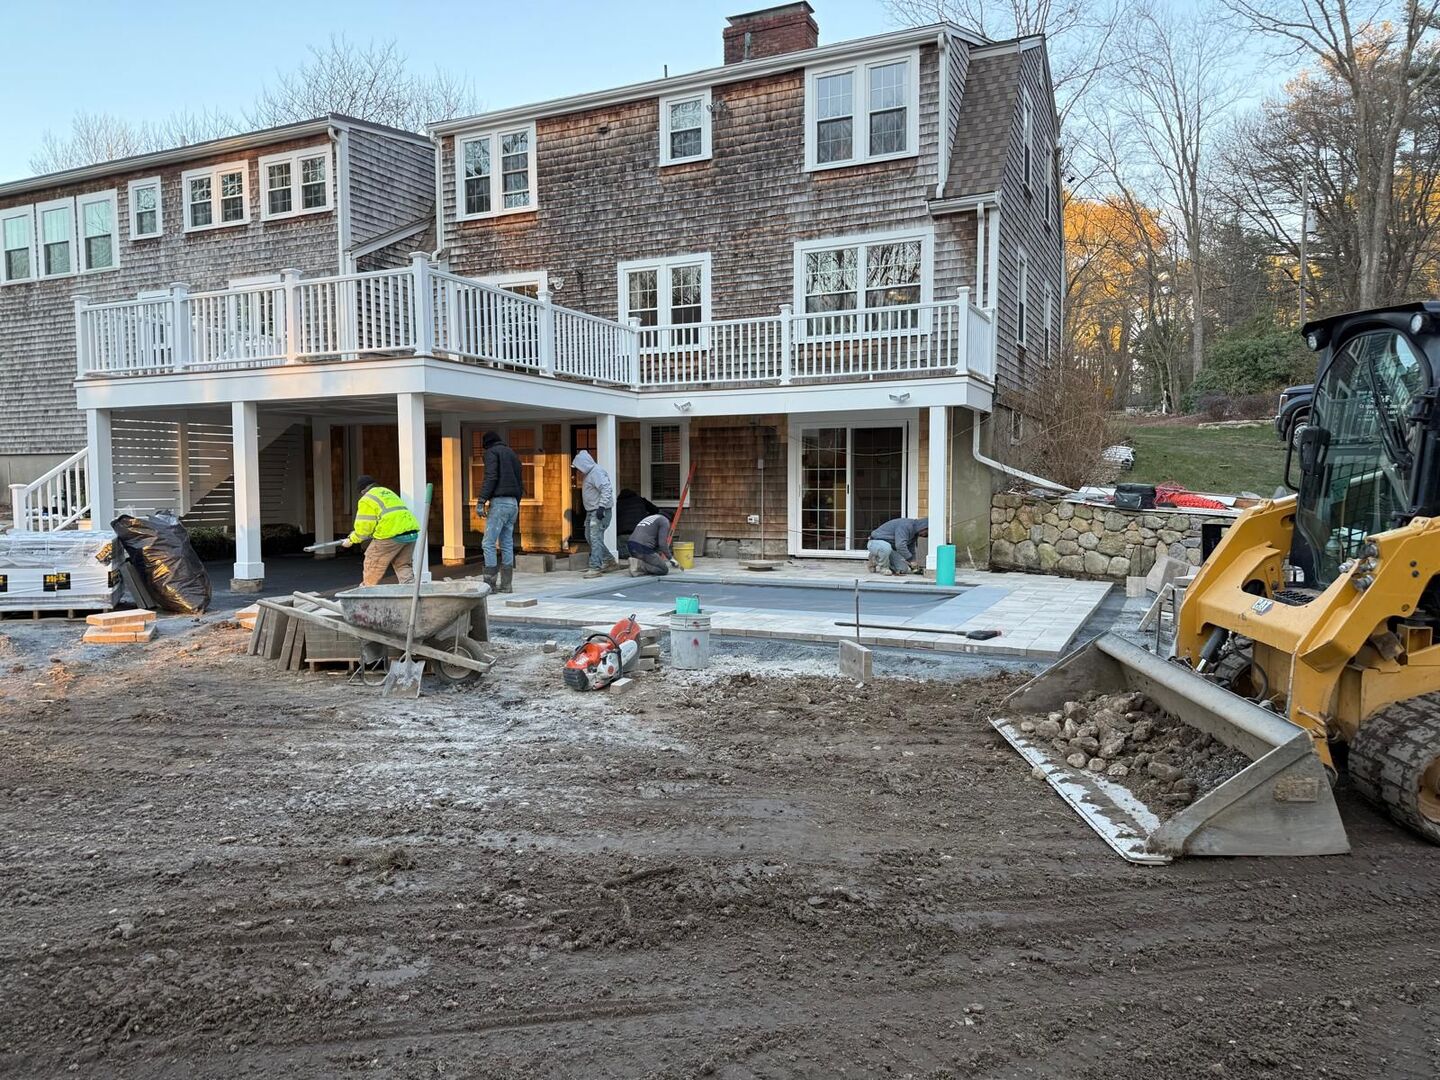
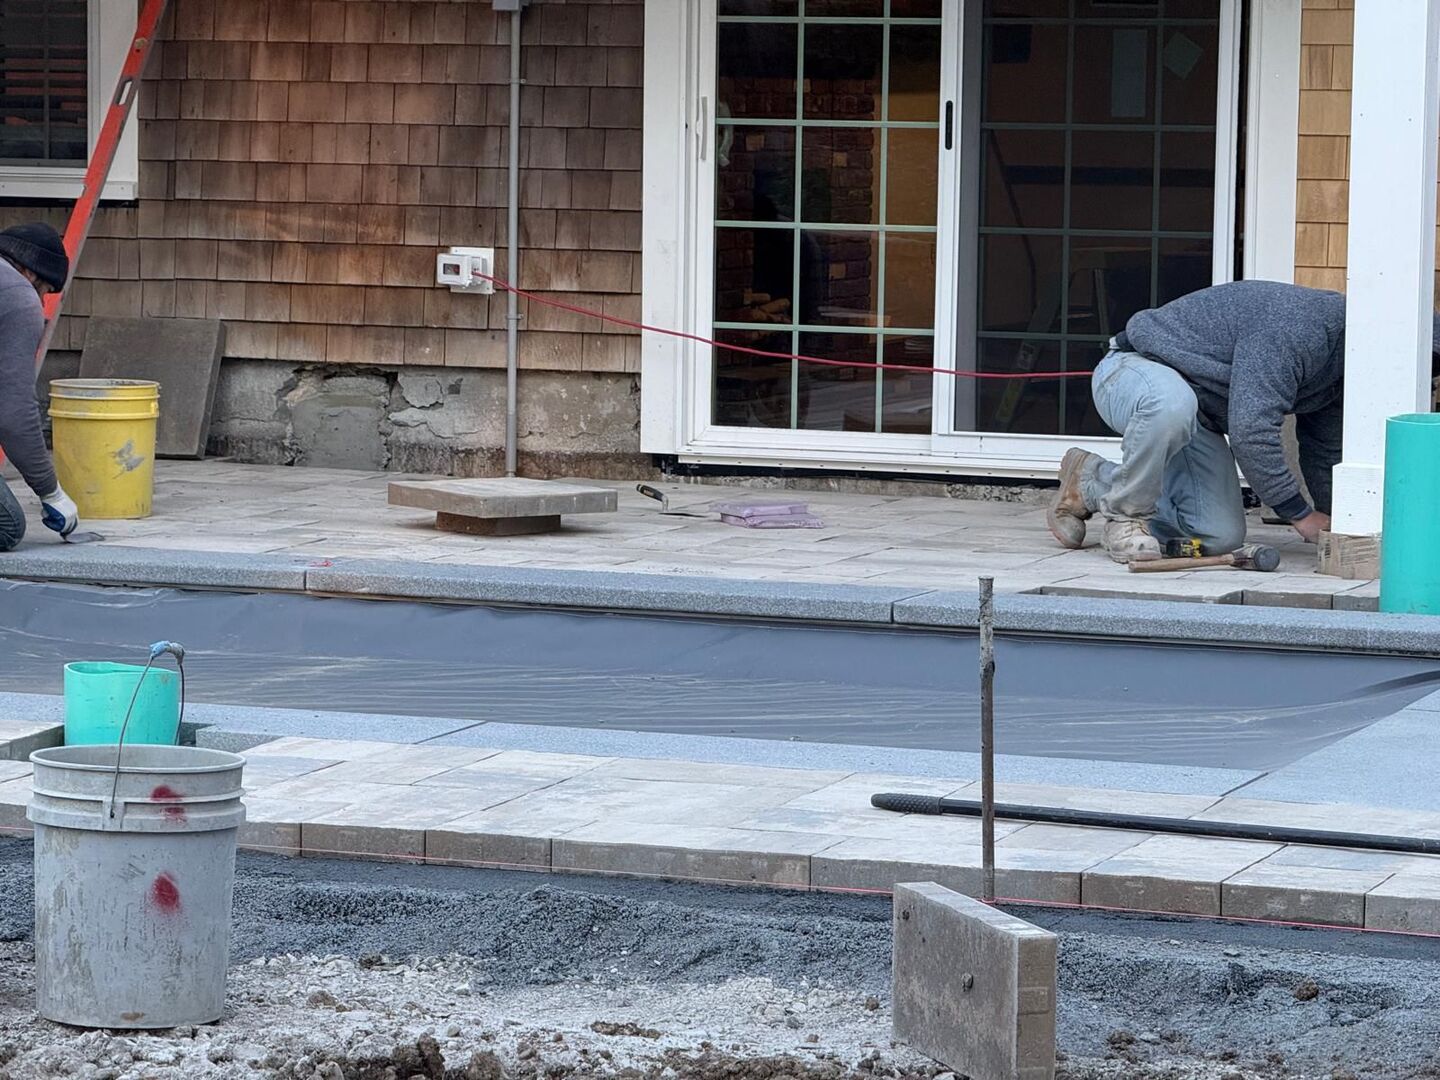
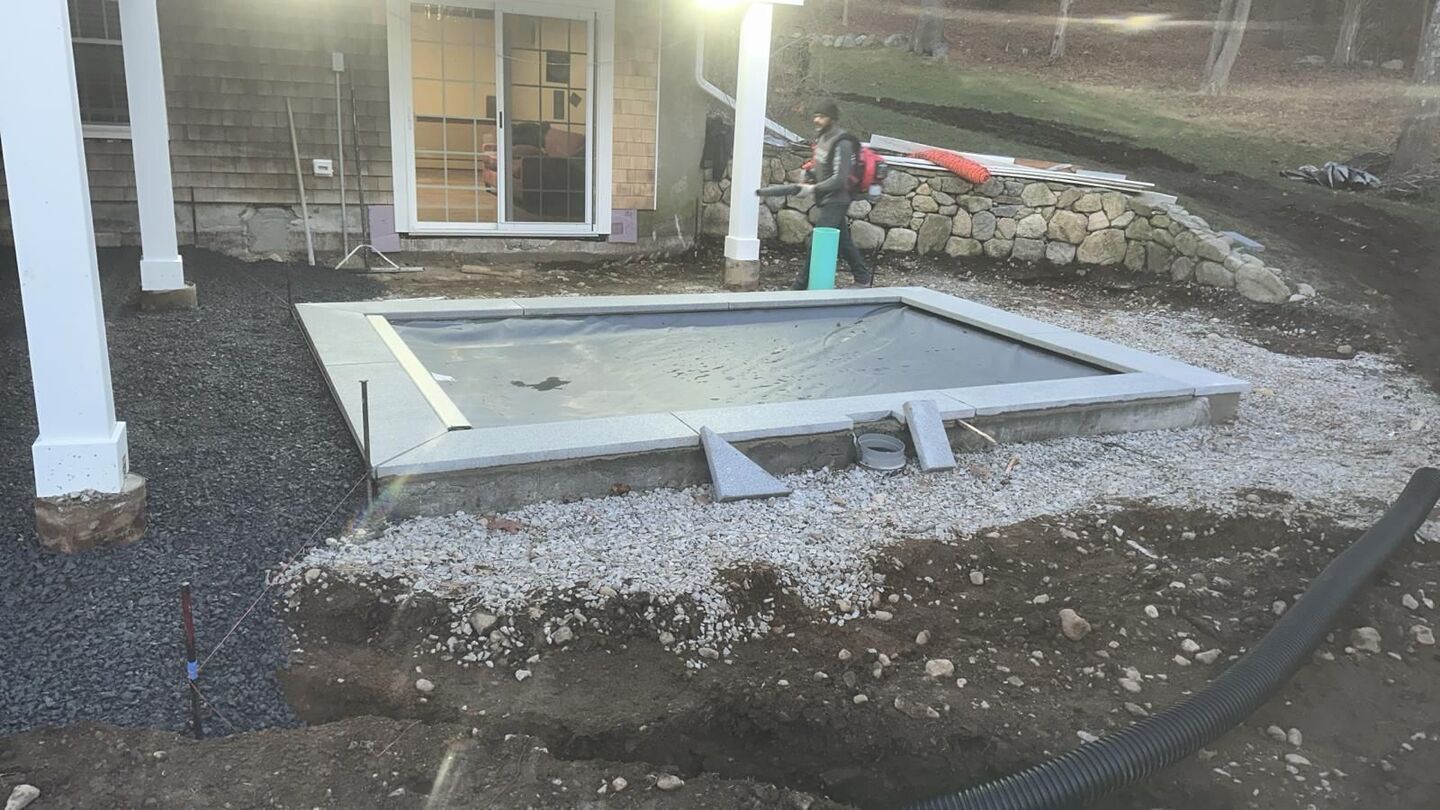
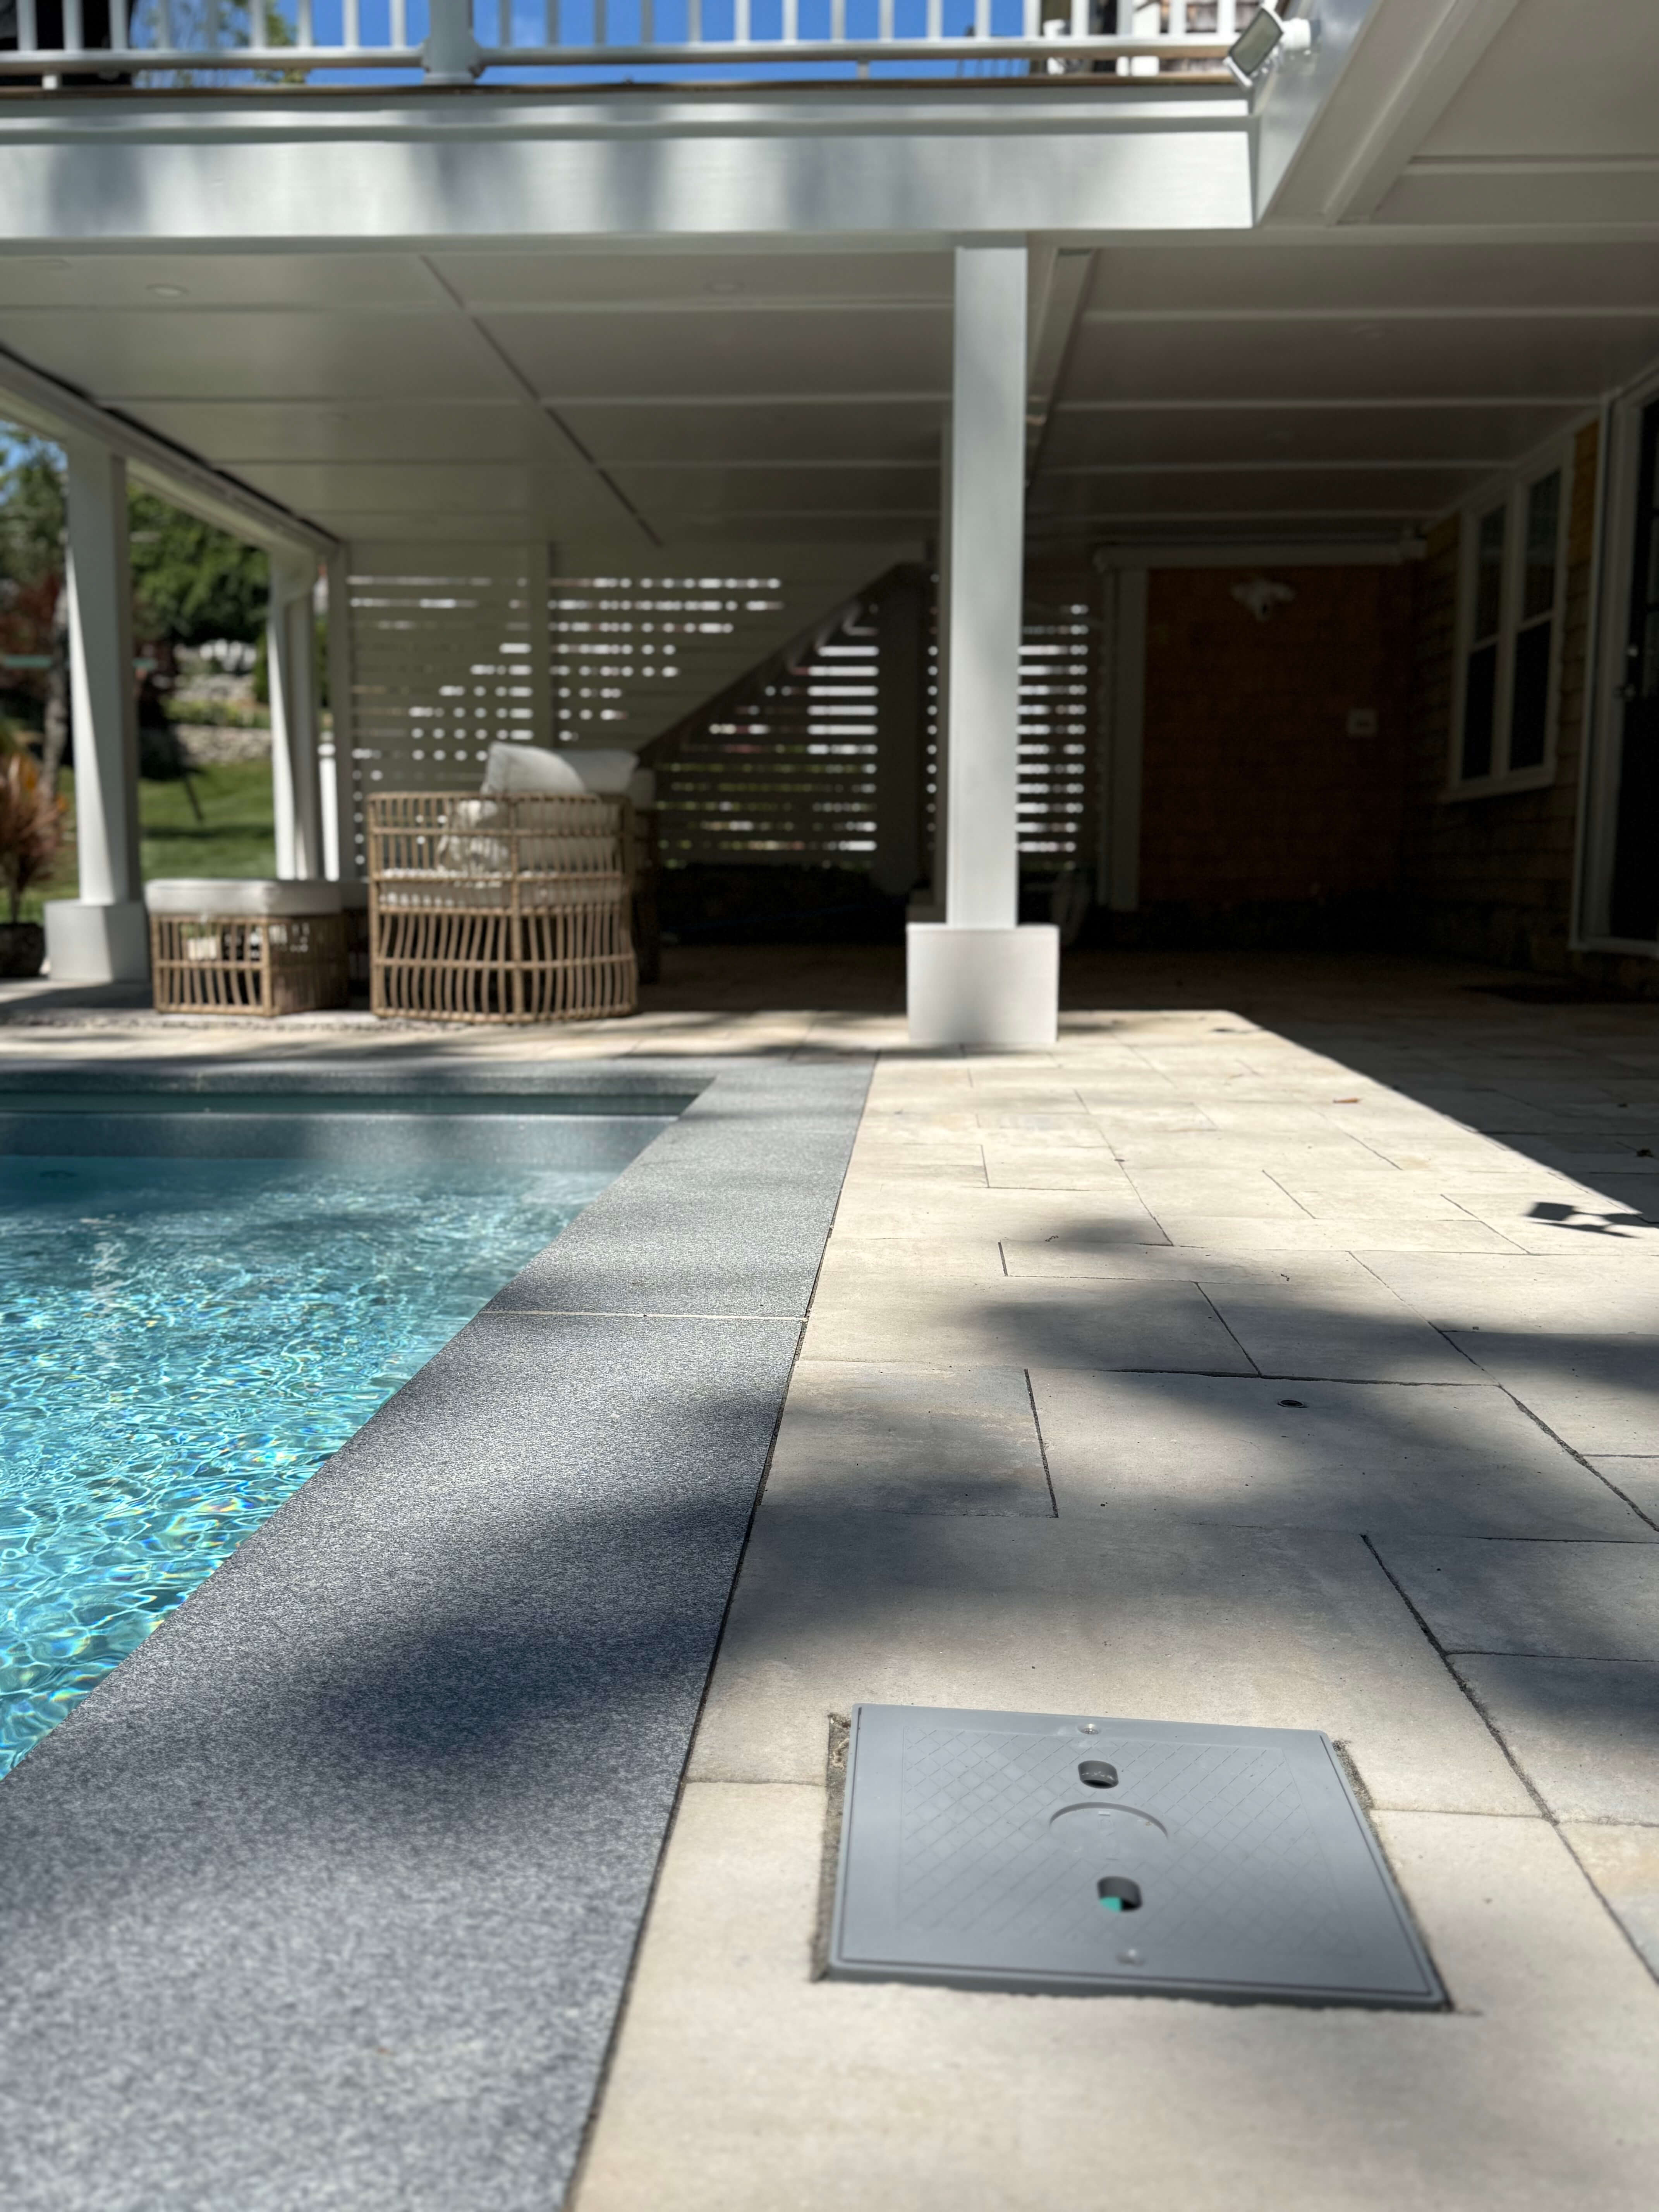
Phase 5: Patio
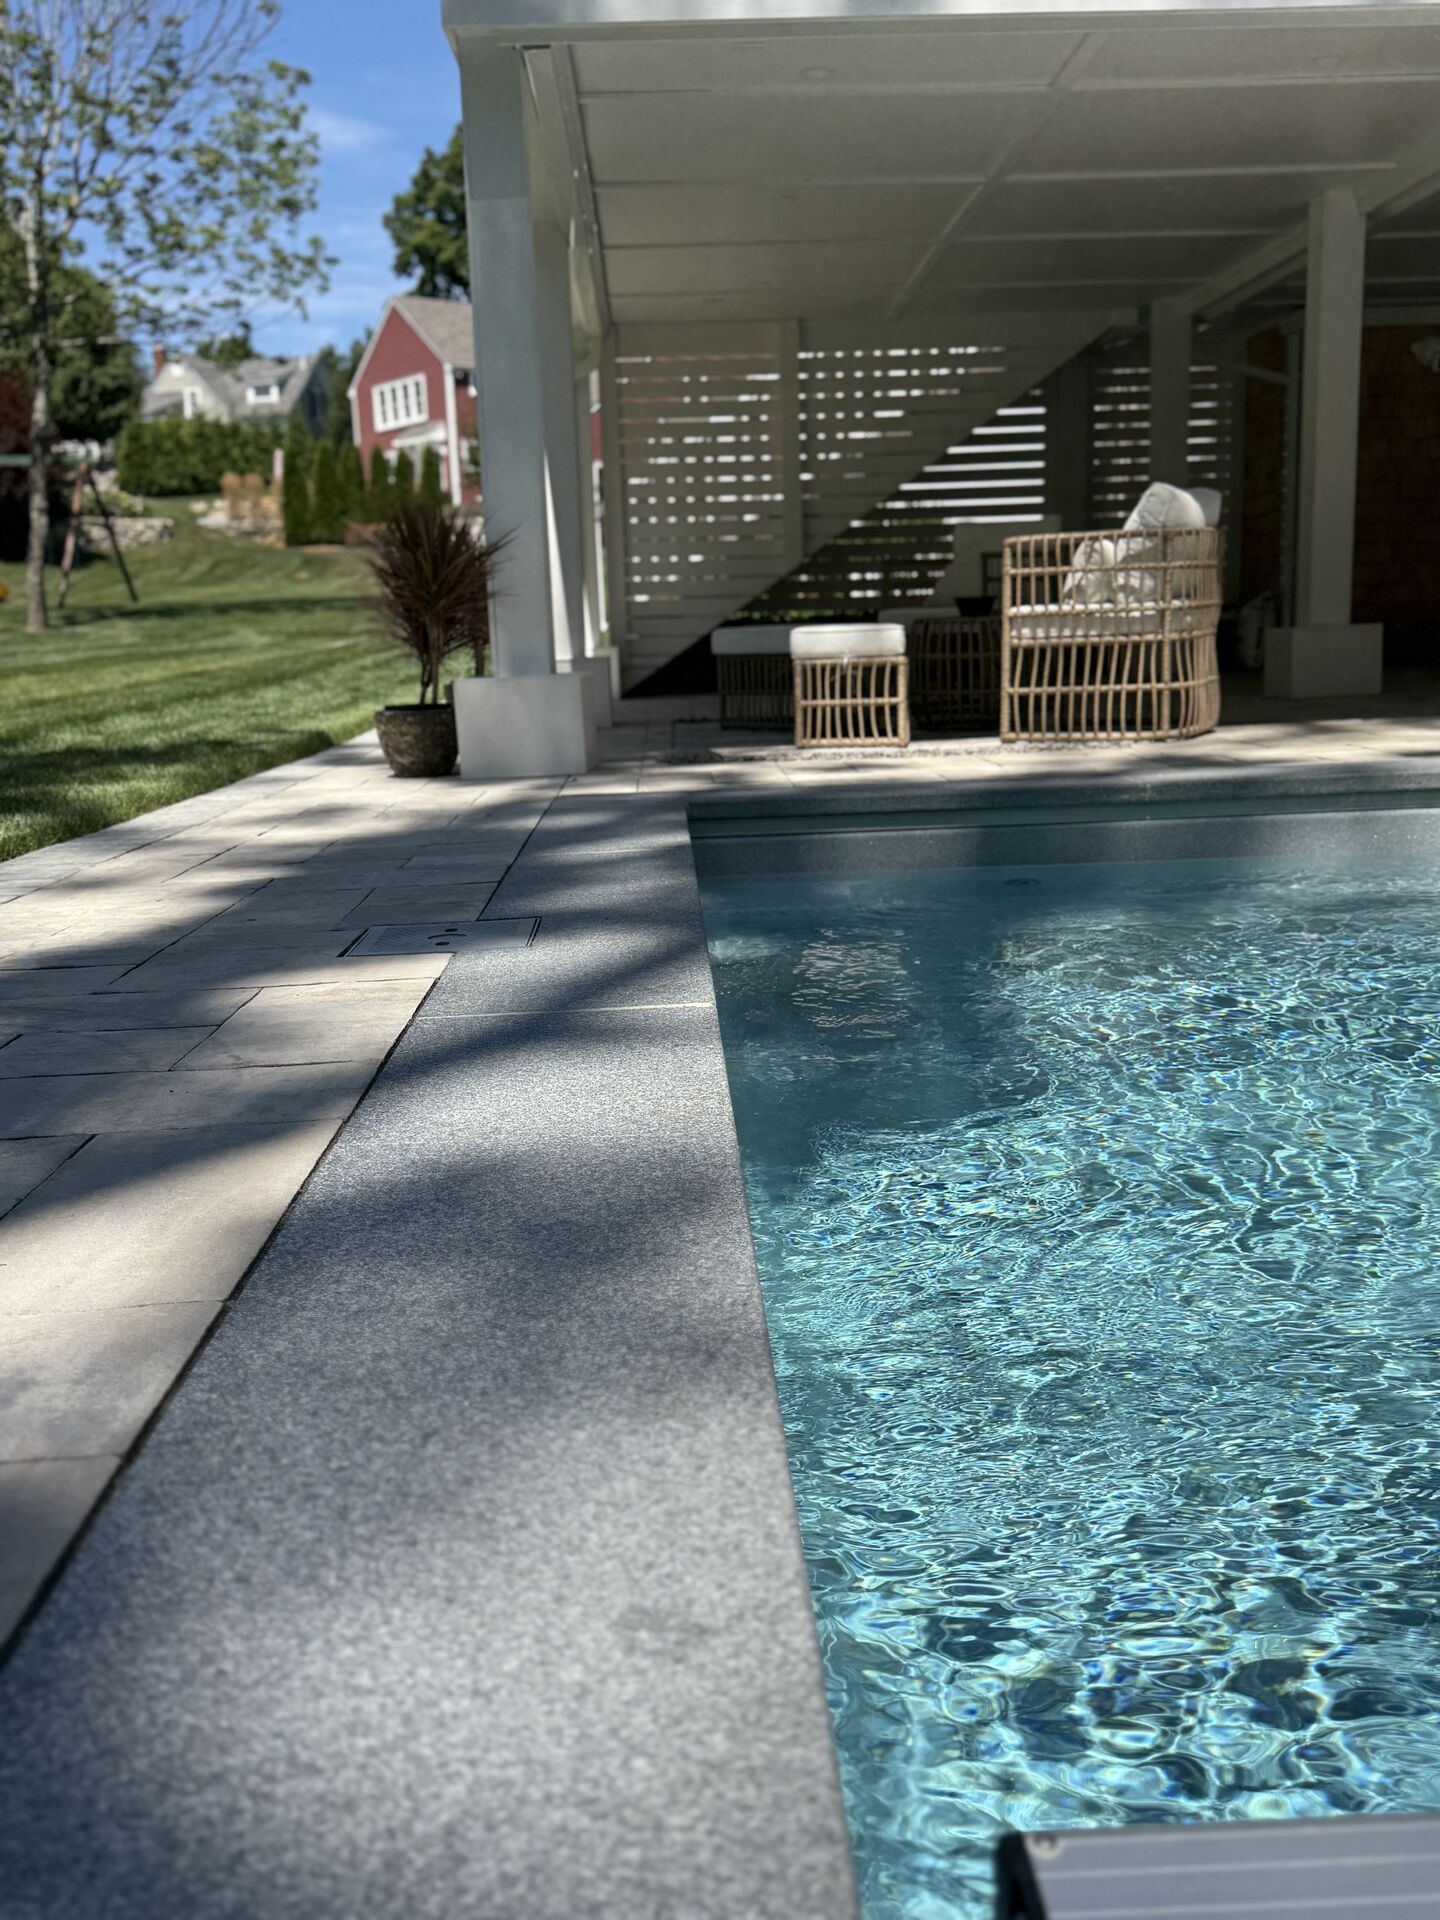
For the patio, we chose the Nicolock Chesapeake Blend Alpine series for the pavers and Nicolock Silver Mist for the pool coping.
We began by compacting the entire perimeter, then added a layer of crushed stone and a leveling slab. Next, we installed the pool coping, ensuring a slight slope along the perimeter for proper drainage. Once the coping was in place, the patio pavers were installed.
The sewer access point was higher than the paver level, so we cut and adjusted it accordingly—a minor issue that was easily resolved.
Final Considerations
This project was very special, with many unique details, and we put a great deal of effort into it. We were thrilled to see the final result and how much the client loved it. At the end of the day, cooperation was the key to the success of this project.